YM336D Restoration thread - Part two

   / YM336D Restoration thread - Part two #1  

Domush

Platinum Member
Joined
Jun 30, 2011
Messages
795
Location
Kentucky, US
Tractor
1981 Yanmar 336D
My tractor is functional, minus 1st and 2nd gear. Now we get to making it spiffy and pretty.

The to-do list:

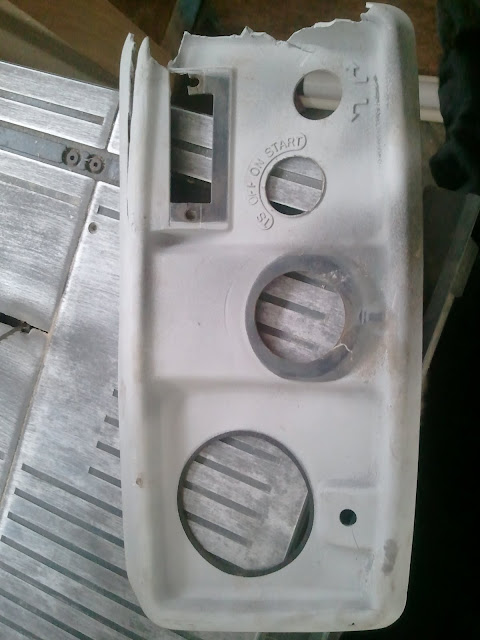
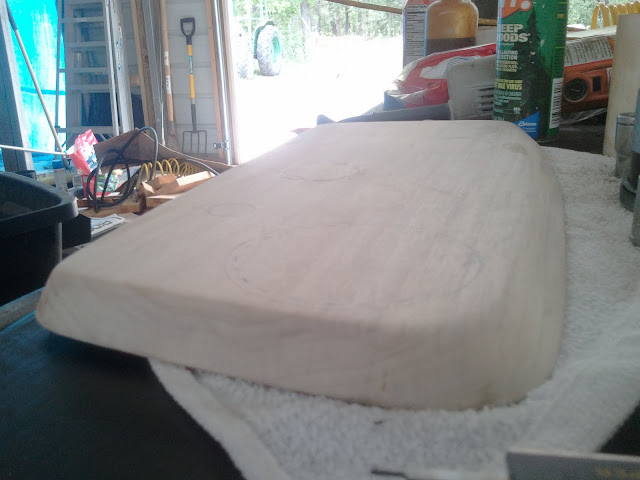
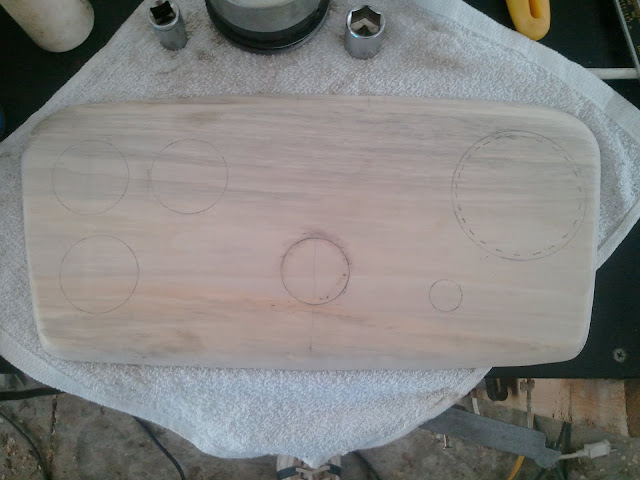
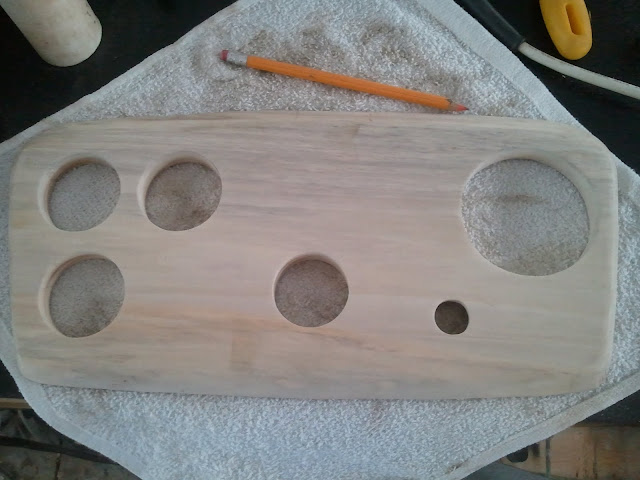
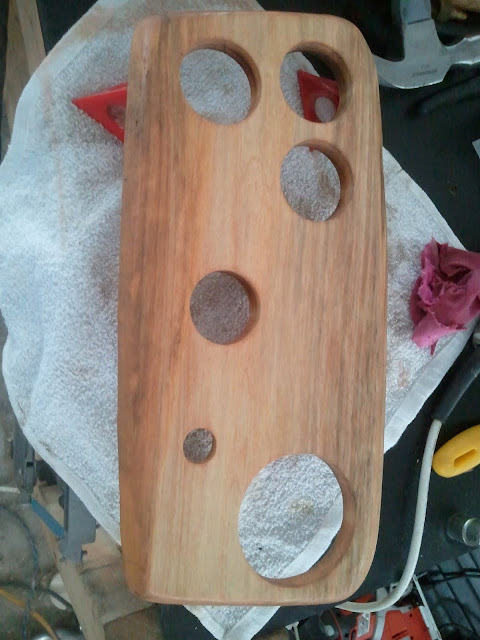
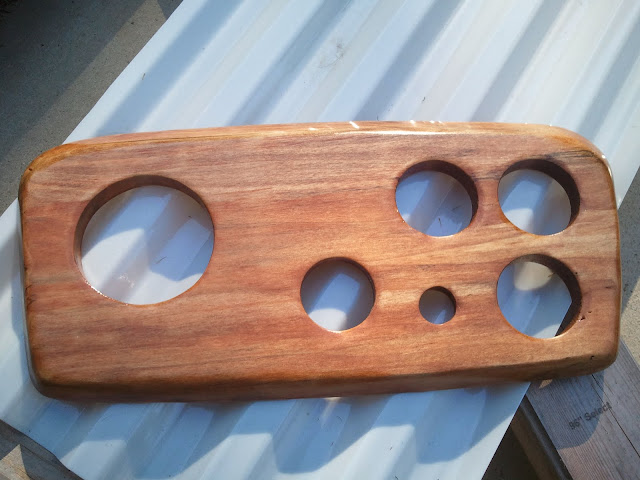
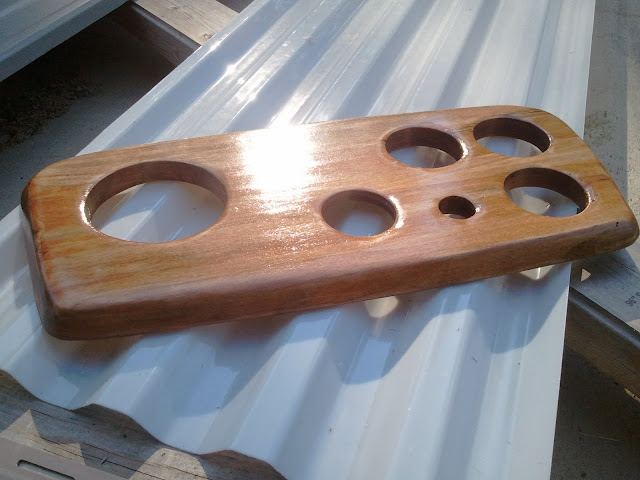
- Rebuilding the dashboard
- Adding useful gauges (removing the idiot lights)
- Replacing the missing switches.
- Glass blasting the engine and rusty areas of the frame
- Priming and painting the engine
- Priming and painting the frame and rims
- Piping the exhaust up the canopy for a more gag-free experience
- Diagnosing and (hopefully) stopping the white-grey smoke coming from the exhaust

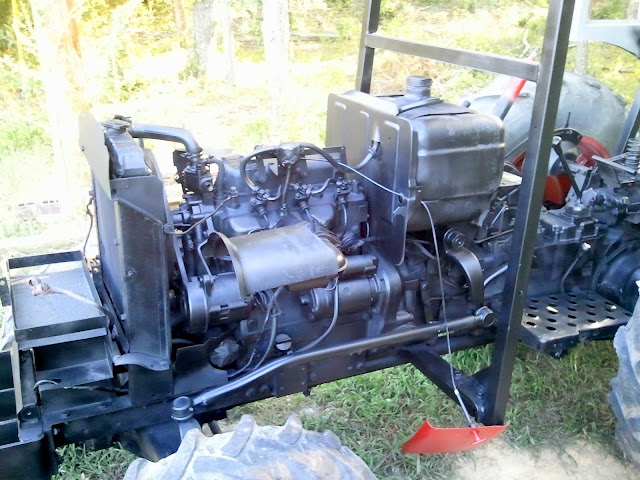
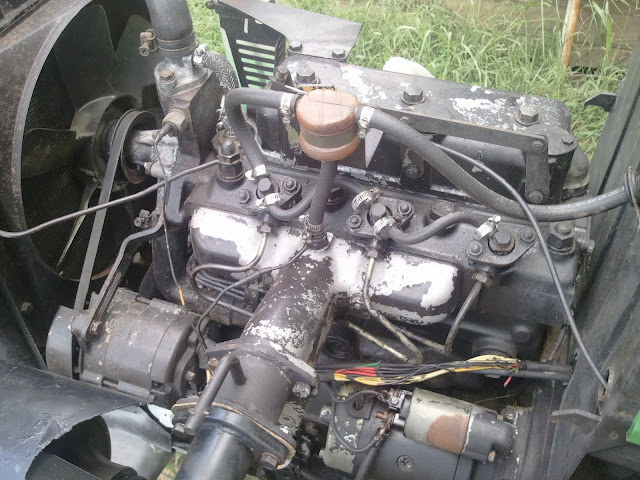
And the before photos of the engine (my first item)

2011-08-21%25252015.15.19.jpg


2011-08-21%25252015.15.34.jpg


Yesterday I began blasting the engine in order to remove the flaking paint. I degreased everything, let it dry overnight and threw on a coat of primer on the entire tractor, or as much as I could do before my compressor seized from overheating :eek:.

I'll attempt to finish the priming this afternoon. Hopefully tomorrow will be the first coat of engine paint, as I have very little sanding to do on the engine, seeing as it doesn't need to be perfectly mirror-worthy.
 
   / YM336D Restoration thread - Part two
  • Thread Starter
#2  
As always, here is a link to my rebuild photo collection, which has every photo I've taken, not just the ones I post here.

Small update today. I got my gauges in and also some 1/8" OD copper tubing for the oil pressure line. Being the impatient person I am, I couldn't help but begin the process of trying out my new gauges :D, so I began my dashboard rebuild.

2011-08-25%25252013.30.51.jpg

The OEM dashboard was destroyed, so it was time to make a new one.

2011-08-25%25252013.30.22.jpg

For ease of fabrication and a nice, custom look I opted to use ash for the new dash cluster.

2011-08-25%25252013.32.28.jpg

After some planing, sanding and bend sawing I had an exact replica of the OEM dash shape.

2011-08-25%25252013.32.12.jpg

I decided to move the new gauges to the left side and the tach to the right.

2011-08-25%25252014.40.45.jpg

After some liberal use of my hole saws and new jigsaw, I had perfectly sized holes for the new component locations.

2011-08-25%25252015.00.19.jpg

Here you can see the contour of the new dash, which is identical to the original.

2011-08-25%25252015.00.02.jpg

And after the first coat of stain and poly. I'll be adding 4 more coats of poly prior to installing it. I don't want to remake this every year.

I'm tempted to begin making a new, wooden steering wheel as well as some matching wooden shift knobs just for kicks. This will never be a show winning tractor, but at least I can make it mine.

UPDATE: I may have shot myself in the foot on this one, as the tach cable may not reach the new tach location. I'll have to check this shortly. I'd hate to have to remake the entire cluster because I misplaced one gauge :(
 
   / YM336D Restoration thread - Part two #3  
Wow, that's gorgeous. Nicely done work, and terrific write-up! Thanks for the other photos in your album, too.
 
   / YM336D Restoration thread - Part two #4  
You gonna worry about 1 and 2? I assume its boths the high and low range right? 1's not a big deal but i use high 2 alot. Im thinking you may miss your #2 gear!
 
   / YM336D Restoration thread - Part two
  • Thread Starter
#5  
You gonna worry about 1 and 2? I assume its both the high and low range right? 1's not a big deal but i use high 2 a lot. I'm thinking you may miss your #2 gear!

Yeah, #3 is certainly a bit fast, especially as I want a tiller for this beast. I'll likely wait until things are stable before digging into the broken gears, as that likely requires splitting the tractor. I'll pull the shifter housing in a week or so and see what I'm dealing with. #2 has only a few broken teeth, so it would be nice to be able to TIG the teeth with the gear in place, but I'm dubious whether I can pull that off.

As for the dashboard.. my suspicions were correct. The tach cable no longer reached, so I had to remake the dash.

2011-08-25%25252015.00.02.jpg
2011-08-25%25252018.58.38.jpg

I had to move the tach back to where it was. Luckily it wasn't too difficult to make the dash. I happened to gear up for woodworking a year ago, so I have all of the right tools to make this stuff. Was pretty nice to find a reason to use them all.

2011-08-25%25252018.58.14.jpg

And the side view. It isn't that dark, it was simply getting dusky outside and I don't have lights in my workshop yet. It is the same shade as the original (made from the same board).

Let's hope this is the last one I have to make! :eek:
 
   / YM336D Restoration thread - Part two #6  
Very nice! :thumbsup: When do your dash assembly's go on sale? :laughing::thumbsup:
 
   / YM336D Restoration thread - Part two
  • Thread Starter
#7  
Makes one wonder how well a tractor customization market would do :D

Tractor spinners anyone? :laughing:

If I knew I could make a living making wood replacements for whatever, I'd do it in a heartbeat. There are certainly worse ways to make a living.

This weekend I'll likely be making a wooden steering wheel (my first ever). No real reason; it was so nice using my woodworking tools, I want something else to build.
 
   / YM336D Restoration thread - Part two
  • Thread Starter
#8  
I made this weekend "paint the tractor already!" weekend. I managed to get my primer to thin out nicely enough to get a coat over the tractor and get down to the colorful business of painting it. I'm not finished yet, but at least it is beginning to resemble something which is not an eyesore.

I also got the new gauges ready for installation. I should be able to simply hook them up and go when the dash is installed. I'll have to trim a bit from the brackets to account for the thick wood dashboard. They assume there will only be a skinny metal mount, not a 5/8" thick one.

2011-08-28%25252017.06.21.jpg

I finished up the dashboard today. The fourth coat turned out well.

2011-08-28%25252017.06.09.jpg

It isn't a mirror finish, but it'll do.

2011-08-28%25252017.06.47.jpg

Finally rid of that awful green! I primed the entire tractor and recoated it with black. I am so happy to rid myself of having to look at an ugly beast. Who knew a paint job could make one feel so much better :)

2011-08-28%25252017.07.06.jpg

No more flaking and mismatched paint. Removing the hood was quite easy. Not sure why I fought my removing it for so long.

2011-08-28%25252017.07.25.jpg

The new tractor color. I also planned for the new gauges by cutting some additional holes. I'm excited to see it in place.

Tomorrow I'll be painting the fenders, canopy and recoating the hood in order to make it more scratch proof. Hopefully there will be enough daylight (and energy) left to remove the wheels one by one and paint the rims.
 
   / YM336D Restoration thread - Part two #9  
Domush
Nice job as usual,with the repairs and the updates,its great to see this tractor come back to life-really like the wood dash,its a nice touch !!
 
   / YM336D Restoration thread - Part two #10  
Great "resurrection" ..... you will have looking so nice you won't want to use it:D
 
 
Top