AMD's 1968 MF 135

   / AMD's 1968 MF 135 #61  
start soaking the square headed bolts that fasten the drive lugs to the rim on the power adjustment rail with PB blaster or equivilent. They can be rusted and difficult to remove. I could not get one loose and was lucky that I was able to remove the rim clamp and turn the rim past the stuck clamp and install the second drive lug on the opposite side to move the tires out then reinstall the rim clamp. I used anti sieze on all the rim clamp nuts since I had to cut them off and did not want to go through that again. I still have not got that one drive lug loose but have no reason to move it yet.

This is the instructions I mentioned earlier in the thread. The original intent of the pavt rims is you loosen the rim clamps, move the stops and shift into gear and let out the clutch to shift the rims in or out to the stop you preset without jacking up the tractor. I jacked up the rear end of the tractor and rotated them by hand for better control since I could not get one of the stops loose. There should be a stop on both sides of the rim clamp except if the rim is all the way in or all the way out and then the ends of the rails on the rim act a stop.
 
   / AMD's 1968 MF 135
  • Thread Starter
#62  
Wow... didn't remember you writing that in my thread previously... sorry for duplicating my question. I've been all over the internet trying to find something on it but all I needed to do was check here in my own thread. Thanks for pointing it out (again)!

I've started soaking the square nuts already, and by reading this now,along with looking at a picture I think I understand better... I thought they were all I would need to loosen but guess I have to do the 4 large nuts too.

Thanks so much, and again excuse me for overlooking the advice you'd already given.
 
   / AMD's 1968 MF 135 #63  
Wow... didn't remember you writing that in my thread previously... sorry for duplicating my question. I've been all over the internet trying to find something on it but all I needed to do was check here in my own thread. Thanks for pointing it out (again)!

I've started soaking the square nuts already, and by reading this now,along with looking at a picture I think I understand better... I thought they were all I would need to loosen but guess I have to do the 4 large nuts too.

Thanks so much, and again excuse me for overlooking the advice you'd already given.

My tractor looked like it spent some years outside since the 3/4 -10 bolts were frozen with rust. I broke two 1/2 drive breaker bars in the process and finally used a nut cracker to split the nuts off the bolts. A 3/4 drive ratchet would be better if you have access to one. If you can find the right sockets, you may need to use a 4 point square drive socket for the drive lugs unless you get a lot luckier than me. Antisieze on all the bolts when you put things back together would beneficial. When tightening the rim clamps, tighten each one a little at a time to keep them even.

So far I havent needed to put my chains on yet, hopefully never but I wont count on it. We had some single didget weather but not enough snow to even think about getting the tractor out yet.

namyessam
 
   / AMD's 1968 MF 135
  • Thread Starter
#64  
So far I havent needed to put my chains on yet, hopefully never but I wont count on it. We had some single didget weather but not enough snow to even think about getting the tractor out yet.

We had 8" Tues / Wed... my first time ever blowing was in the dark Wednesday night - and I'm hoping that the chains will help - there were several times that I started to spin and i couldn't actually let the blower ride the ground on it's skids. I'm relatively flat, but around the house is raised as is the path to where I built my shelter. Getting these chains on and having some time to observe in daylight this weekend will be beneficial. I shortened the top link up too much likely as well as I was being over cautious with the gravel driveway... I figure things can only get better!! Thanks. I'll let you know how I make out...
 
   / AMD's 1968 MF 135
  • Thread Starter
#65  
Well I did get the rims adjusted out the 2" I needed but it was a battle! The first side probably took me upwards of 5 hours, but I got everything loose and cleaned and done properly. It was definitely tough work though. The 1-1/8" nuts on the rim clamps were seized. A lot of penetrating oil, a broken ratchet and a few curse words got it done. The second side went much better except that I could not get either of the stops loosened. I ended up removing the bolt and rim clamp and turning past the stop to get it done. I'll have to continue with the penetrating oil and hopefully get the stop moved eventually.

Chains went on and I noticed a huge difference in grip. Now just the lights to go! I worked at them a bit as well but apparently did something wrong. They were lower priority to me anyways. I'll have to bring a multimeter home at some point to check what I've done wrong.

Thanks again for all your help namyessam!
 
   / AMD's 1968 MF 135 #66  
Well I did get the rims adjusted out the 2" I needed but it was a battle! The first side probably took me upwards of 5 hours, but I got everything loose and cleaned and done properly. It was definitely tough work though. The 1-1/8" nuts on the rim clamps were seized. A lot of penetrating oil, a broken ratchet and a few curse words got it done. The second side went much better except that I could not get either of the stops loosened. I ended up removing the bolt and rim clamp and turning past the stop to get it done. I'll have to continue with the penetrating oil and hopefully get the stop moved eventually.

Chains went on and I noticed a huge difference in grip. Now just the lights to go! I worked at them a bit as well but apparently did something wrong. They were lower priority to me anyways. I'll have to bring a multimeter home at some point to check what I've done wrong.

Thanks again for all your help namyessam!

I had one stop that wouldn't come loose but I was lucky it was the inside one. I was able to get the outside one off and removed the clamp just as you did and rotated it past the stuck one and it became the outside stop. Installed the other inside and was set. I never did get it off and figure I will have to resort to heat, but am a little reluctant so I dont get it too hot and melt the tube. Glad you made out ok. The chains make a big difference especially on packed snow and ice.

I was in the same situation when I did mine. I just got done rebuilding the engine and didn't even have the loader back one when the snow started and seemed to never stop that year. I was under the gun the whole winter. started out with a back blade until I got the loader on. Then added the chains but had to go slow till I got the rims moved out. It was a real chore I don't want to go through again. I mentioned earlier in the thread about the heat houser. I think you found a picture of one but I finally got pictures of mine I will post when I get home later.
 
Last edited:
   / AMD's 1968 MF 135 #67  
heres pictures of the heat houser, front mounted auxiliary hydraulic system and the two spool auxiliary valve on my tractor.
 
   / AMD's 1968 MF 135
  • Thread Starter
#68  
heres pictures of the heat houser, front mounted auxiliary hydraulic system and the two spool auxiliary valve on my tractor.

Cool. I haven't minded it too much so far, but the one thing I did notice my first night was that my thighs of all things got cold. I guess this would help with that a lot. I really had never heard of one before you mentioned it!

What's the windshield? Plastic? Wouldn't do much for a rear mount blower when I'm turned around most of the time!!
 
   / AMD's 1968 MF 135 #69  
Cool. I haven't minded it too much so far, but the one thing I did notice my first night was that my thighs of all things got cold. I guess this would help with that a lot. I really had never heard of one before you mentioned it!

What's the windshield? Plastic? Wouldn't do much for a rear mount blower when I'm turned around most of the time!!

The windshield is a flexible clear vinyl. They do have a top and a rear curtain available for an additional cost. Since the Massey is side entry, I suppose the rear curtain would help if you had the top. The heat coming off the radiator, manifold, and engine block does make it a bit more comfortable. I think just breaking the wind makes the big difference. I thought it may not help too much with a rear mounted blower especially if the wind is blowing back at you. You can get a bit of snow on you. Hope the winter isn't too bad on you. Maybe Santa Claus will bring us a new tractor with a cab. LOL
 
   / AMD's 1968 MF 135
  • Thread Starter
#70  
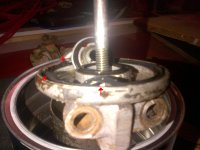
Everything had been going well with the tractor until the 22nd of Dec - got home from work and needed to blow snow. Had the tractor plugged in while I was out, so started and went in to see wifey and son and get changed. Came out to find a puddle of oil under the tractor which was pouring out of the filter assembly at the top. I tightened the bolt as a first fix, and added oil and it seemed to stop leaking. I watched it as I blew snow and twice more it started leaking (not as badly though). I did decide that I was going to convert to a screw-on filter though - I got the parts at the local dealer and the conversion went smoothly. When I removed the old filter cartridge and assembly I saw this:
IMG-20131226-00058-b.JPG

Very evident what the problem was - the gasket had swollen in three places and was very hard. Has anyone else ever seen this happen? The filter (along with gaskets) had only been changed in the summer so age shouldn't have been an issue. Anyway, I've now eliminated that with the spin-on!

Also got lights working over the holidays!
IMG-20131227-00064.jpg
 
 
Top