Ok folks, so I spent a gorgeous Saturday changing a suspected back tube in one of the rear tires of my JD4600. The tires are 17.5x24, and I purchase a Firestone tube for $60 at a local tire shop. I also purchased a few tools that I will post links to show you what I used.
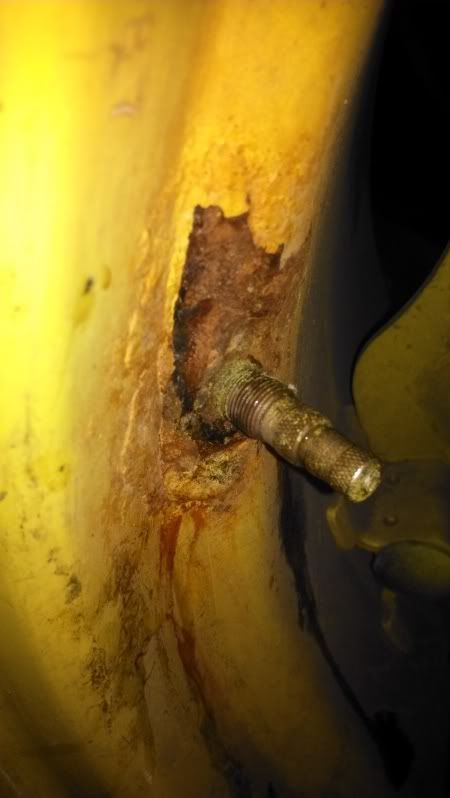
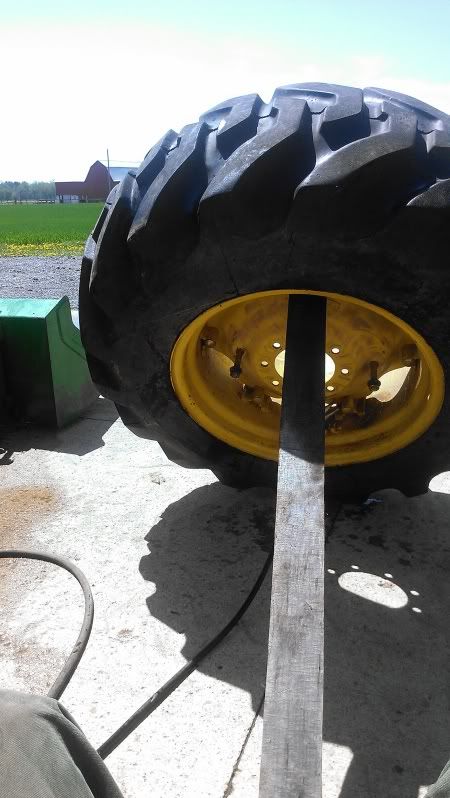
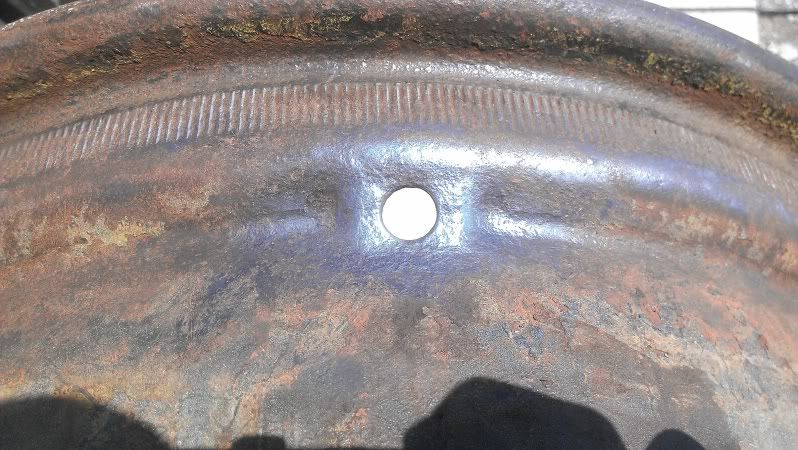
Here's what I had to start out with. The leaking calcium chloride ballast has begun to corrode the valve stem area of the time.
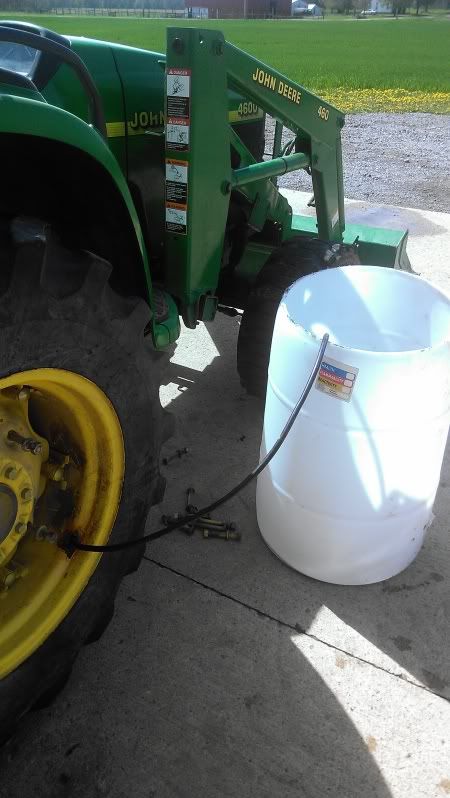
With the rear end of the tractor lifted off the ground and properly blocked, the tire can be rotated. You'll need to do this so when the tire runs low on air pressure you can turn the valve stem back to the 12 o'clock position to pressurize the tire again. I pulled the wheel weights, pressurized the tire to 20psi, pulled the valve core and installed a piece of fuel line with a hose clamp and tightened it over the valve stem and ran the calcium chloride ballast into a 55 gallon poly barrel I had laying around.
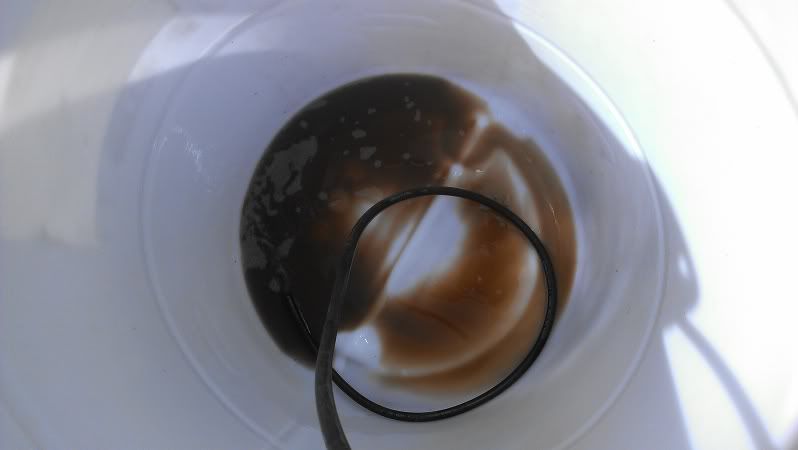
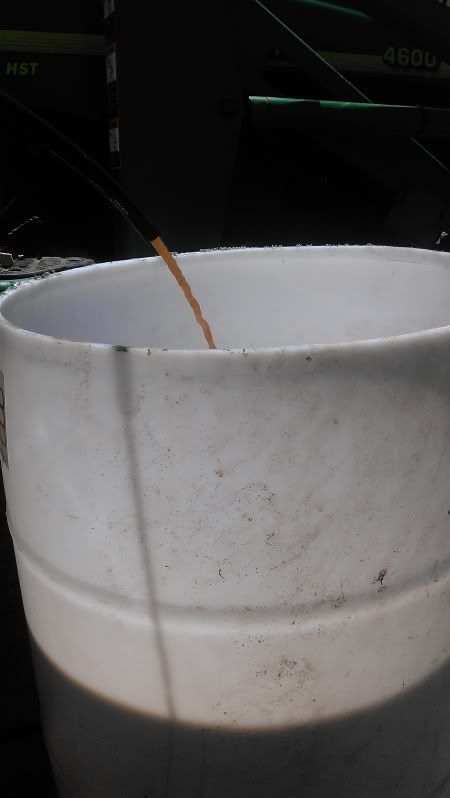
It took 1 hour to empty the ballast from the tire, having to re-pressurize the tire 3 different times. A little trick here is to keep an airgun handy because the flow would suffer and I found it to be debris that was inhibiting flow. A short blast of air into the discharge hose quickly cleared any blockage.
Once it got down low enough I had to remove the assembly from the tractor and tip it over to get more calcium chloride out of it.
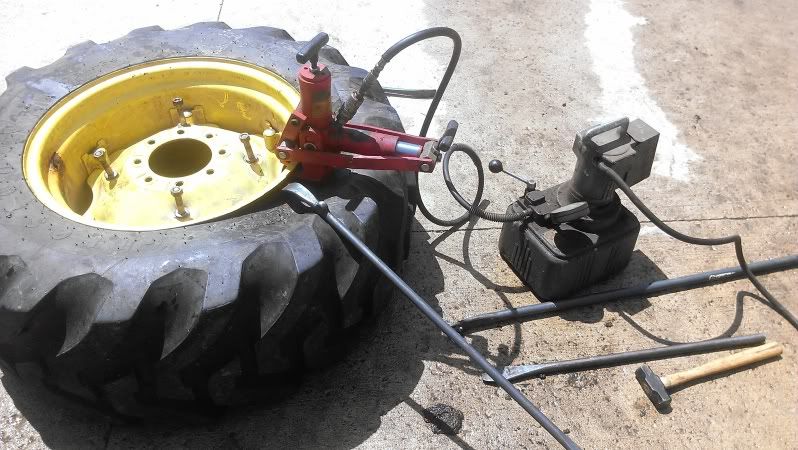
Now begins the fun part. I have access to all kinds of tire changing tools; tire spoons, a bead slide hammer, and as overkill as it seems, a hydraulic bead breaker. I used the spoons a little bit to get access to the rim, then I let the hydraulic breaker do the work for me. My grandpa picked up this 110v hydraulic power unit probably at an auction and boy am I glad he did. It clamps onto the rim and the lower hook separates to separate the tire from the bead. Piece of cake!
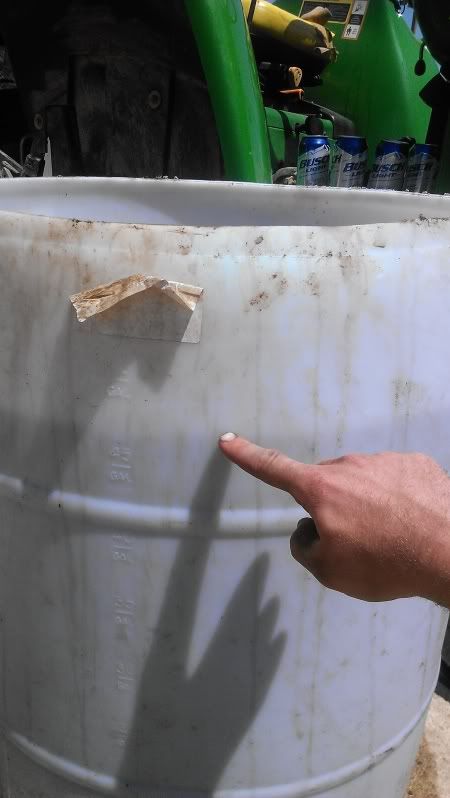
Using old rims as spacers I was able to get the tire up and remove the tube, then pull the rim completely to clean it up. With the tube out you can completely drain any remaining ballast out. I took around 47 gallons out of this tube.
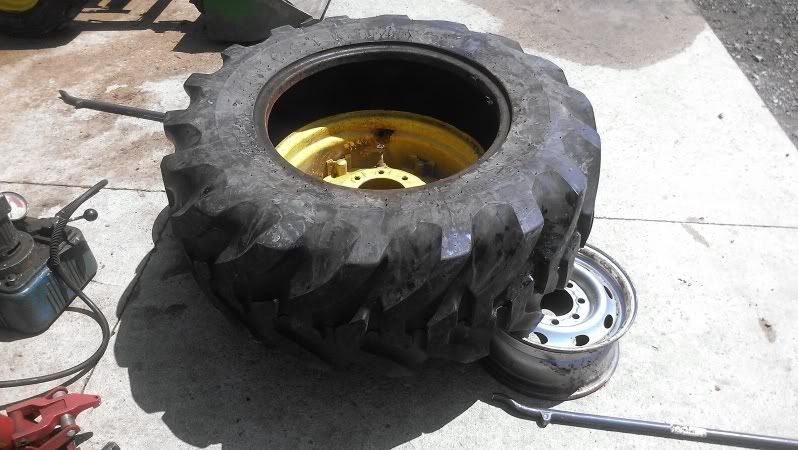
Once the rim was out, I cleaned it up with a wire wheel on a grinder, primed and repainted the inside and outside of the rim.

I kinda forgot to take pics from this point on. After the paint dried, I lubricated the tire beads with Dawn dish soap, got one bead on the rim and installed the tube. I was told a trick to use baby powder on the tube to keep it from binding or sticking inside the rim, but that was only after I had installed my tube with Dawn dish soap and some water to make it nice and slippery.
My wife helped hold some spoons and we were able to get the tire back on without pinching the tube. From there I inflated the tube to seat the beads, then used a shop vac to deflate the tube inside the tire so any kinks or folds in the tube would work their way out. I did that 3 different times to ensure the tube was good to go, then slapped it back on the tractor.
I purchased an adapter from my local NAPA to pump the calcium chloride back into the tube. Cost was around $18 and comes with a few adapters. A garden hose hooks up to it and it also has an air bleed valve to depressurize the tube as the ballast is pumped into the tube. I found it quicker to just unhook the garden hose at the adapter to bleed the air out much quicker.
NAPA AUTO PARTS
I also purchased a Wayne drill pump with garden hose fittings to pump the ballast back in.
http://www.ruralking.com/pump-drill.html?utm_medium=cse&utm_source=google&CAWELAID=520009190000031064&CAGPSPN=pla&catargetid=1708823525&cadevice=c&gclid=CPDqwK2BpL4CFVQiMgodHAsAZQ
With the valve stem at the 12 o'clock position, I began pumping the calcium chloride back into the tube. It took an hour to pump it back in. I found that I had to submerge the intake of the pump directly into the barrel of the calcium chloride because the pump didn't have enough suction to prime itself with a 4 foot piece of garden hose stuck into the barrel. I added 20 psi to each tire, again with the valve stem at the 12 o'clock position to keep the calcium chloride out of my tire gauge, reinstalled my wheel weights and was ready to work again.
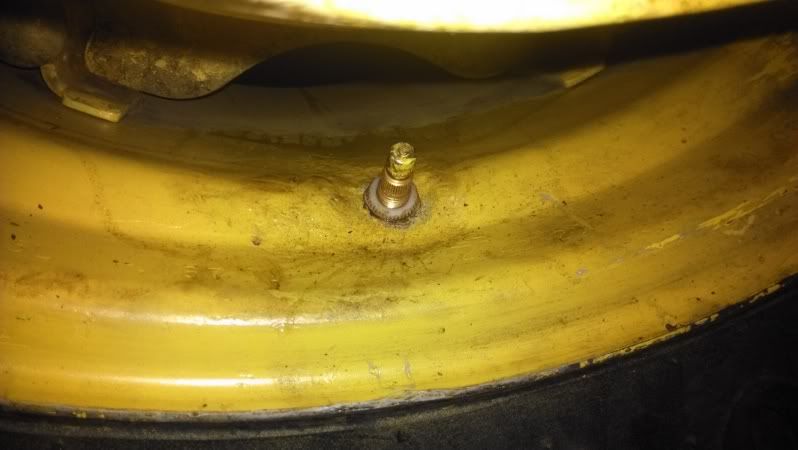
Looks much better now.
Here's what I had to start out with. The leaking calcium chloride ballast has begun to corrode the valve stem area of the time.
With the rear end of the tractor lifted off the ground and properly blocked, the tire can be rotated. You'll need to do this so when the tire runs low on air pressure you can turn the valve stem back to the 12 o'clock position to pressurize the tire again. I pulled the wheel weights, pressurized the tire to 20psi, pulled the valve core and installed a piece of fuel line with a hose clamp and tightened it over the valve stem and ran the calcium chloride ballast into a 55 gallon poly barrel I had laying around.
It took 1 hour to empty the ballast from the tire, having to re-pressurize the tire 3 different times. A little trick here is to keep an airgun handy because the flow would suffer and I found it to be debris that was inhibiting flow. A short blast of air into the discharge hose quickly cleared any blockage.
Once it got down low enough I had to remove the assembly from the tractor and tip it over to get more calcium chloride out of it.
Now begins the fun part. I have access to all kinds of tire changing tools; tire spoons, a bead slide hammer, and as overkill as it seems, a hydraulic bead breaker. I used the spoons a little bit to get access to the rim, then I let the hydraulic breaker do the work for me. My grandpa picked up this 110v hydraulic power unit probably at an auction and boy am I glad he did. It clamps onto the rim and the lower hook separates to separate the tire from the bead. Piece of cake!
Using old rims as spacers I was able to get the tire up and remove the tube, then pull the rim completely to clean it up. With the tube out you can completely drain any remaining ballast out. I took around 47 gallons out of this tube.
Once the rim was out, I cleaned it up with a wire wheel on a grinder, primed and repainted the inside and outside of the rim.
I kinda forgot to take pics from this point on. After the paint dried, I lubricated the tire beads with Dawn dish soap, got one bead on the rim and installed the tube. I was told a trick to use baby powder on the tube to keep it from binding or sticking inside the rim, but that was only after I had installed my tube with Dawn dish soap and some water to make it nice and slippery.
My wife helped hold some spoons and we were able to get the tire back on without pinching the tube. From there I inflated the tube to seat the beads, then used a shop vac to deflate the tube inside the tire so any kinks or folds in the tube would work their way out. I did that 3 different times to ensure the tube was good to go, then slapped it back on the tractor.
I purchased an adapter from my local NAPA to pump the calcium chloride back into the tube. Cost was around $18 and comes with a few adapters. A garden hose hooks up to it and it also has an air bleed valve to depressurize the tube as the ballast is pumped into the tube. I found it quicker to just unhook the garden hose at the adapter to bleed the air out much quicker.
NAPA AUTO PARTS
I also purchased a Wayne drill pump with garden hose fittings to pump the ballast back in.
http://www.ruralking.com/pump-drill.html?utm_medium=cse&utm_source=google&CAWELAID=520009190000031064&CAGPSPN=pla&catargetid=1708823525&cadevice=c&gclid=CPDqwK2BpL4CFVQiMgodHAsAZQ
With the valve stem at the 12 o'clock position, I began pumping the calcium chloride back into the tube. It took an hour to pump it back in. I found that I had to submerge the intake of the pump directly into the barrel of the calcium chloride because the pump didn't have enough suction to prime itself with a 4 foot piece of garden hose stuck into the barrel. I added 20 psi to each tire, again with the valve stem at the 12 o'clock position to keep the calcium chloride out of my tire gauge, reinstalled my wheel weights and was ready to work again.
Looks much better now.
")