schmism
Super Member
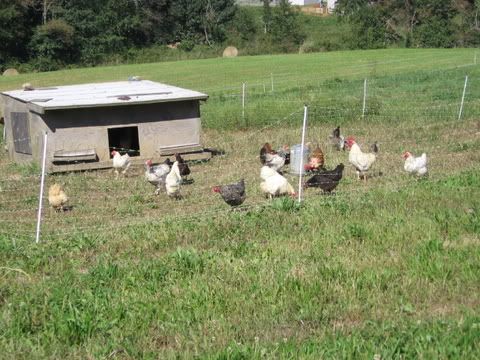
dispite the title, it really has nothing to do with the desiel kind so it has to go down hear in the rural living
i was asked to put together a tread of my build. I had entended on starting last week on it, but it went all the way till sat morning before i got started.
for the readers digest version check out the pics page
Chicken Tractor Pics (dial up friendly)
my goal was something with a fairly small foot print that would be easy to move. Ive seen a number of other tractor designs and have encorperated a number of the design features into my own design. I belive i have been sucessfull in something that is functional as well as still easy to move. (ive seen more than one chicken tractor design that wound up being a not so movable coupe because the size and estimated weight got away from the builders.
Mine was built from 100% recycled materail i had laying around because 1) im cheep, and 2) i was hopeing that if i pulled it off well, it would give it that rustic "barn" look (i think ive achived it)
I guesitmate ive got about $50 in hardware cost. bought tires at harbor freight for $4.99 instead of TSC for 19.99
so far ive got about 8 hrs in it, but over half that time was the time it took to scroung up 2x4's clean them of nails, and rip them into 2x2 etc. The 1x you see is infact old cypris fence boards i scrounged some time ago and have been sitting in a tarped pile for the past 5? years.... I spent time planing the back sides to 1) create bedding for the new girls, 2) cut the full 1" rought cut boards down to 3/4" to shave some weight 3) give a clean, flat mounting surface on the back face
Ive been known to do trim carpentery in the past as side work, so my collection of "profesional grade" tools and skills may be more than the avg person. Tools i used,
table saw
miter saw
planner
air nailer (16 ga 1.75 trim nails)
titebound 3 waterpoof glue (harbor freight)
cordless drill
Design cryteria, 1) make it fit under 1 pannel of recyled tin roofing that i have laying around, the size of the pannels i have are ~32"x7.5'
with that in mind, my basic size was kept to 28" wide, 6' long, 2' low end, 4' high end. The other consideration that was important to me was, i had bought 3' tall chicken wire, and didnt want to have to "splice" the wire vertically. (youll see how that comes into play later)
so without further ado.... the pics
the frame and 2 end verts
.JPG)
i notched the inside edge so i could get maximum surface contact for glue and screws
.JPG)
The wheel end needs to be raised because i used 10" pnumatic tires, which means the center of the hub is 5" off the ground... if i wanted to maintain ~.75" clearance i would need to center my hub at 4.25" (above the height of a standard 2x4) some small 2x2 scabs provide the needed space. I also clipped the bottom corner of the frame so that the corners wouldnt rub when you pick up the short end to move it.
.JPG)
as Norm Abrams often doesn, when he finds an issue in his protype, **** often make a tweek in his "final version"
One of my design changes for the future would be to hold the rear frame brace shown in the above pic, 3/4" or so above the bottom. As i rolled the frame around the yard it often catches on grass clumps, rocks etc.
hear are the tall end verts up, rear folding door (egg door) and a mock up of the roof line
.JPG)
The only plywood used on the project was for the floor. its ~24" sq
I opted for a bottom hindgeing door with a barrel lock in the downward postion so that its natural "gravity" postion is closed/locked.
.JPG)
the top is hindged at the rear, and the small 1x2 runners are simply nailer for fence and the upper rear side panneles. (small to keep weight down)
.JPG)
this is a good shot to see the clearance under the rear tires. just enough to be able to move it, but not enough for critters to get in.
at the end of sat
.JPG)
NOTE: the wheels are attached with 1/2" lag bolts. they have 5/8" centers but with a washer and the lag bolt they seem to roll just fine.
Sunday i started putting the "siding" on the upper "box"
.JPG)
I finished up the siding, and was working on some of the other small details such as a ramp up to the box, roost in the box (it will eventually have a nest box but not untill they start laying) when some friends showed up so i wasnt able to get the girls moved in last night.....
Ill finish up the wire tonight and post the last few pics of the girls moved into there new coupe for the summer/fall.
.JPG)
.JPG)