LA125 Overhaul

   / LA125 Overhaul
  • Thread Starter
#21  
Well, just when I thought I had the mower finished up, I started it up and mowed a patch in front of the shop to see how it ran and mowed. At first it seemed okay, but then after a couple of minutes it started smoking blue smoke out the exhaust and missing sometimes.
I pulled it back into the shop and noticed a lot of oil on the frame behind the engine and running down onto the mower deck. When I pulled the dipstick, oil and vapor sprayed out all over because the was so much blowby in the crankcase.
Well, *****!
After I shut it down and pulled the dipstick again, the oil on it was already black as coal. Not good. 🙁
So, after mulling over what to do, I figured the engine had to come off and be checked out. I HOPE that a new set of rings, maybe a piston, and honing out the
cylinder will take care of it, but until I get it all apart, it's hard to say.
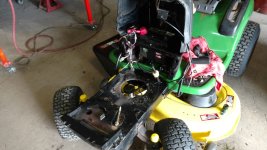
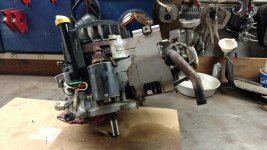
It was easy to get the engine out, only took about a half hour. Four bolts hold it to the frame, an electrical connector, starter cable, throttle cable, fuel line, remove the mower belt and finally take the bolt out of the drive pulley on the bottom and it slid right off the crankshaft. It not even that heavy, so I lugged it over and set it on the bench. Probably pull it apart tomorrow and see shat the verdict it.
 

Attachments

  • IMG_20220707_175924452 (Medium).jpg
    IMG_20220707_175924452 (Medium).jpg
    676.5 KB · Views: 70
  • IMG_20220707_175936385 (Medium).jpg
    IMG_20220707_175936385 (Medium).jpg
    732.4 KB · Views: 69
   / LA125 Overhaul #22  
Well that's an unfortunate turn of events, must say you have a great attitude!

When one get's vested in a restoration project like this one, you just have to push to the finish.
 
   / LA125 Overhaul #23  
That's frustrating, but as Carl said you've got the right attitude for this. You'll certainly have the nicest LA around when done.
 
   / LA125 Overhaul #24  
Bummer, wishing you luck that it’s not too tough to fix.

Mike
 
   / LA125 Overhaul #25  
Well, just when I thought I had the mower finished up, I started it up and mowed a patch in front of the shop to see how it ran and mowed. At first it seemed okay, but then after a couple of minutes it started smoking blue smoke out the exhaust and missing sometimes.
I pulled it back into the shop and noticed a lot of oil on the frame behind the engine and running down onto the mower deck. When I pulled the dipstick, oil and vapor sprayed out all over because the was so much blowby in the crankcase.
Well, *****!
After I shut it down and pulled the dipstick again, the oil on it was already black as coal. Not good. 🙁
So, after mulling over what to do, I figured the engine had to come off and be checked out. I HOPE that a new set of rings, maybe a piston, and honing out the
cylinder will take care of it, but until I get it all apart, it's hard to say.
It was easy to get the engine out, only took about a half hour. Four bolts hold it to the frame, an electrical connector, starter cable, throttle cable, fuel line, remove the mower belt and finally take the bolt out of the drive pulley on the bottom and it slid right off the crankshaft. It not even that heavy, so I lugged it over and set it on the bench. Probably pull it apart tomorrow and see shat the verdict it.
Hi BX
Don't rush to rip into your engine with rings etc. The oil on the frame and blow-by are the classic symptoms of a blown head gasket on that engine.
No biggie and an easy repair.
Notice that the oil on the frame (Chassis) will be coming from the breather gauze in the vacuum fuel pump in the Left Rear corner of the cowling?
That's the clue that the head gasket has blown between the cylinder and the pushrod tunnel cavity.
You'll see the blown evidence at the 3-o'clock position on the cylinder when you remove the cylinder head.

It's the common fault on this B&S engine model.
No need to open the crankcase. Just change the engine oil twice to flush it after you install a new head gasket.

Remove the engine cowel as you seem to have done.
Undo the carb mounting bolts and move the carb to the side (Don't disturb the rubber o-ring seal in the inlet manifold.
Remove rocker cover and rockers.
Note the pushrods are different so mark them upper & lower.
Undo the head bolts and prise away the cylinder head. You will immediately see the 'blow' and why it pressurises the crankcase through the pushrod tunnel.

Clean the combustion chamber and the surfaces gently.
Lots of info on the web and many 'cowboy' videos on youtube.
You can leave the exhaust pipe on since you have the engine on the bench.

Nice work on the rebuild so far.
 
   / LA125 Overhaul #26  
When re-installing the engine lock the Parking Brake pedal - This removes the tension on the transmission belt and makes the installation of the drive pulley easy.
It may be also easier for you to remove the exhaust pipe and re-fit it after the engine is mounted back on the chassis.
 
   / LA125 Overhaul
  • Thread Starter
#27  
Hi BX
Don't rush to rip into your engine with rings etc. The oil on the frame and blow-by are the classic symptoms of a blown head gasket on that engine.
No biggie and an easy repair.
Notice that the oil on the frame (Chassis) will be coming from the breather gauze in the vacuum fuel pump in the Left Rear corner of the cowling?
That's the clue that the head gasket has blown between the cylinder and the pushrod tunnel cavity.
You'll see the blown evidence at the 3-o'clock position on the cylinder when you remove the cylinder head.

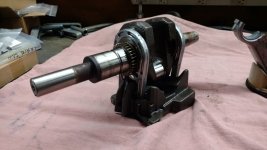
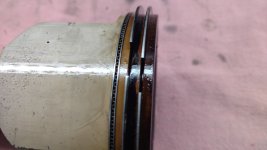
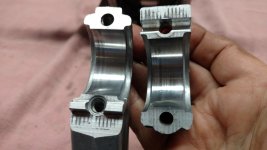
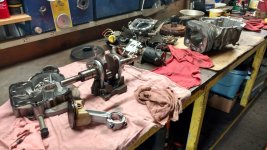
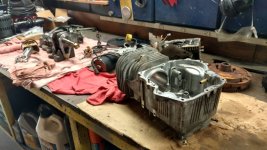
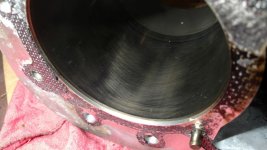
Too late! I pulled the engine apart this afternoon. The head gasket looked okay, I didn't see any area that looked blown, but I guess it could have seen leaking. I did find the two compression ring gaps were within 1/2 inch of each other and the oil ring had virtually no tension on it, which is why there was a lot of oil in the cylinder. The bore look very good, plenty of cross hatch still visible, Piston looks very good, as does to connecting rod and crank journal.
I ordered a set of rings and a gasket and seal kit this afternoon from my local JD dealer, so I should have them early next week. I spent a couple of hours cleaning up the crankcase, bottom cover and cylinder head. Also blasted and painted the rocker cover and a couple other parts that were rather rusty. Will probably get the rest of the parts all cleaned up tomorrow.
I had one small screw that holds the cooling baffle to the the bottom of the cylinder, snap off, despite tapping on it with a hammer and gently working it back and forth, so I'll work on getting that out tomorrow also.
I was surprised when I got the bottom cover off the engine and saw the huge balance weight attached the the crank. I've never seen one of those before.
I'll knock the glaze off the cylinder wall and get a nice new crosshatch in it so it'll be ready to reassemble when I get the parts.

Edit: On examination of pictures I took, it does look like the head gasket was blown like you suggested. Oh well, at least now I know it will be right, and like I said, there was a lot of oil in the cylinder when I took the head off.
 

Attachments

  • IMG_20220708_141851460 (Medium).jpg
    IMG_20220708_141851460 (Medium).jpg
    501.2 KB · Views: 90
  • IMG_20220708_141938740 (Medium).jpg
    IMG_20220708_141938740 (Medium).jpg
    360.4 KB · Views: 77
  • IMG_20220708_142206725_TOP (Medium).jpg
    IMG_20220708_142206725_TOP (Medium).jpg
    424.3 KB · Views: 71
  • IMG_20220708_145951475_HDR (Medium).jpg
    IMG_20220708_145951475_HDR (Medium).jpg
    826.8 KB · Views: 79
  • IMG_20220708_150001643_HDR (Medium).jpg
    IMG_20220708_150001643_HDR (Medium).jpg
    733.3 KB · Views: 92
  • IMG_20220708_150048814 (Medium).jpg
    IMG_20220708_150048814 (Medium).jpg
    616.9 KB · Views: 89
Last edited:
   / LA125 Overhaul #28  
Wow, you got right after that. Thanks for keeping us informed. Much appreciated.
 
   / LA125 Overhaul
  • Thread Starter
#29  
When re-installing the engine lock the Parking Brake pedal - This removes the tension on the transmission belt and makes the installation of the drive pulley easy.
It may be also easier for you to remove the exhaust pipe and re-fit it after the engine is mounted back on the chassis.
Thanks for the tip, I was kinda wondering how to do that. (y)
It's the common fault on this B&S engine model.
No need to open the crankcase. Just change the engine oil twice to flush it after you install a new head gasket.
So, is there a tip to keep it from blowing again?
 
   / LA125 Overhaul #30  
So, is there a tip to keep it from blowing again?
No, not really.
The 'tip' is to recognise when it is blowing.

In your 6th photo of the cylinder cross-hatching you can see the blown area right there at 3-o'clock between the cylinder and the pushrod cavity.
Understand that this is a design issue where there is no head bolt in that area at all so clamping pressure on the gasket is reliant upon the head bolts at 1 o'clock and 5 o'clock.

That's a lot to ask for a simple compound head gasket to deal with. Inevitably, yes, it will happen again.

The telltale indication of trouble is when you begin to see oil on the area around the vacuum fuel pump at the rear of the engine cowl. In addition to the crankcase breather the additional excess pressure in the crankcase is relieved by blowing through the pulse line to the fuel pump. Eventually you begin to see oil on the chassis in the area near your left foot. (Below the fuel pump)

At that point, where oil is on the chassis you know your head gasket is a goner.

The upside is that it's a relatively simple repair in-situ. An hour, (in the field even) , at most.

The downside is that if you miss the oil-on-chassis-signal (Red Alert!) you will lose the engine through "insufficient lubrication".

Easy monitoring involves checking the dipstick every time before mowing. It's that simple.
(Most operators, however, don't bother.)

If you notice a drop in oil level on the dipstick - Where has it gone? Look for the oil on chassis...

Second - look on the crankshaft pulley in-case the lower crankshaft oil seal has failed.

When refitting the cowl to the engine take care to correctly align the 'finned edges of the dipstick tube with the grooves inside the cowl. (Practice upside down on the bench first so you can see how it sleeves together.)

Also that air-duct shield you mentioned above has two tabs that fit on the cowl.
Another pair of hands can be useful when refitting this together with the dipstick tube and a keeping it all aligned.
 
 
Top