Minneapolis Moline BF Restoration--continuing news

   / Minneapolis Moline BF Restoration--continuing news #1  

flusher

Super Member
Joined
Jun 4, 2005
Messages
7,538
Location
Sacramento
Tractor
Getting old. Sold the ranch. Sold the tractors. Moved back to the city.
OK. Continuing this thread that had the large images and was slow loading.

I'm to the point where the engine has been pulled and the clutch removed.

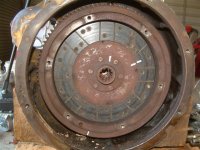
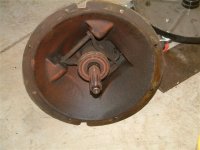
Here's the clutch bell housing. It came off after a 1/4-turn to the right.
DSCF0051 (Small).JPG

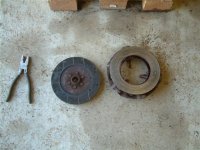
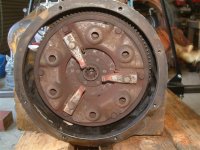
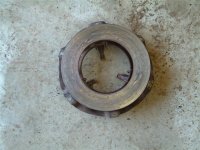
The clutch pack. It's a Rockford RM single disc clutch--9" dia. Pretty simple design. Similar clutches were used on a lot of farm equipment 60 years ago.
DSCF0053 (Small).JPG

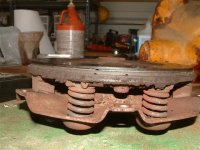
Pressure plate. Looks pretty OK but I'll inspect it more closely later.
DSCF0056 (Small).JPG

The facing against the flywheel.

DSCF0057 (Small).JPG

DSCF0061 (Small).JPG

DSCF0063 (Small).JPG

I've slowed down a little on this project the past week while calibrating my restored Minneapolis Moline P3-6 grain drill for oats and fertilizer. I should finish that work tomorrow and then get back to the BF engine disassembly.

Next steps--remove flywheel, housing and front pulley on the crankshaft. Then mount the engine on the service stand.

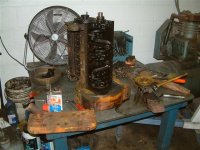
I checked with the machine shop in Red Bluff today. They can hot tank the block, machine the head, grind the flywheel, and seat the valves--all at a reasonable cost. That'll speed up the engine work considerably.
 
   / Minneapolis Moline BF Restoration--continuing news
  • Thread Starter
#3  
Got the engine to the machine shop this week.
Disassembly is complete and most of the parts have been hot tanked.

DSCF0121 (Small).JPG

DSCF0126 (Small).JPG

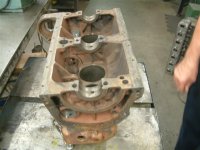
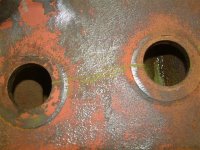
Block was magnafluxed. Found a small crack between two adjacent freeze plug ports (a common problem in these old engines). Figure a treatment with K&W Metallic Block Sealer will fix this glitch.

DSCF0125 (Small).JPG

This Hercules IXB3SL has cylinder sleeves and these are worn out of round. The pistons may be salvagable if the wear is confined to the rings but I may decide to replace them anyway. Needs valves, valve guides, rings, rod and main bearings. Head and block need to be machined flat. I'll get new valve seats since the old ones are not particularly compatible with today's unleaded gas.

Haven't been able to locate a supplier for the cylinder sleeves. Will visit NAPA tomorrow and see what's in their fat books.

The crankshaft needs to be ground. That will be done at a specialty shop, hopefully this week. I'll order the rebuild parts as soon as we have the micrometer measurements off the newly machined crankshaft.
 
   / Minneapolis Moline BF Restoration--continuing news #4  
You might want to check on the availability of oversize bearings before you get the crank ground. Another option may be to spray weld the crank and use standard bearings.
 
   / Minneapolis Moline BF Restoration--continuing news
  • Thread Starter
#5  
You might want to check on the availability of oversize bearings before you get the crank ground. Another option may be to spray weld the crank and use standard bearings.

The plan is to take 0.010" off the crank and use main bearings and rod bearings that are 0.010" undersize to fit the new crank dimensions.
 
   / Minneapolis Moline BF Restoration--continuing news
  • Thread Starter
#6  
Time for an update:

Making progress, slowly.

I picked up the Hercules IXB3SL engine from the machine shop yesterday.

DSCF0191 (Small).JPG

Four new pistons/rings (0.020 over)
Four new exhaust valves
Eight new valve guides
Crankshaft machined 0.010 under
Cylinders machined 0.020
Head milled flat
Block milled flat
Flywheel machined flat
New bearings and gaskets everywhere.

Had the engine reassembled into a short block configuration at the machine shop. I'll complete the assembly later.

A little pricey: $800 parts, $800 labor.

Lately I've been stripping paint from all the parts. Tedious work.
I'm using my angle grinder with flap discs and those "polycarbide" paint removal discs. Both work fine and do a quick job getting down to bare metal.

I don't have a decent grit blast setup to get into the tight spots. I'll try using my pressure washer and see what happens.

Been reading old TBN threads on grit blasting. The consensus seems to be that, unless you're willing to spend several thousand bucks, grit blasting is frustrating (slow, lotsa clogging due to water in the compressed air that isn't effectively removed by dryer filters, etc). Some folks swear by grit blasting; some people swear at grit blasting (messy, grit gets into places you don't want it, etc)

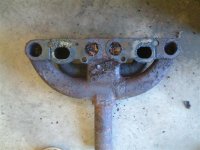
Ordered a replacement manifold ($200). The old one is shot. I don't need rusty crap getting into my nice newly rebuilt engine and screwing up the valves, cylinders and bearings.

DSCF0021 (Small).JPG

The carb rebuild kit showed up in yesterday's mail ($25 plus $15 for the float). Its a Marvel Schebler TSX-826 single barrel updraft type.
 
   / Minneapolis Moline BF Restoration--continuing news
  • Thread Starter
#7  
Been cleaning parts for the past week or so. Paint arrived yesterday. Ordered a rebuilt clutch today.

Been struggling with disassembling the front axle of the Minneapolis Moline BF tractor. It's a 3-piece assembly

--center section, and left and right extensions that adjust in and out to vary the front track width.

The left extensionslid out of the center section fairly easily while the axle was still on the tractor. The right extension was rusted and was stuck fast to the center section.

I removed the front axle months ago. Lately I've been using a 50-50 mixture of acetone and automatic transmission fluid as a penetrant, attempting to free up the rusted parts.

This AM I took my best shot at pulling those fricken pieces apart.
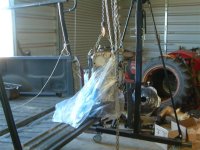
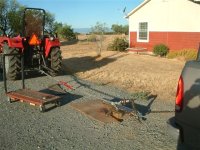
I chained the axle between the Mahindra 5525 and the F150.


DSCF0216 (Small).JPG

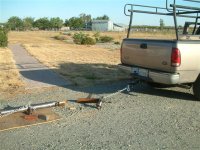
I pulled the F150 forward to tension the chains and tried to pull using that ratchet binder. No luck---the ratchet assembly just twisted the chain. Not the right tool for this job.

So I took the small sledge hammer and a small length of 4x4 and hammered on the spindle end (near the F150) until the axle extension moved about an inch.

DSCF0217 (Small).JPG

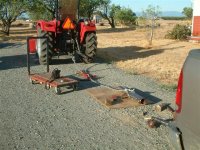
Then I used the mighty F150 to pull the pieces apart--fairly easy pull.

DSCF0218 (Small).JPG


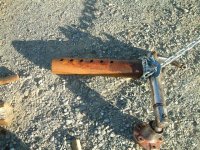
DSCF0219 (Small).JPG

Looks like the penetrant did some good soaking the rusted area

DSCF0220 (Small).JPG

So, to date, the engine has been rebuilt and is in my shop in the short block configuration. Clutch is on order. Parts have been cleaned.
Time for some work with the spray gun.
 
   / Minneapolis Moline BF Restoration--continuing news #8  
The last axle I pulled apart was on a B AC, that had the adjustable front. Man that was a job. Like you I soaked it, I beat it, I pulled it, I heated it, and I cussed it. The bolts that tighten it in place had dimpled in and also dimpled the inner piece till it was almost a peranant conection. I feel for you but It's nice to know that it can be cleaned and painted before it goes back together.
I bought an old T5 Terramite TBL last week and have been rebuilding the cyl,s on it and they also havn't been off since new in the 80's. It's a pain, but almost done now.
Later, Nat
 
   / Minneapolis Moline BF Restoration--continuing news
  • Thread Starter
#9  
The last axle I pulled apart was on a B AC, that had the adjustable front. Man that was a job. Like you I soaked it, I beat it, I pulled it, I heated it, and I cussed it. The bolts that tighten it in place had dimpled in and also dimpled the inner piece till it was almost a peranant conection. I feel for you but It's nice to know that it can be cleaned and painted before it goes back together.
I bought an old T5 Terramite TBL last week and have been rebuilding the cyl,s on it and they also havn't been off since new in the 80's. It's a pain, but almost done now.
Later, Nat

An AC B or C is on my wish list. If I find one with the wide front axle, I'll likely be doing what you had to do to get it disassembled.

Fortunately, the BF front axle is fabricated from fairly stout, thick-walled pipe sections. So there was no dimpling and these sections were not out-of-round. So I had a fighting chance to pull the stuck parts free provided I could get some penetrant to soak some of the rust buildup that was causing the problem. It took about 3 days of squirting penetrant on the axle to get it soaked enough to pull apart.

Old tractors and stuck parts seem to go together.
 
   / Minneapolis Moline BF Restoration--continuing news
  • Thread Starter
#10  
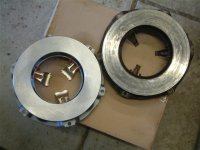
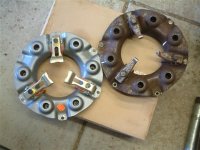
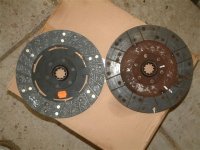
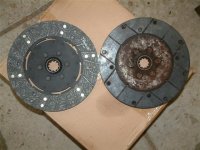
UPS delivered the new (rebuilt) clutch today.

DSCF0038 (Small).JPG

DSCF0039 (Small).JPG

DSCF0056 (Small).JPG

DSCF0057 (Small).JPG

The dimensions are OK. Looks like the rebuilt pressure plate has more robust fingers.

Finished the last of the paint removal today. Those 38" dia rear wheels are a bear to move around.

DSCF0055 (Small).JPG

DSCF0045 (Small).JPG

Looks like I've outgrown my shop.
 
 
Top