downsizingnow48
Elite Member
I didn't start out to make a hydraulic quick attach, or even a quick attach. I started to make a grapple. But after taking off the factory 4-pin bucket to make some measurements, I changed the plan. The bucket (212 lbs) was easy enough to put back on, the flat bottom makes it scootable. But the grapple will be about 360 lbs and not very scootable at all. So I started to look at quick attach options.
About that time Blue Power put up a thread on his quick attach similar to the Euro standard and using a linear actuator (http://www.tractorbynet.com/forums/kubota-owning-operating/332587-home-made-quick-attach.html). Then Fallon put up a thread adapting a linear actuator to his factory ssqa (http://www.tractorbynet.com/forums/customization/321704-linear-actuator-power-ssqa.html).
Many thanks to the OPs and the commenters. These threads gave me lots of information to worth with. Two points were particularly important. First, starting the quick attach from scratch, it would be simpler to make a horizontal pin locking mechanism like Blue Power, rather than make two over-center hand operated latches. Second, reading comments by Ovrszd and Roadhunter, I decided to use a small hydraulic cylinder rather than the linear actuator, since I was going to have to put a hydraulic hookup on the loader anyway.
This past week I got started setting up the hydraulics.
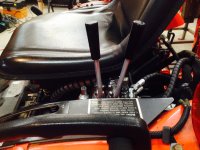
Photo 1: A while back I installed auxiliary valves, between the seat and the fender. PB from the loader valve goes to the aux valves, PB from the aux valves goes to the backhoe. The rear valve operates the hydraulic thumb, the front will be for the grapple. Both valves have work port reliefs set at 1200 psi.
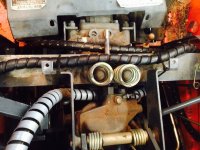
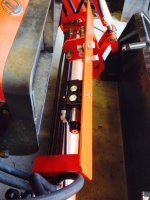
Photo 2,3: The hoses going forward fit neatly under the seat and behind the transmission cover.
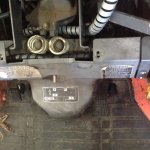
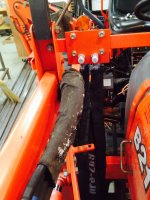
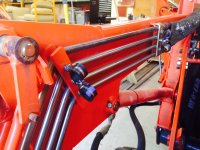
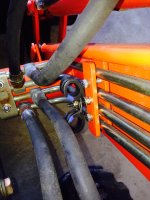
Photo 4,5,6: The hoses go to a bracket on the ROPS brace next to the loader valve. From there I made three simple brackets to keep the new hoses tidy and close to the loader tubes.
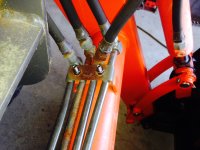
Photo 7: The existing loader tube brackets make a handy place to mount a new bracket using studs instead of the factory cap screws.
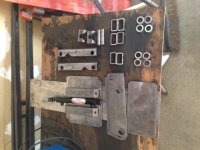
Photo 8,9,10: The new bracket is made from 4"x.25" flat bar and 6"x2"x.188" rectangular tubing. It carries and also protects the diverter valve, a set of disconnects for the grapple, and a set of bulkhead fittings for the quick attach cylinder.
In another week or two I will add a section showing the quick attach, which I am still working on.
About that time Blue Power put up a thread on his quick attach similar to the Euro standard and using a linear actuator (http://www.tractorbynet.com/forums/kubota-owning-operating/332587-home-made-quick-attach.html). Then Fallon put up a thread adapting a linear actuator to his factory ssqa (http://www.tractorbynet.com/forums/customization/321704-linear-actuator-power-ssqa.html).
Many thanks to the OPs and the commenters. These threads gave me lots of information to worth with. Two points were particularly important. First, starting the quick attach from scratch, it would be simpler to make a horizontal pin locking mechanism like Blue Power, rather than make two over-center hand operated latches. Second, reading comments by Ovrszd and Roadhunter, I decided to use a small hydraulic cylinder rather than the linear actuator, since I was going to have to put a hydraulic hookup on the loader anyway.
This past week I got started setting up the hydraulics.
Photo 1: A while back I installed auxiliary valves, between the seat and the fender. PB from the loader valve goes to the aux valves, PB from the aux valves goes to the backhoe. The rear valve operates the hydraulic thumb, the front will be for the grapple. Both valves have work port reliefs set at 1200 psi.
Photo 2,3: The hoses going forward fit neatly under the seat and behind the transmission cover.
Photo 4,5,6: The hoses go to a bracket on the ROPS brace next to the loader valve. From there I made three simple brackets to keep the new hoses tidy and close to the loader tubes.
Photo 7: The existing loader tube brackets make a handy place to mount a new bracket using studs instead of the factory cap screws.
Photo 8,9,10: The new bracket is made from 4"x.25" flat bar and 6"x2"x.188" rectangular tubing. It carries and also protects the diverter valve, a set of disconnects for the grapple, and a set of bulkhead fittings for the quick attach cylinder.
In another week or two I will add a section showing the quick attach, which I am still working on.

")