You are using an out of date browser. It may not display this or other websites correctly.
You should upgrade or use an alternative browser.
You should upgrade or use an alternative browser.
SE SEAT FOR MY 2520
- Thread starter glc24
- Start date
/ SE SEAT FOR MY 2520
#31
OP
glc24
Platinum Member
Hello RRiley
Looking real good :thumbsup:
It looks like you used the same brackets as I did. Were you able to just purchase what you needed,or did you have to get the attaching parts kit?
Greg
Looking real good :thumbsup:
It looks like you used the same brackets as I did. Were you able to just purchase what you needed,or did you have to get the attaching parts kit?
Greg
OP
glc24
Platinum Member
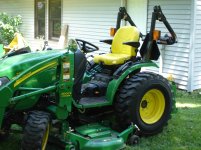
Just a little update:
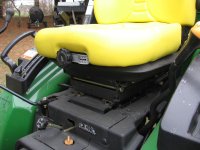
I thought I would add a few more pics for those with the 23 and 2520.
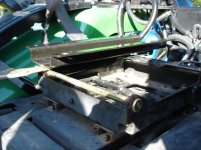
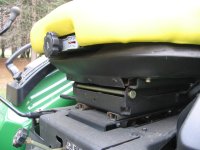
The way I did my install,still utilizes the factory slider and pivot mount.
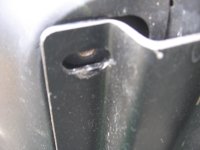
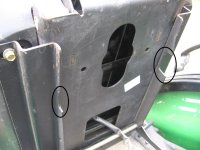
The two brackets that are bolted to the seat are from JDs' attaching parts kit. I know someone posted that you can get those separately instead of having to purchase the whole kit. The two rails are M148651 and M148647 (Thanks PCABE5:thumbsup") They aren't cheap (I think 70.00),but then what is from John Deere. The two mods I had to do was slot the seat mounting hole,as it was not inward enough,and cut out part of the bracket where it sat on the back of the slider frame where the factory snubbers used to be.
They aren't cheap (I think 70.00),but then what is from John Deere. The two mods I had to do was slot the seat mounting hole,as it was not inward enough,and cut out part of the bracket where it sat on the back of the slider frame where the factory snubbers used to be.
The seat does slide back as far as possible,but there again the back is alot more meatier too,so it won't go quite as far as factory.
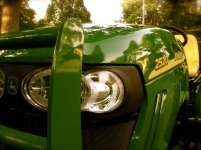
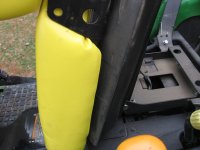
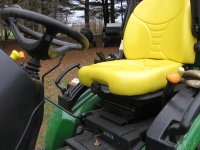
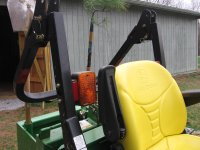
As for the seat sitting higher on the tractor,there is no way around this.As you can tell,it is much thicker (cross section wise) than the factory seat. If you look at the top of the seat back in relation to the hazard lights,the factory seat is 1/3 maybe halfway up the light assembly,where the suspension seat is at the top of the light. If you are a large person,it may be difficult getting in and out of the seat,but IMO,it still can be done.
Is this seat worth an effort to install? You betcha it is! My opinion of course.
I thought I would add a few more pics for those with the 23 and 2520.
The way I did my install,still utilizes the factory slider and pivot mount.
The two brackets that are bolted to the seat are from JDs' attaching parts kit. I know someone posted that you can get those separately instead of having to purchase the whole kit. The two rails are M148651 and M148647 (Thanks PCABE5:thumbsup
They aren't cheap (I think 70.00),but then what is from John Deere. The two mods I had to do was slot the seat mounting hole,as it was not inward enough,and cut out part of the bracket where it sat on the back of the slider frame where the factory snubbers used to be.The seat does slide back as far as possible,but there again the back is alot more meatier too,so it won't go quite as far as factory.
As for the seat sitting higher on the tractor,there is no way around this.As you can tell,it is much thicker (cross section wise) than the factory seat. If you look at the top of the seat back in relation to the hazard lights,the factory seat is 1/3 maybe halfway up the light assembly,where the suspension seat is at the top of the light. If you are a large person,it may be difficult getting in and out of the seat,but IMO,it still can be done.
Is this seat worth an effort to install? You betcha it is! My opinion of course.
Attachments

PCABE5
Platinum Member
I must say this is a very good write-up on how to do this. I installed the seat on my old 2320 the exact same way as on this thread and swapping this seat to my new 2520 was the first mod I did. Great pictures and details on how this can be done.
Once I sit on the seat some of the height difference goes away as the suspension goes down (maybe to much Easter ham). Just to note that fore and aft travel is more limited on the 2520 than the 2320 with this seat.
These instructions should be a sticky for others to follow as they are dead on.
Once I sit on the seat some of the height difference goes away as the suspension goes down (maybe to much Easter ham). Just to note that fore and aft travel is more limited on the 2520 than the 2320 with this seat.
These instructions should be a sticky for others to follow as they are dead on.
kennyd
Advertiser
What does SE stand for?
Special Edition.
Forget about it, been there.:thumbsup:Im feelin pretty stupid, thanks just the same
I purchased the Michigan seat from ebay for $200. Yea its black, and yea it was less than half the price of the SE yellow seat JD sells. Boy is it worth it whatever the cost!
I mounted mine different than all the other posts I've read about. I simply took the pivoting piece that attaches to the OEM sliding frame, drilled a new 'lower' hole set for the horizontal bar to go through and welded it to the Michigan seat. No need for special attaching kit or seat plate fabrications, use what you already have. Took two hours, and only that long because my welder needs a new tip. :confused2:
I also cut all but one round off the foam bushings in back to make the seat more level.
I'll get pictures tomorrow.