my kubota rebuild

/ my kubota rebuild #1  

mattbatson

Silver Member
Joined
Nov 18, 2011
Messages
174
Location
canton, nc
Tractor
kubota B1750HST4x4
I've been fixing my recently purchased B1750 for the past few months, and have been posting it on a couple of forums, and figured I would add it to this one too.
the thread is here... http://www.mytractorforum.com/showthread.php?t=209875
all my future updates will show up here on this forum though...
Hoping this can help others.
Long story short, I bought this tractor sight unseen from a tractor auctioneer in TX and had it shipped to me in FL. I had seen a video of it operating and when I got it, it appeared to be fine.
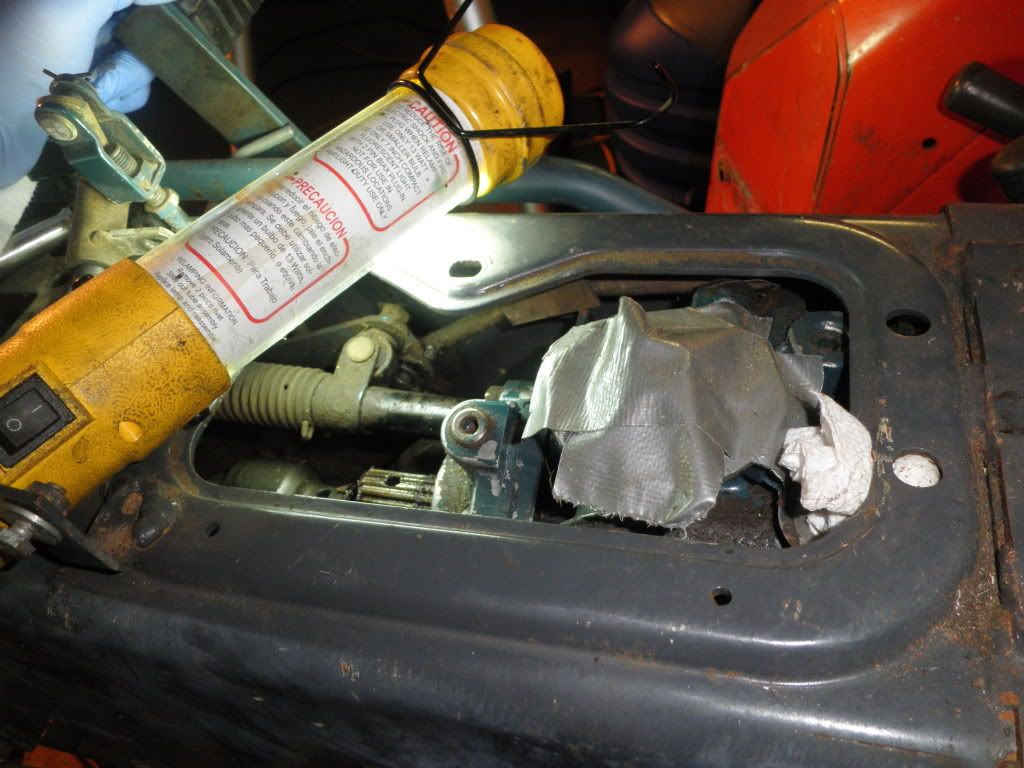
However, I uncovered a hornets nest of problems, including a cracked cluth cover (the main frame tunnel in the center of the tractor), heavily damaged clutch/pressure plate, bent flex plate, tranny hyd filter screen filled with metal shards, and bent FEL....
I'm in the process of fixing it all :confused2:

onto the ongoing saga.....


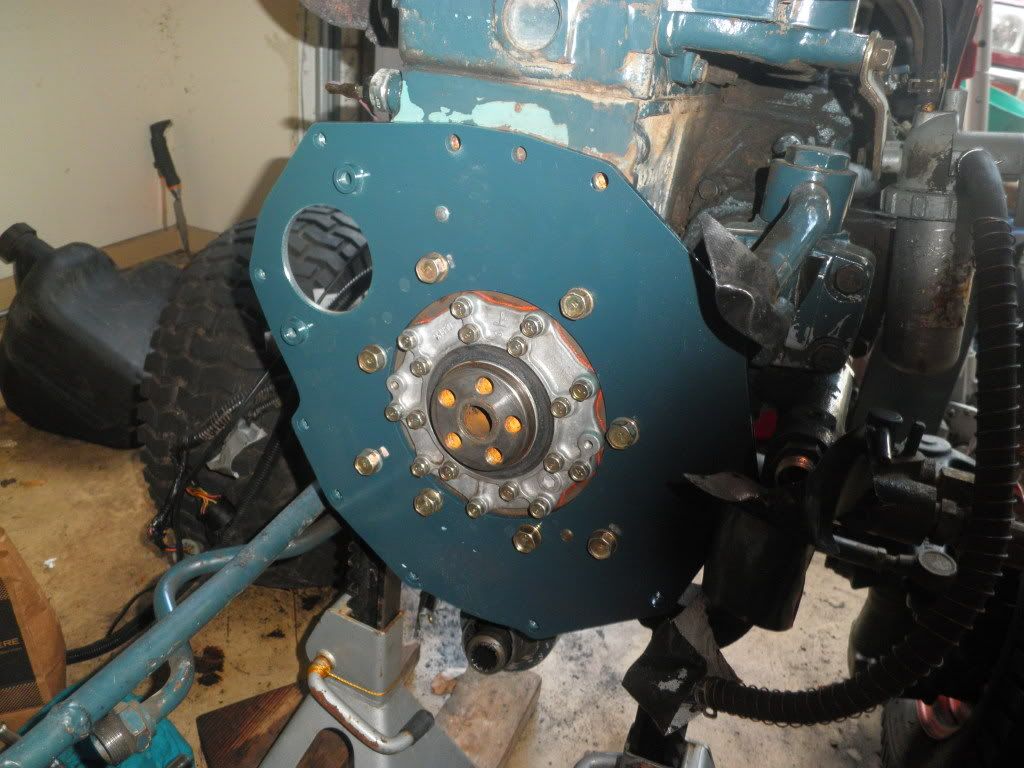
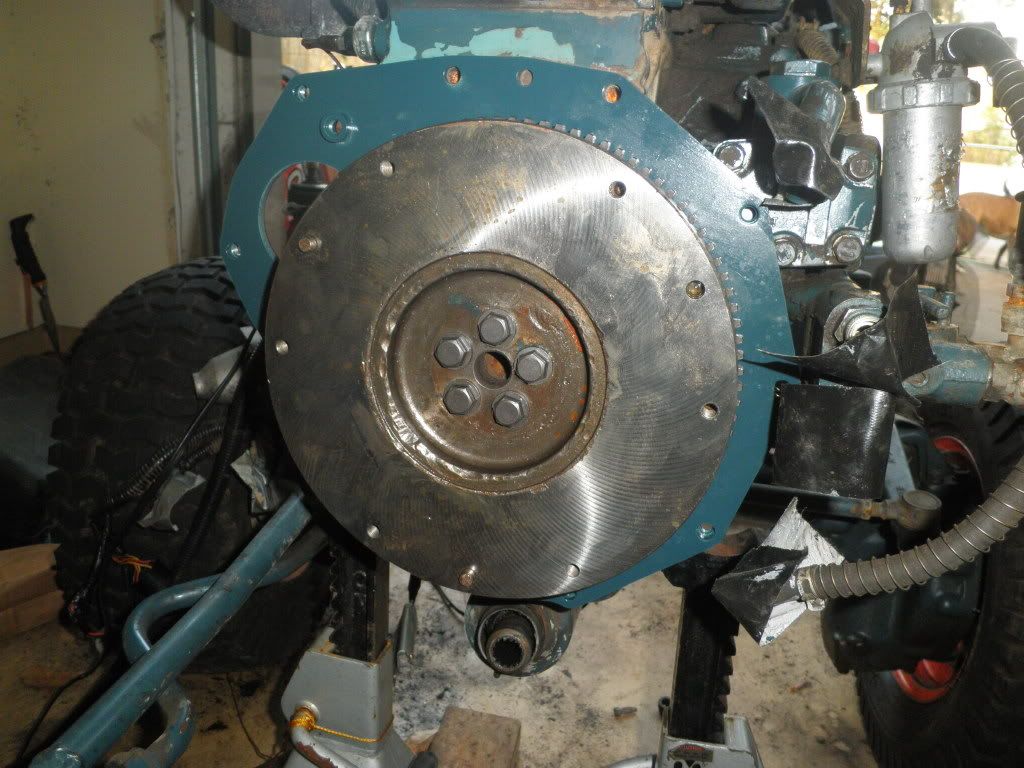
ok, took delivery of my 700 dollar used clutch cover today...
rusty from sitting in some salvage yard in alabama for many years...

002-6.jpg


003-4.jpg


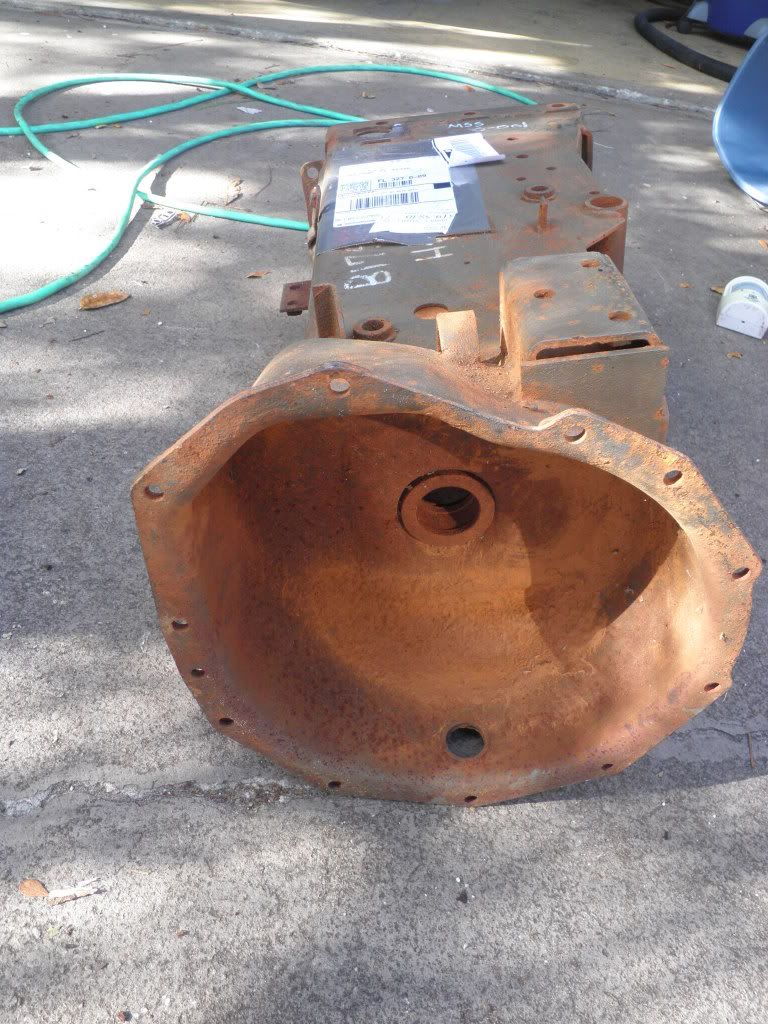
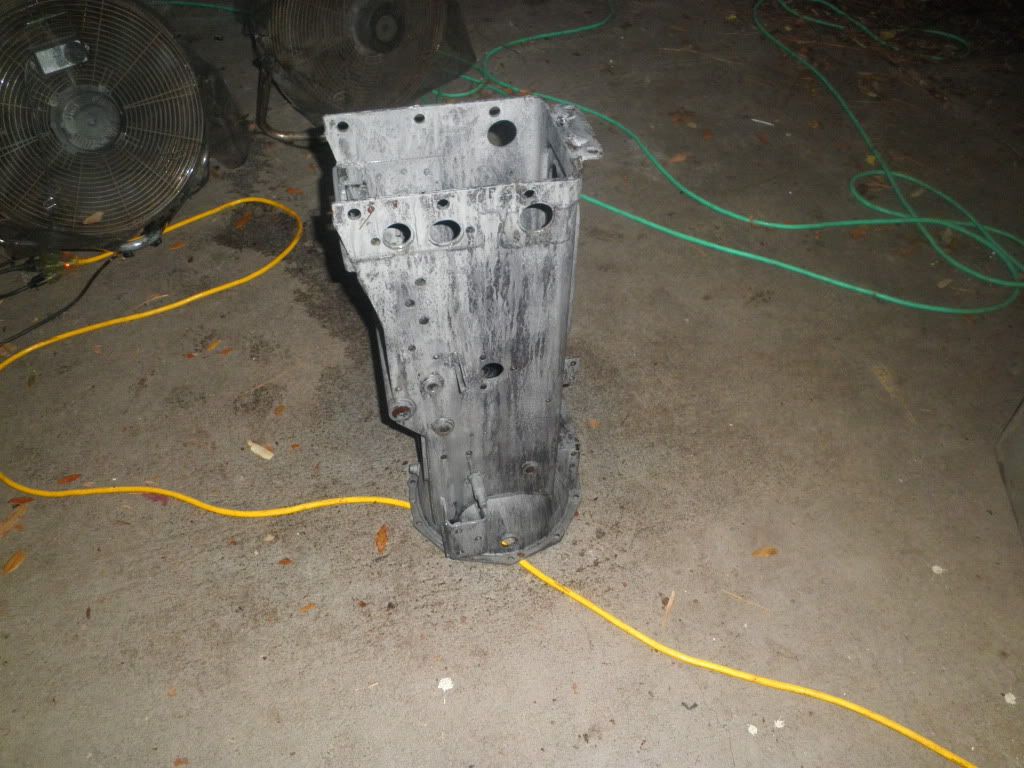
took it to get sandblasted and is now sitting in coat of Ospho as there was still some rust that the sandblaster missed...I may take it back to have them hit it again, as the inside has a few spots still. I have other things off the tractor needing blasting, so will take them in too.

004-6.jpg


my brand new flexplate...shiny

006-5.jpg


bought some paint from lowes for the dark grey on the clutch cover...I think they matched it up pretty well, and got a half gallon for 26 bucks as opposed to 35 for a pint at kubota.
plan to apply with a paint brush

012-2.jpg


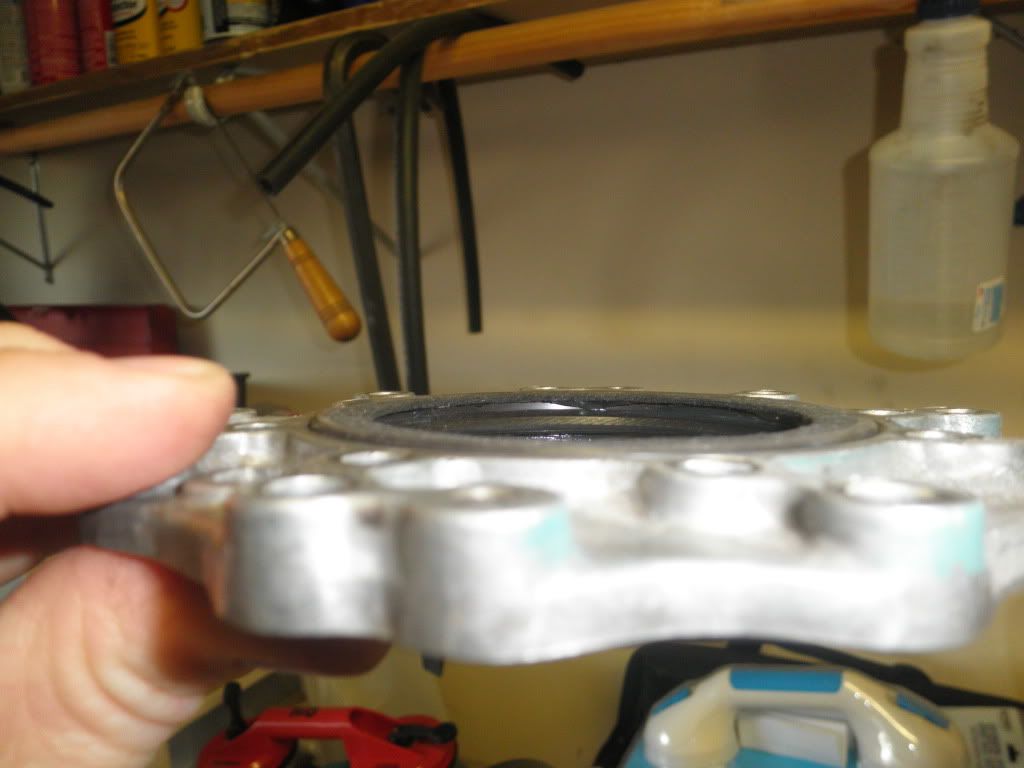
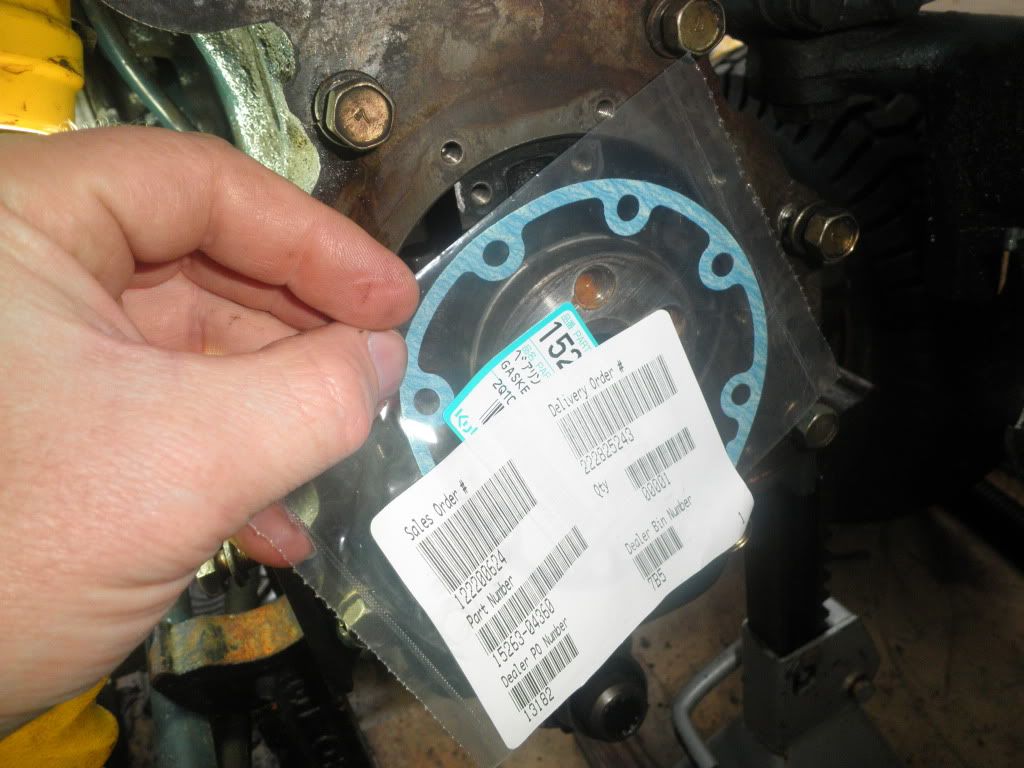
I removed the rear main seal/carrier, and started scraping off the old gasket material...takes two paper gaskets and then the main seal itself..

010-1.jpg


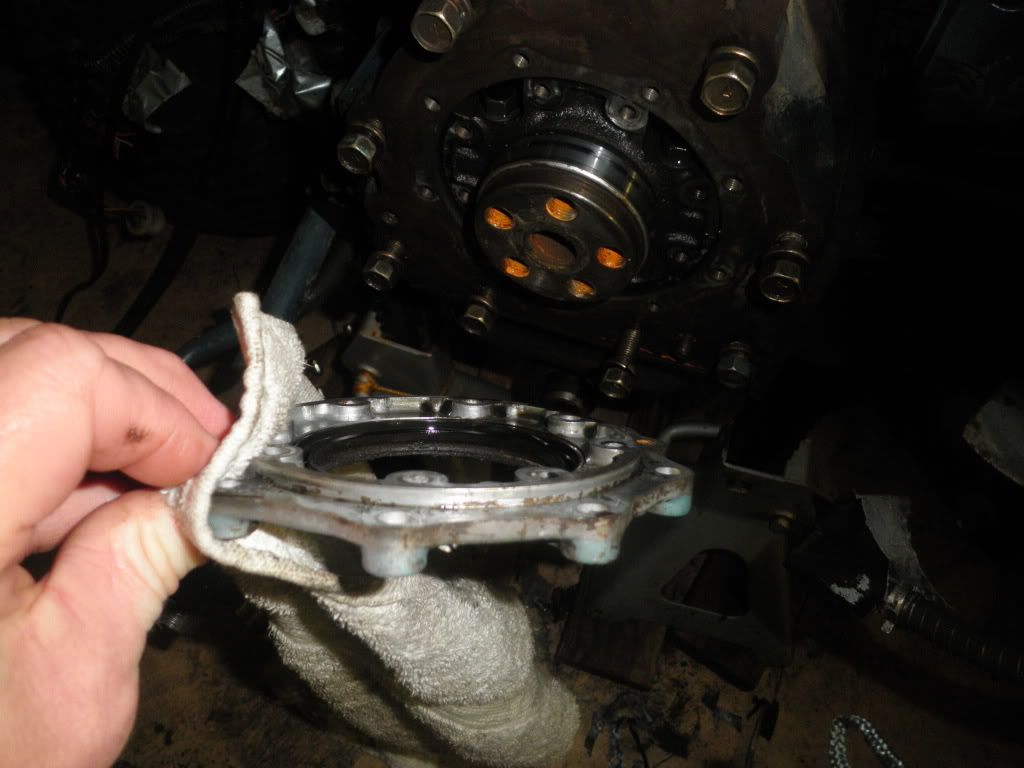
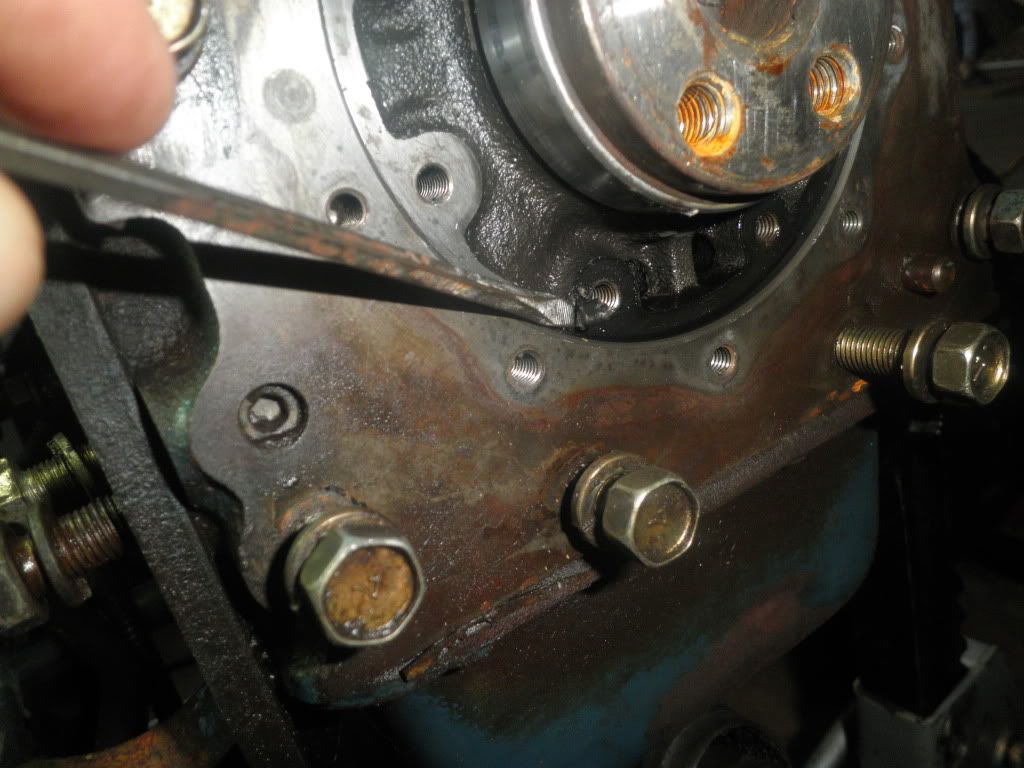
I noticed on the inside of the crank hole there is a rubber gasket thing that looks like it has seen better days...not sure what it does, but will look up in the manual and call the dealer about it tomorrow.

009.jpg


moving along...need to pick up the pace or it is never going to get done, ha ha
 
/ my kubota rebuild #2  
your restore job sure is looking nice.an i know your learning alot as your rebuilding it.
 
/ my kubota rebuild
  • Thread Starter
#4  
thx
I am learning it inside and out, and replacing any wear items as i go
plan to pass it down to my 3 yr old son someday :thumbsup:
 
/ my kubota rebuild #5  
Interesting thread. Looking at the youtube I can see the machine flexing in the middle with just the weight of the FEL. Add weight to the front and ballast to the back would put some serious flex on the bell housing. This setup NEEDS a subframe from front to back so this does not happen again. IMO, most of this damage is from not having a subframe and still being used with cracks making the thing flex constantly. The flex puts huge stresses on the clutch which could be where that damage came from. My little B6100 has a 1/4" by 2" subframe linking the loader frame to the rear axle. I think there's pictures on here somewhere of it. I also attached a picture of another B1750 I found via Google, I added arrows to point to the subframe I'm talking about. Mine is setup similarly, if you want photos of mine I can get them for you. Good luck with this project.
 

Attachments

  • b1750.JPG
    b1750.JPG
    109.8 KB · Views: 1,489
/ my kubota rebuild #6  
/ my kubota rebuild
  • Thread Starter
#7  
Interesting thread. Looking at the youtube I can see the machine flexing in the middle with just the weight of the FEL. Add weight to the front and ballast to the back would put some serious flex on the bell housing. This setup NEEDS a subframe from front to back so this does not happen again. IMO, most of this damage is from not having a subframe and still being used with cracks making the thing flex constantly. The flex puts huge stresses on the clutch which could be where that damage came from. My little B6100 has a 1/4" by 2" subframe linking the loader frame to the rear axle. I think there's pictures on here somewhere of it. I also attached a picture of another B1750 I found via Google, I added arrows to point to the subframe I'm talking about. Mine is setup similarly, if you want photos of mine I can get them for you. Good luck with this project.

That is a great idea, and something I will plan for this tractor. Not sure if I'll take it into the dealer, or somebody else to do that install. I went to your pics and had a hard time seeing how it connected. Thanks for the excellent advice.

also, I was wondering if you did your rear main oil seal while you were in there doing the clutch?
I'm getting ready to put the new one in, but am not sure if I should coat the outside of the new seal(the portion of the seal that presses into the opening) with some sort of silicone sealant or some such...
I'll take pics and post of what I'm talking about...
 
/ my kubota rebuild #8  
That is a great idea, and something I will plan for this tractor. Not sure if I'll take it into the dealer, or somebody else to do that install. I went to your pics and had a hard time seeing how it connected. Thanks for the excellent advice.

also, I was wondering if you did your rear main oil seal while you were in there doing the clutch?
I'm getting ready to put the new one in, but am not sure if I should coat the outside of the new seal(the portion of the seal that presses into the opening) with some sort of silicone sealant or some such...
I'll take pics and post of what I'm talking about...

I did not touch the rear main seal, I didn't see the need. I didn't even remove the flywheel. As for the sealant, I would probably use a very small amount of RTV where it's metal to metal (with a paper gasket??). On the rubber that touches the crank you can wet it with a bit of clean motor oil.
 
/ my kubota rebuild
  • Thread Starter
#9  
I did not touch the rear main seal, I didn't see the need. I didn't even remove the flywheel. As for the sealant, I would probably use a very small amount of RTV where it's metal to metal (with a paper gasket??). On the rubber that touches the crank you can wet it with a bit of clean motor oil.

thx for the info...

now, I thought about some RTV on the perimeter of the rubber oil seal...the surface that seats within the carrier that it rides in...pics here
here is how I removed the old seal
013.jpg


now here is the new seal as it would go into the case that carries it...
014.jpg


here is the new seal sitting in the carrier...but not pressed in yet...
015.jpg


so, I will definitely put some oil on the inside of the oil seal where it rides on the crank.
and there are two paper gaskets for the carrier where it bolts to the engine, that I may put a thin film of RTV onto.

But , still trying to decide if i should put any RTV or equivalent type silicone onto the outside perimeter of the oil seal :confused2:

sorry if it seems like I'm being overly cautious here, but I really, really, really, dont want that oil seal to immediately start leaking once I get this thing back together again.
I've done main oil seals on cars before and had one or two leak immediately, so now I really take my time and make sure I do it correctly :thumbsup:
 
/ my kubota rebuild
  • Thread Starter
#10  
so I took some of the advice that I got from different people on the forums and used WD-40 to help the oil seal slide in, packed the backside of the seal with grease to keep the spring inside, used a block of wood and very, very carefully banged it in...little by little...to the depth that the original one was in
it all went in straight and true.

032-1.jpg


033.jpg


used some emery cloth very, very carefully to take off some sharp metal on the edge of the crank where the oil seal slides over...
035.jpg


sharpened a little screwdriver in order to make a scraper that would fit in this tight area to scrape off the old gasket material
011-6.jpg


this is the inner paper gasket
010-6.jpg


this is the outer paper gasket
009-3.jpg


I was going to spread a little RTV onto the paper gaskets and install the oil seal with carrier, but found my old RTV tube had hardened up...so need to go get some in the morning

Once I put that back on, I can install the flex plate, and then the flywheel, then the clutch and pressure plate.

I'll keep ya posted :thThumbsU
 
/ my kubota rebuild
  • Thread Starter
#11  
install went pretty well...
001-7.jpg


all torqued on at 8ft lbs on the little 10mm bolts.

spread some motor oil on the inside of the oil seal to help it slide onto the crankshaft.

I went to install the flex plate and after cleaning the area some more noticed the freeze plug here is a little rusty.
002-7.jpg

another pic
003-5.jpg


this freeze plug is normally covered by the flexplate, meaning if it ever started leaking I would be separating the tractor again

004-7.jpg


do you guys think it is bad enough that I should do it now?
or not bad enough to worry about?

I hate to stall out when I'm getting some momentum, but want to do things now rather than later IF needed.
thx
 
/ my kubota rebuild #12  
That's just a little surface rust on a bare (no paint) steel freeze plug. No need to replace it.
 
/ my kubota rebuild #13  
I don't recall ever hearing about someone having a freeze plug leak on one of these. I wouldn't bother and would worry more that a replacement may leak. How would you test it while taken apart?
 
/ my kubota rebuild
  • Thread Starter
#14  
sounds good, on to the flywheel then ! :thumbsup:
 
/ my kubota rebuild
  • Thread Starter
#15  
I do have another little problem also...
In my factory kubota service manual it speaks of a metal shim or gasket, in the shape of a circle, that the 5 flywheel bolts go through when bolting on the flywheel.
It had been a month or so since I had pulled the flywheel, and I didnt remember removing such a thing.
I know for a fact that this shim/gasket didnt go on the outside of the flywheel, as I had pictures from pulling it off.
so that would mean that it would have to be on the inside, between the crank and the flywheel.
So, after searching the garage and coming up empty, I went to the dealer to order it up.
The dealer couldnt find it anywhere in the schematics on the computer. I looked over his shoulder and sure enough there isnt anything there on the parts breakdown?

Does anyone have any first hand knowledge about this ?

Should I just bolt the flywheel up and call it a day?

I'll take a picture of the service manual instructions and post them up...in about an hour or two
thx
 
/ my kubota rebuild
  • Thread Starter
#16  
okay, so the flex plate is on...
001-5.jpg


and then the flywheel went on without a hitch...blue loctite on the bolts

002-8.jpg


but then I checked the manual to see if I missed anything AFTER I installed everything :drunkie:

007-5.jpg


008-5.jpg


as you can see they mention some sort of flywheel washer, and it would seem to indicate it is steel.

but again, went to the dealer, and they showed nothing of the sort on their schematic's.
 
/ my kubota rebuild #17  
Very nice and informaitive rebuild/restoration going on. Keep up the pics as they are great..
 
/ my kubota rebuild #18  
From the Pic of the fly wheel there has been a washer and this is commom on desiel.

From the damage to the flywheel it may be damaged previously.
 
Last edited:
/ my kubota rebuild
  • Thread Starter
#19  
From the Pic of the fly wheel there has been a washer and this is commom on desiel.

From the damage to the flywheel ir mat be damaged previously.

001-4.jpg


this is what i found when I split the tractor.
there isnt a washer there?
Do you mean on the INSIDE of the flywheel? Between the flywheel and crank?
 
/ my kubota rebuild #20  
Question Who is saying the tractor has not been apart previously?

The shim washer goes under the bolt heads and against the fly wheel.

On viewing that there may not have been one and your manual may be for a earlier or latter engine.

Leaving it out is not likely to cause any ongoing problems or you may have to look at a wrecker to get one.

From that Picture the bolts don't seam loose but the engine was run for some time after the clutch had flown apart.
 

Attachments

  • 001-4.jpg
    001-4.jpg
    129.7 KB · Views: 406
Last edited:

Marketplace Items

2012 Chaparral boat with trailer (A59231)
2012 Chaparral...
DEUTZ MARATHON 60KW GENERATOR (A58214)
DEUTZ MARATHON...
2018 Claas Volto 900 (A53317)
2018 Claas Volto...
2018 Kubota RTV500 4x4 Diesel Utility Cart (A59228)
2018 Kubota RTV500...
(INOP) 2005 MACK GRANITE CV713 DUMP TRUCK (A60430)
(INOP) 2005 MACK...
CASE TR310 SKID STEER (A60429)
CASE TR310 SKID...
 
Top