|
|
|
|
|
||||||||||||||||||||||
|
|
||||||||||||||||||||||
|
|
#32 (permalink) |
|
Super Member
Join Date: Aug 2001
Location: Silver Creek, NY
Posts: 5,633
|
Your barn is looking great but I do not see any bracing on it. I would not be putting any steel on the roof until you had the walls either braced well or siding on. If you get the type winds you talk about it can do a lot of damage to your building with no bracing. Basically, it will be a big kite. I have seen two other pole barns fall as a result of no or too little bracing. The one was just a frame with trusses on it and the winds turned it into a pile of sticks (it was a big barn too). Good luck to you on yours.
__________________
![]() God must love stupid people; He made so many
|
|
|
|
|
|
#33 (permalink) | |
|
Platinum Member
Join Date: May 2004
Posts: 561
|
Quote:
|
|
|
|
|
|
|
#36 (permalink) | ||
|
Silver Member
Join Date: Jul 2006
Location: Chehalis, WA
Posts: 132
|
Quote:
The good news is that there's never been a major windstorm here this late in the year. But, I still don't think I'm willing to bet that much money and time on it. ![]() Quote:
__________________
Massey 1533, 1525FEL, 2005 Rotary, Pallet Forks. 8.5 acres of timber and pasture |
||
|
|
|
|
|
#37 (permalink) |
|
Super Member
Join Date: Aug 2001
Location: Silver Creek, NY
Posts: 5,633
|
I was looking at the pictures again and it doesn't look like you are out in the open to catch any real strong winds like you were saying. I would just feel bad if you did catch a strange wind and it took that building down or even twisted it. Put in some braces like you said as they are not expensive and are the cheapest insurance you can get. Keep them on till you have your roof and walls all done (well, at least till you have your walls done). Keep up the great work.
__________________
![]() God must love stupid people; He made so many
|
|
|
|
|
|
#38 (permalink) | |
|
Silver Member
Join Date: Jul 2006
Location: Chehalis, WA
Posts: 132
|
Quote:
You're correct in your assumption that the worst of the winds are blocked here. What you can't see is there's a 400 foot elevaton rise directly behind the property that shields me from the worst of the winds. But, last year I lost quite a few large trees in a windstorm. The wind came from due south that time, as opposed to WSW. Like you said though, better safe than sorry.
__________________
Massey 1533, 1525FEL, 2005 Rotary, Pallet Forks. 8.5 acres of timber and pasture |
|
|
|
|
|
|
#40 (permalink) |
|
Silver Member
Join Date: Jul 2006
Location: Chehalis, WA
Posts: 132
|
Got a little bit done today before the rain really started coming down, once the snow started to mix in I called it a day and split kindling in the dry shop. I got all 36 holes drilled for the 10" x 3/4" bolts that will tie the center, double rafters to the posts. I was talking to a friend the other day about augering those holes, and he insisted I borrow his all steel construction, 1" chuck, wrist breaker of a drill. It's probably 60's vintage, they just don't make tools like that anymore.
Also, got the first 16 foot fascia board up. Took a little thought as to how I was going to hang those by myself, but eventually figured out a way, again using the tractor loader, with the forks on. It's amazing the uses you can come up with for forks. I should add I think I may be changing my mind on the T&G 2x6 fir for the stalls. I've got a line on some 1x5 T&G cedar at $0.20/lf that I intended to use for siding. But at that cost I'm considering framing out the stalls with 2x4's, covering that with 3/4" plywood, then stapling the cedar onto that. It's a little more work, but I think it's going to come out far cheaper than having the 2x6 T&G milled. Rough calculation I can cover the entire exterior of the barn and do the stalls for about $1500. I've had some requests for closer pictures on how the purlins are tied in, etc. So I'll add in some more detailed pictures than the one's I've been posting. 
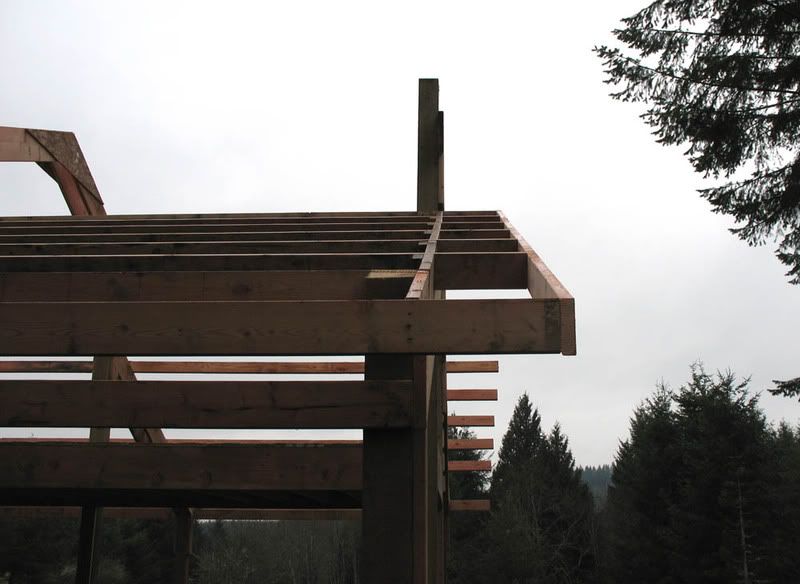
First fascia board up. Took me a while to figure out the end rafter had a bow to it and was throwing me off. It look so obvious now in this picture. Eventually I broke out the 4 foot square and string to mark where to cut off the ends of the purlins. ![]() Overhang, outside. Notice the one purlin cut off. That one is nailed to the post, so it's not a 90 to the rafter board. I went back and forth on how to deal with that. I went and looked at how they did the shop I had built a few years ago, they cut it off and extended the 2x6 that supports the overhang back one more purlin. I wanted the purlin supported by the rafter, so this is what I came up with. ![]() 
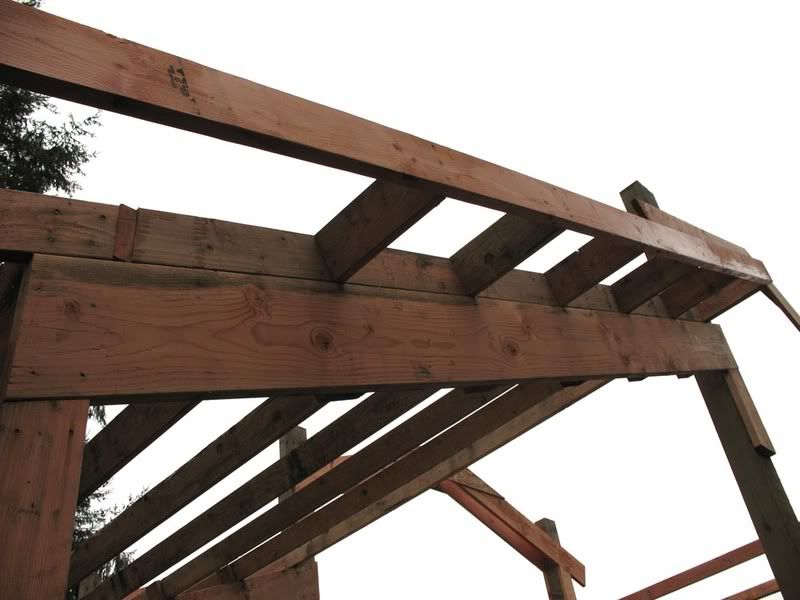
End rafter and prulin detail. ![]() 
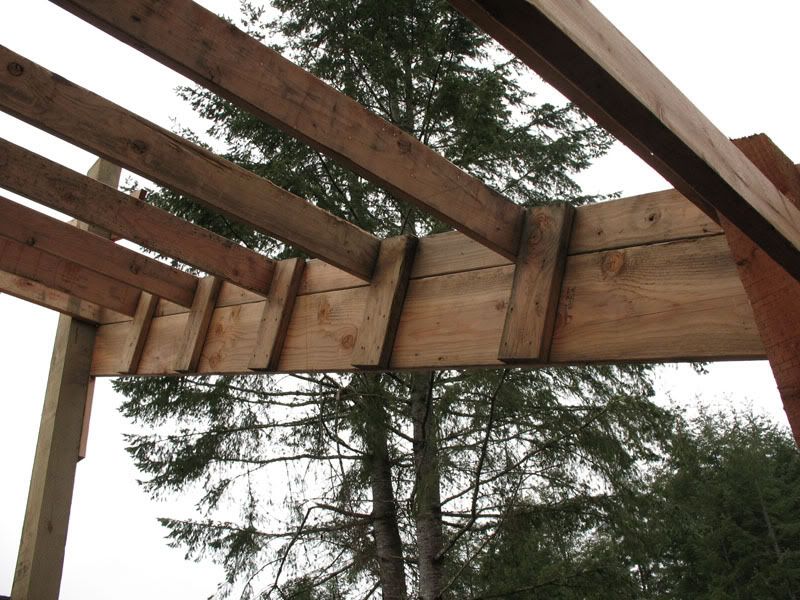
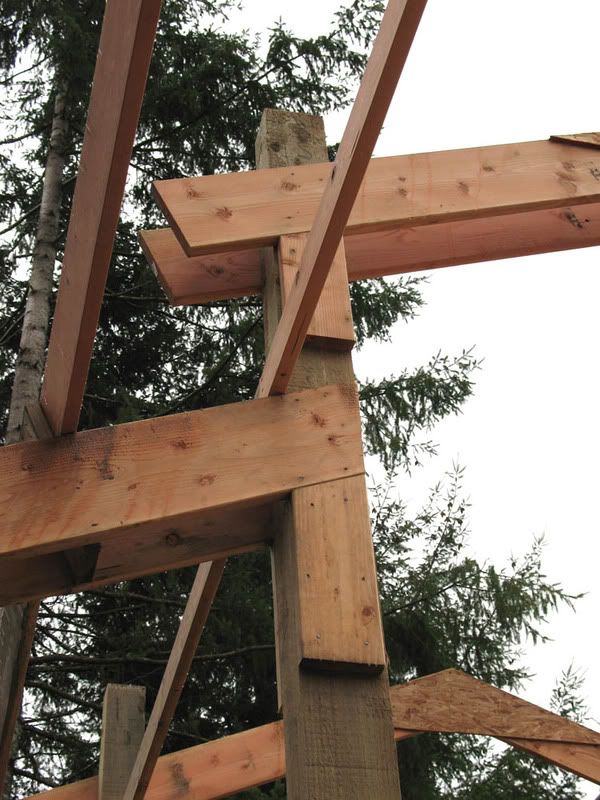
Center rafter and purlin detail. ![]() Overhang detail. ![]() 
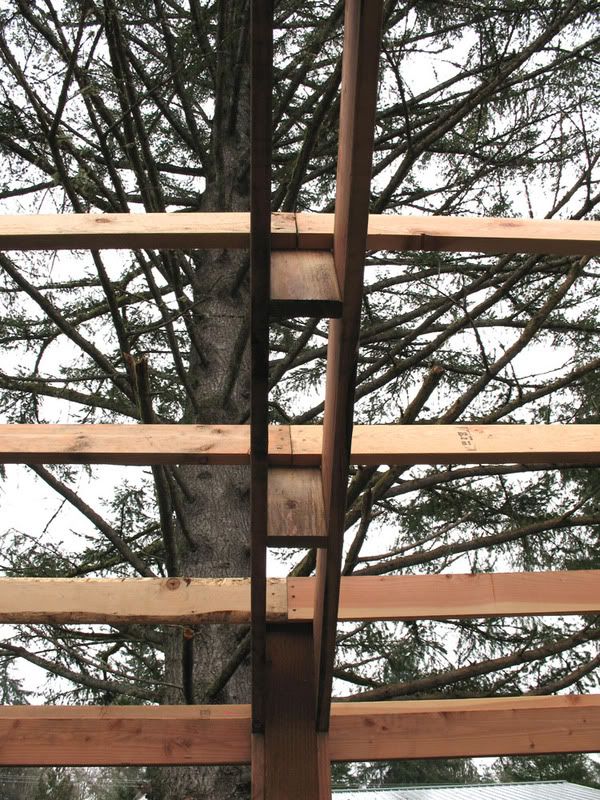
Rafter to center posts. This was prior to auguring the holes for the bolts. There is now one hole in the center of each rafter and 2 holes in the rafter support block. In hindsight, I should have just cut the upper support block to rest on top of the lower rafter. I still need to climb out onto the purlins and trim the excess upper rafter flush with the post. ![]() Upper rafter gusset detail. 7/16" OSB gusset with close to 30 screws total. I was impressed with how sturdy this came out. ![]()
__________________
Massey 1533, 1525FEL, 2005 Rotary, Pallet Forks. 8.5 acres of timber and pasture |
|
|
|
![]() |
||
| Thread Tools | |
| Display Modes | |
|
|
|
||||||||||||||||||||||
| About TractorByNet.com | Terms of Service | Advertise | © 2008 TractorByNet.com |