At Home In The Woods

   / At Home In The Woods #5,161  
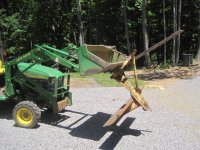
One of the local counties has a place where you can pick up leaf mulch. My wife went and got a pickup load. I unloaded them.

View attachment 320688 View attachment 320689 View attachment 320690

We are using the leaf mulch in beds around the house.

View attachment 320691

Mulch as a appearance cover/moisture conservator/weed retarder works pretty good as does the wood chips generated by the "tree eating" machines (chipper shredders). As a soil amendment these additives take up available nitrogen in the decomposition process and starve plants for nitrogen. You can balance things by adding high nitrogen fertilizer. If properly composted before use there is virtually no worry regarding nitrogen depletion.

Patrick
 
   / At Home In The Woods #5,162  
Obed:

That black, partially composted, leaf mulch is what I call black gold because of the many benefits if brings to the soil and the plants in it. It conserves moisture (lowering ground temp. and reducing evaporation); partially prevents weeds due to limiting light for seed germination (if you put it on thick enough--3-4 inches minimum); feeds the earthworms (they love it and will multiply wonderfully if you continue to add it every year; the earthworm castings will provide nutrients and other stimulants for plant growth; increase tilth of the soil for better root growth and makes it easier to till and work the soil; in sandy soils it increases water retention and in clay soils it helps break up the tightness (thank the earthworms too).

All in all a golden goodie in my opinion.

I have been using the leaf mulch/compost for many years and have exceptional growth from muy plants. Do a soil test every three years or so and amend as recommended.

Congratulations on this freebie and continue to take advantage of its availability.

Arkaybee
 
   / At Home In The Woods
  • Thread Starter
#5,163  
Arkaybee,
It's interesting that you bring up the topic of earthworms. My wife and I were discussing them last week. We have observed that our back yard seems harder and drier that we would have expected considering the copious amounts of rain we have received this spring. We are hoping that the earthworm population in the back yard will grow as the lawn matures.
Obed
 
   / At Home In The Woods
  • Thread Starter
#5,164  
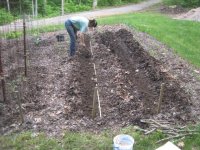
My wife has been using lots of the leaf compost in the garden. The leaf compost is a great help for minimizing the weeds between the rows and plants.

IMG_0573 (Small).JPG
 
   / At Home In The Woods
  • Thread Starter
#5,165  
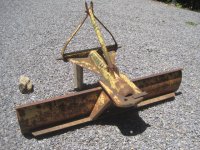
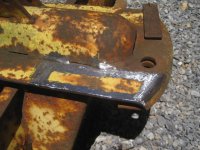
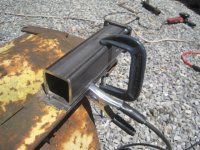
I decided to finally try my hand at welding on the hitch receiver tube onto the grader blade.

IMG_0608.JPG IMG_0609.JPG

I cleaned off the spot for the receiver tube.

IMG_0610.JPG

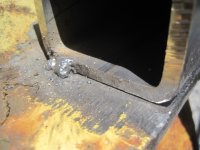
I made a pitiful tack weld.

IMG_0611.JPG IMG_0612.JPG

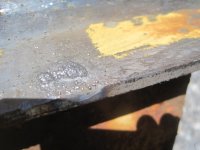
I then made a test weld to prove I could get some penetration.

IMG_0613.JPG

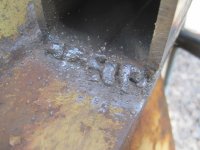
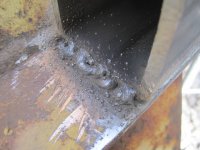
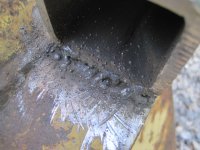
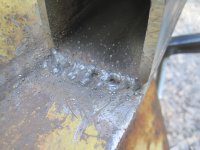
I tried my first attempt to weld the receiver tube to the blade. Not so great.

IMG_0614.JPG

Scraped off the weld to try again.

IMG_0615.JPG

Pretty bad.

IMG_0617.JPG IMG_0618.JPG

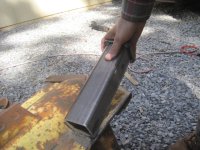
I wasn't penetrating the receiver tube. I was able to easily pull up the tube and break the weld.

IMG_0619.JPG

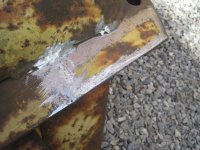
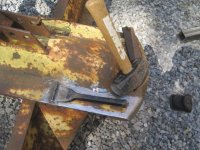
I got a chisel to see if the weld bead attached to the blade could be knocked off. The weld bead attached to the blade could not be chipped off.

IMG_0620.JPG

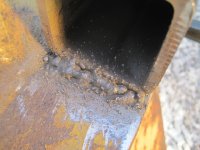
I tried another weld. It was my worst.

IMG_0621.JPG

My last weld attempt was better but I still left gaps. I ground it off and will try again next time.

IMG_0623.JPG

I have difficulty telling how much metal I have applied to the weld bead. Yes I still have trouble seeing. My auto-darkening helmet is set to "9", the lightest darkening setting. I may not just know what I should be looking for. I do know to look for the weld puddle.
 
   / At Home In The Woods
  • Thread Starter
#5,166  
My guess on whats changed... slower wire speed, and you've slowed down your travel speed. One of the new welder faults is they try to complete the weld too quickly and don't stay in one place long enough to get the base metals to melt.

You are exactly right. This was exactly my problem when i first started. I was just moving across the seam in a straight like like i was caulking, I ended up with a splattered mess.
Sometimes I go too fast and leave gaps. At other times I go too slow and end up with too much weld build up. On my last weld attempt, I increased the length of each of my "weaves" as I wove the welder tip back and forth. That part of the technique seamed to help.

Unfortunately, until I stop welding and remove my helmet to take a look, I have no clue how well I'm doing.

Obed
 
   / At Home In The Woods #5,167  
Arkaybee,
It's interesting that you bring up the topic of earthworms. My wife and I were discussing them last week. We have observed that our back yard seems harder and drier that we would have expected considering the copious amounts of rain we have received this spring. We are hoping that the earthworm population in the back yard will grow as the lawn matures.
Obed

This fall get a load of leaf mulch and spread about an inch on the grass. It is like a fertilizer with lots of organic material for the worms. I have done it for a few years and in the spring the grass is green and thick. Rick
 
   / At Home In The Woods #5,168  
Unfortunately, until I stop welding and remove my helmet to take a look, I have no clue how well I'm doing.

How close are you to the work?

Are you watching the welding at an arms length, or is your mask 12" from the welding action?
 
   / At Home In The Woods #5,169  
Sorry to butt in having never posted to your thread before but in my opinion:

1) With a small welder like this, you need to preheat. Get a MAPP gas torch and preheat the metal before welding. Notice how your last attempts are always best? That's not just because you get better, it's because the metal is hot too.
2) Point a halogen work light at whatever you're welding so you can see.
3) If you still have trouble seeing, mark where you're supposed to weld with a fat Sharpie. Don't breath the Sharpie fumes.
 
   / At Home In The Woods #5,170  
How close are you to the work?

Are you watching the welding at an arms length, or is your mask 12" from the welding action?

Good point I don't think we have made this point but I have thought it. OBded you need to have your face close so that you can see and not just a glowing cherry, the actual metal flowing as it melts. Your mask will have slag splatter onto It you should be so close.
 
 
Top