txdon I have been following your entire project with much interest and of course the greatest admiration of not only the physical labor involved, but the quality product. Your latest photos of the circle really peaked my attention.
View attachment 288125
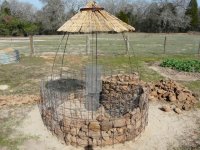
I have a project in my mind of constructing a stone/rock wishing well. I was hoping to cast a number of pieces to form a circle to cap the stone work and saw your great work. I am trying to do what you did, but on a much smaller scale.
Your forms appear to be oiled, bent plywood with stakes to hold the forms, and a couple of clamps. My forms would need the addition of a bottom.
Is there any special cement mix you use or is it something I could buy at Home Depot?
Also any hints on how you get it smoothed out they really do look professional.
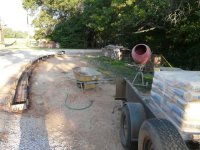
Smalltown, The forms are four 20' sections of 1/8" metal 6" wide with cut metal purlins welding on every 4'. The clamps hold the two 20' sections together at the seam. The resulting 40 feet of framed curbing will use 40 - 80 pound bags ready mix. I bought a pallet at a time (42 bags) and was able to set-up where I could mix and pour 40 bags in 2 hours. The picture below shows the set-up.
The gray cart to the far right (you can only see the top edge) is where I would cut 2 bags in half and set them in it open side up. I would the pour the 4 bags (now 40 pound bags) into the red electric mixer I got from Home Depot. I turn on the mixer and spray water in as it is mixing to the right consistency and then dump it into the yellow wheelbarrow.
From there I would pour it into the curbing frame where my wife would be holding a plywood backstop to prevent overflow at the pour area.
I would return to cut two more bags etc.... while my wife would tap the side of the curbing and poke the middle with a piece of rebar to make sure there were no air bubbles in the poured cement.
After about 16 bags I would go and
smooth it with a hand float. At the end I would use an edging tool to round off the top edge.
40 feet of curbing complete!
Repeat 17 times.
The prep time of leveling the frames and setting the rebar took a few days on each 40' pour.
I rough leveled the white rock with the tractor and then with a 2X4 screed board. I then Compacted with a plate compactor, added sand, washed it in, and compacted again. I then toped it off with about an inch of corse sand and leveled it for the right slope matching the top of the curbing leaving enough space the thickness of the paver. Then I was ready to set pavers.
_________________________
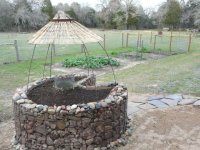
OK, now to the wishing well. Actually that is my next project down by my spring pond.
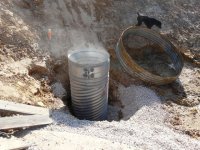
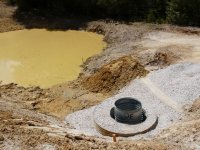
During the drought I dug down to the spring, cleaned it out, set in the bottom half of the culvert. I then bought a 3' piece of culvert (not in picture) to add to the top clamped piece and will make a wishing well. The water has cleared up and the culvert is full and I can see the bottom 5'. I was thinking of using rock and mortar around the culvert but your idea of a cement form using plywood or fiberboard is also a possibility. It looks like you will be the first so please keep me advised on how you do it and what it looks like.
Another way to do it is to stack rocks on the outside edge, inside the form, and pour cement on the inside of the form After a day take off the framing then clean the rocks facing the outside.
If you are planing on pouring one block or 6" layer at a time, that would also work. Make sure you put some support wire or metal in the cement for strength if it is a longer pour.
If you are just pouring the top edge what is the diameter and will you be pouring it in a half or quarter circle pieces, or one piece?
(Your attachment does not work please try again)
Don


")