Building a 3 point balast box

   / Building a 3 point balast box #1  

Timber

Veteran Member
Joined
Jul 12, 2006
Messages
1,748
Location
East Bridgewater Massachusetts
Tractor
Kubota B7800
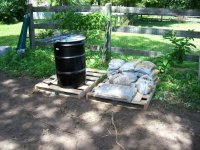
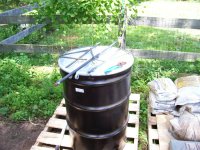
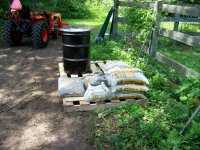
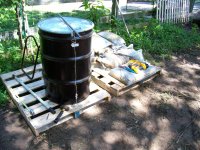
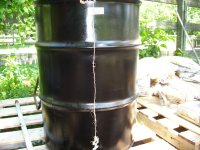
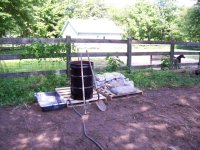
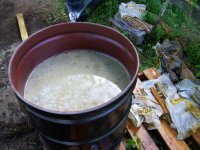
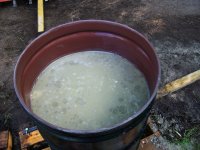
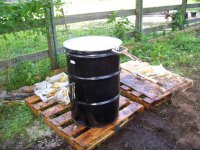
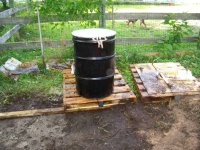
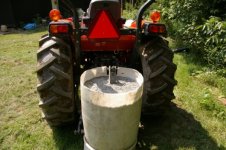
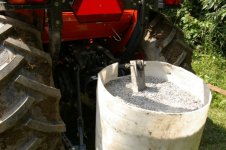
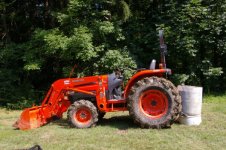
OK Todays Tractor project was a 3 point Balast box for my B7800
I was fortunate to acquire a new 55 gallon drum with a lid and a
snap ring. I went to Lows and picked up my 2 bags of cement,
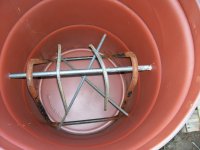
4 bags of sand and 6 bags of stone. I also grabbed a piece of 3/4
solid steel rod and some re-bar and a couple of clevis pins
 

Attachments

  • 000_0087.jpg
    000_0087.jpg
    273.7 KB · Views: 581
  • 000_0088.jpg
    000_0088.jpg
    254.3 KB · Views: 458
  • 000_0089.jpg
    000_0089.jpg
    291.8 KB · Views: 473
   / Building a 3 point balast box
  • Thread Starter
#2  
OK 1st thin is to drill the holes to run my 3/4 rod through. I set my rod on top
of the barrel in the center. Then I dropped a plum line from the rod on each side. I measured up the distance in my case it was 20 inches from the bottom.
I marled the holes with a punch and the drilled them out with a hand drill. I pushed my rod through. Determined how much stock I was gona cut off and then I dry fit all my re-bar
 

Attachments

  • 000_0090.jpg
    000_0090.jpg
    269.4 KB · Views: 434
  • 000_0091.jpg
    000_0091.jpg
    214.1 KB · Views: 325
  • 000_0092.jpg
    000_0092.jpg
    250 KB · Views: 321
  • 000_0093.jpg
    000_0093.jpg
    214.8 KB · Views: 417
   / Building a 3 point balast box
  • Thread Starter
#3  
I am going to have my rod extend 4 inches out each side of the barrel
so I am cutting off 5 inches of waste. I'm breaking out my sawzall an a new Lenox metal blade. Little oil and in a few seconds we are done. So now we mark the hole for the clevis pins. I'm coming in 1 1/4 inch from the end and mark it with a punch. Take it over to the drill press, clamp it to the bed. Now I use 2 bits. 1/8 and then went to a 3/8 and done. Now take it back and fit it all together
 

Attachments

  • 000_0094.jpg
    000_0094.jpg
    256.8 KB · Views: 343
  • 000_0095.jpg
    000_0095.jpg
    295.1 KB · Views: 304
  • 000_0096.jpg
    000_0096.jpg
    267.2 KB · Views: 298
  • 000_0093.jpg
    000_0093.jpg
    214.8 KB · Views: 389
   / Building a 3 point balast box
  • Thread Starter
#4  
Now its time for the messy part. Get out your mixing tub, spade,
garden hose and your hoe. Pick a nice cool spot and a place were you can leave this thing for a week or so. Don't do this in your driveway or your garage. The mix I am using is 1 bag of cement, 2 bags of sand,3 bags of stone.The 1st thing is set the rod and clamp it into place so it stays were you put it. That is the mix. I do 1/2 of that at a time. Be careful it gets real wet before you know it. So wet it mix wet it mix a little at a time. You kind of want it like clam chowder. When you get it mixed start shoveling it in. Keep rinsing off the outside so it stays clean. then do the next batch till your done
 

Attachments

  • 000_0097.jpg
    000_0097.jpg
    249 KB · Views: 339
  • 000_0098.jpg
    000_0098.jpg
    273.1 KB · Views: 273
  • 000_0099.jpg
    000_0099.jpg
    241.3 KB · Views: 284
  • 000_0100.jpg
    000_0100.jpg
    247.1 KB · Views: 279
  • 000_0102.jpg
    000_0102.jpg
    285.8 KB · Views: 380
   / Building a 3 point balast box
  • Thread Starter
#5  
OK now it is all mixed clean everything, all your tools, the barrel, rice it wipe it even if you think it is an old nasty thing you just might want to paint it some day. Now for me I have a lid so this will also be my chain box so I wipe down the inside above the cement. Now take a small block of wood an float the surface so it is nice and smooth. Make sure it is level too so it isn't heaver on one side. If you have a lid and snap ring put it on so the barrel stays round as it cures. cement can miss shape your container so make sure it is in place. Now forget about it for a week to 10 days and your done
 

Attachments

  • 000_0103.jpg
    000_0103.jpg
    267.9 KB · Views: 354
  • 000_0104.jpg
    000_0104.jpg
    257 KB · Views: 321
  • 000_0112.jpg
    000_0112.jpg
    265.2 KB · Views: 370
  • 000_0113.jpg
    000_0113.jpg
    272.5 KB · Views: 478
   / Building a 3 point balast box #6  
What are you going to mount your top link to, to keep it from tipping?? Everything else looks great...........
 
   / Building a 3 point balast box
  • Thread Starter
#7  
Now I will probably weld a washer on each side later and if you want you could weld the re-bar to the rod and wire it all together. I don't think I will need the top link but you can do that too. This project will weigh about 750 pounds. There is 700 pounds of cement plus the water and the steel. You can use just about any container, its only purpose is a form but be careful, cement will miss shape a lot of things so brace up something with soft sides or it will blow out and you'll have a big mess on your hands
 
   / Building a 3 point balast box
  • Thread Starter
#8  
johnk said:
What are you going to mount your top link to, to keep it from tipping?? Everything else looks great...........
all the wt is in the bottom, it might rock a little but it will never tip. We never used a top link on them in the past, that is why you run the rod through the center
 
   / Building a 3 point balast box #9  
I made one like Soundguy explained in some earlier posts. I used ten 80# bags of concrete,rebar , 2" box tubing that connects to the top link with holes drilled in flat stock that I welded to the box tubing.
 

Attachments

  • 7-30-2006 Vacation 049.jpg
    7-30-2006 Vacation 049.jpg
    81.4 KB · Views: 458
  • 7-30-2006 Vacation 051.jpg
    7-30-2006 Vacation 051.jpg
    69.8 KB · Views: 386
  • 7-30-2006 Vacation 086.jpg
    7-30-2006 Vacation 086.jpg
    99.7 KB · Views: 479
   / Building a 3 point balast box
  • Thread Starter
#10  
I didn't want to mess with the lid so I grab it above center. as long as I have my ground clearance I don't need it any higher. I wanted the trunk space LOL
 
 
Top