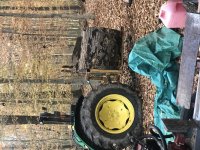
A simple three point counterweight

   / A simple three point counterweight #81  
Here you go, let me know if you need any more. the 4x4 steel angle go all the way to the embeded drawbar and fasten in with large bolts, the 2 inch fastens to the drawbar with a long 3/4 inch all thread, and welded to the 2 inch receiver, and then rebar welded at an angle on each side to the drawbar and the side of the 2 inch reciever for side to side stabilization.

James K0UA

This looks like what I need except for the receiver hitch which I don't really need.
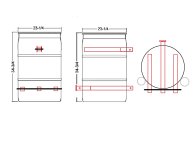
 
   / A simple three point counterweight #83  
This what i eventually plan on doing. use a 55 gallon plastic drum and design it so i can attach to my quick hitch.

Ballast.jpg
 
   / A simple three point counterweight #84  
This what i eventually plan on doing. use a 55 gallon plastic drum and design it so i can attach to my quick hitch.

assuming I already posted, but that's what I did. Put in rerod. My dad had one (in a barrel) split in half after a few years. Mine is QH compatible. I forget the weight, but it seems like it was maybe 1400#. I'd have to find/open the CAD to tell exactly.

Anyway.....
Tractor - Counterweight - Album on Imgur
 
   / A simple three point counterweight #85  
This is as simple as it gets - install rear pallet forks - back up to big ol chunk of oak - watch tractor squat !
IMG_1274.JPG
 
   / A simple three point counterweight #86  
Might want to check the air pressure in those tires!!! :D :D :D
 
   / A simple three point counterweight #88  
I was thinking about making a ballast box but Titan had there's for sale at $219 and figured I couldn't make it for that. So now I'm the owner of a Titan ballast box. But I certainly did enjoy reading all about the innovative ideas on this thread.
 
   / A simple three point counterweight #89  
I've browsed this forum a bunch while figuring out how to design a ballast box. I thought I'd add pictures of mine.
I couldn't make myself pay $200+ for a ballast box when I knew I could build one for about $25. I grew up pouring concrete with my Dad's construction company so building the box was a no-brainer.
 

Attachments

  • IMG_0627.JPG
    IMG_0627.JPG
    148.8 KB · Views: 432
  • IMG_0619.JPG
    IMG_0619.JPG
    164.6 KB · Views: 340
  • IMG_0609.JPG
    IMG_0609.JPG
    138 KB · Views: 378
  • IMG_0599.JPG
    IMG_0599.JPG
    82.1 KB · Views: 283
   / A simple three point counterweight #90  
Here you go, let me know if you need any more. the 4x4 steel angle go all the way to the embeded drawbar and fasten in with large bolts, the 2 inch fastens to the drawbar with a long 3/4 inch all thread, and welded to the 2 inch receiver, and then rebar welded at an angle on each side to the drawbar and the side of the 2 inch reciever for side to side stabilization.

James K0UA

Hi James,

I am in the process of copying your design - thanks for sharing.

For the holes in the angle for the pin for the toplink, how critical is sizing? I have an MX5100, which is a Cat-2. I have a 1" hole saw, which basically creates a zero-clearance hole for the 1" pin. I am worried that this could be problematic when trying to attach the ballast. The next size up hole-saw I have is 32mm (1.26"). This would allow easy insertion of the 1" pin. Would the 1/4" of 'oversize' be a problem?

Another option is to drill smaller holes - I may have a suitable drill bit or may be able to borrow one - and use the Cat-1 pin.

All opinions and advice will be appreciated.

Ken
 
 
Top