dillo99
Gold Member
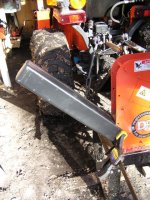
For those of you that own a DR 3PH Chipper, you may have noticed that the adjustable chute was about a $400 add on. I could not justify that so I have been planning to attempt adding a chute. Here is the result - it cost about $20 and took about 1 hour to do. It is pretty ugly right now because I did not want to spend 8 hours building something that I was not sure would work. So far, this thing works pretty well. I can shoot chips into a small trailer or just shoot them on the ground without worrying about the pile building up and clogging the chipper. I am sure some of you can probably improve on this design, but here is the basic approach.
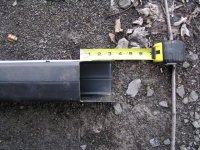
Picture 1: First I needed to find an easy option for a chute. I thought about a plastic fence post (square) but they were a little too big. I then stumbled upon the Rubber Maid mailbox post....a perfect fit.
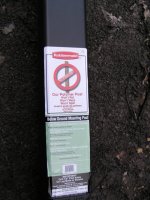
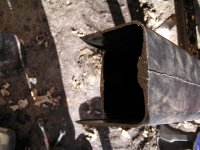
Picture 2: Close up of mailbox post.
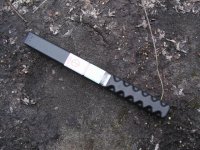
Picture 3: First step is to cut the mailbox post in half just above the rippled part. There is a small line there - just cut at that point. Then cut back one side only - about 3 inches.
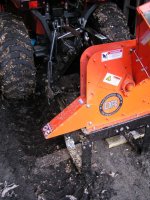
Picture 4: This is the chipper before any changes are made...remove the chute guard.
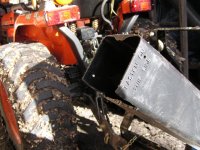
Picture 5: Test fit of the new chute - held on with a clamp. Note: I decided I wanted it to fit down a little further so I cut more off the one side (about another inch - taking it to 4 inches) and then I cut 1 inch off of the opposite side (the bottom of the chute). Sorry I did not take a picture of this change.
Picture 6&7: I then cut the end off at the top of the chute...and also cut the lower side to make sure there was plenty of room for discharge.
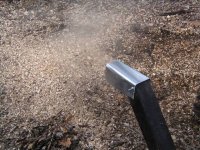
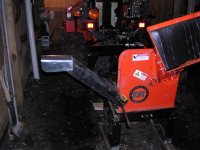
Picture 8: I added a piece of sheet metal folded over the top to direct the output down a bit. (yea, I know this part is really ugly....I may change it later but it works. I did not make it adjustable but you could easily do that). Note: I did run into a slight bit of clogging when testing this so I reduced the angle of this (sorry no pics). The sheet metal chute is now basically parallel to the ground - no more clogging.
After test run I drilled a hole in the chute that corresponded with one of the existing holes in the chipper. Used the chute guard bolt to attach the new chute. I still use the clamp as well because the chute only hit one of the guard holes.
That's it! Works pretty well and I can't beat 1 hour and twenty bucks for a $400 modification. PS - Chippers are dangerous - modify at your own risk!")
Picture 1: First I needed to find an easy option for a chute. I thought about a plastic fence post (square) but they were a little too big. I then stumbled upon the Rubber Maid mailbox post....a perfect fit.
Picture 2: Close up of mailbox post.
Picture 3: First step is to cut the mailbox post in half just above the rippled part. There is a small line there - just cut at that point. Then cut back one side only - about 3 inches.
Picture 4: This is the chipper before any changes are made...remove the chute guard.
Picture 5: Test fit of the new chute - held on with a clamp. Note: I decided I wanted it to fit down a little further so I cut more off the one side (about another inch - taking it to 4 inches) and then I cut 1 inch off of the opposite side (the bottom of the chute). Sorry I did not take a picture of this change.
Picture 6&7: I then cut the end off at the top of the chute...and also cut the lower side to make sure there was plenty of room for discharge.
Picture 8: I added a piece of sheet metal folded over the top to direct the output down a bit. (yea, I know this part is really ugly....I may change it later but it works. I did not make it adjustable but you could easily do that). Note: I did run into a slight bit of clogging when testing this so I reduced the angle of this (sorry no pics). The sheet metal chute is now basically parallel to the ground - no more clogging.
After test run I drilled a hole in the chute that corresponded with one of the existing holes in the chipper. Used the chute guard bolt to attach the new chute. I still use the clamp as well because the chute only hit one of the guard holes.
That's it! Works pretty well and I can't beat 1 hour and twenty bucks for a $400 modification. PS - Chippers are dangerous - modify at your own risk!