At Home In The Woods

   / At Home In The Woods #4,991  
I personally can't see a pencil mark or a marker line. I can however after hours of welding - get to realize the shadow line of metal pieces to be joined is my line. When I started out, I was pulling too, and wondered why is was a cold bead. Pushing and weaving really gets the penetration IMHO, but then I am not a professional welder or anything - just saying what worked for me. Also you are just practicing right on a flat spot - so its time to cut it up and weld it back together so you have a "line" to follow. You got a grinder - use that to hack it in 2 pieces or so. Got a spare bolt laying around? use that to practice to tack on and then weld a bead around it too. After welding it --- use a big hammer and whack it to see how strong it holds. if done right -- welds wont break, but metal will bend.
 
   / At Home In The Woods
  • Thread Starter
#4,992  
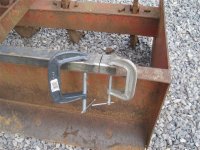
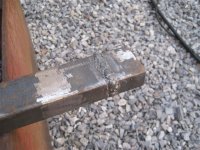
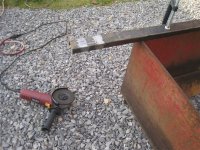
Tonight I made my first attempt at welding something together. I cleaned off some of my scrap, then cut a piece off of the end.

IMG_0434.JPG IMG_0436.JPG IMG_0437.JPG

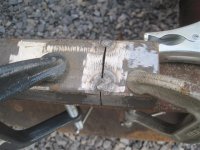
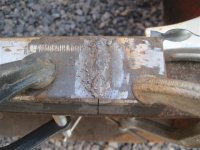
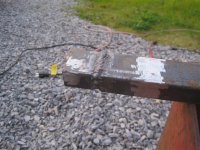
I made a couple tack welds to help keep the pieces together while welding, then laid a bead along the top.

IMG_0439.JPG IMG_0440.JPG

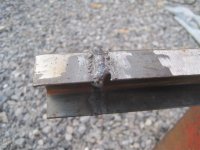
I reoriented the metal and welded the first side. It came out fairly ugly. I'm having a little difficult starting a weld where I ended the previous weld. By the time I have heated the metal enough to get a puddle, I have a large glob of weld resulting from feeding the wire while I'm waiting for the metal to get hot.

IMG_0441.JPG

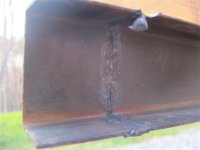
The last side came out even uglier. At the end, I melted away my metal leaving a large gap at the bottom.

IMG_0442.JPG IMG_0445.JPG IMG_0446.JPG

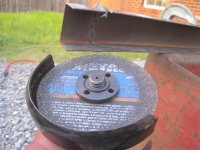
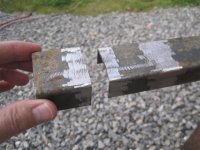
I used the grinder to cut off the excess and then tried to fill in the gap by adding more welding wire. That didn't turn out too great either.

IMG_0448.JPG

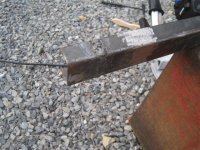
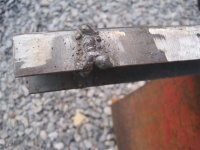
Here's what the final result looked like. I got out a hammer and banged all over the newly welded on piece and it held together. I guess that's what counts even if it's not real pretty.

IMG_0449.JPG IMG_0450.JPG

I think I should have left a slightly bigger gap between the pieces before I welded them to let a little more weld penetrate a little deeper. However, I'm reasonably satisfied with the result for my first real weld.
 
   / At Home In The Woods #4,993  
I like you systematic approach to learning, obed. Never done any welding myself, so it's informative watching you as you go. :thumbsup:
 
   / At Home In The Woods #4,994  
That is not bad. Much better than my first few. A butt weld is by far the most difficult. Try doing a 90deg weld in a right angle corner. I like to push the weld.

Your tacks look really nice. Many times when I am doing a butt weld I will stitch it together with a bunch of tacks. I move around so to not put too much heat in one area, especially on thin stuff.

Congratulations on 500 pages.

Chris
 
   / At Home In The Woods
  • Thread Starter
#4,995  
That is not bad. Much better than my first few. A butt weld is by far the most difficult. Try doing a 90deg weld in a right angle corner. I like to push the weld.

Your tacks look really nice.
Thanks Chris. I was actually surprised that the tacks came out as well as they did. Pure luck I think.
I move around so to not put too much heat in one area, especially on thin stuff.
Yes, I left the welding gun in one spot too long at the end and melted a hole in the metal.
Congratulations on 500 pages.

Chris
I wonder who will author Post #5000?
Obed
 
   / At Home In The Woods #4,996  
I think your welding is off to a good start. I have never used a wire welder, so I am not much help in analyzing the welds. It's definitely one of those "practice makes perfect" skills. Strong is good, strong and pretty takes practice.
 
   / At Home In The Woods #4,997  
Obed, looks like a good start for self taught, beginning welding. Can you operate a nuclear power plant on those welds, no. Could you count on them to hold a draw pin on an implement? Absolutely! That's the first goal, getting welds of sufficient strength to do what you intend (holes and all). Then or worry about "pretty." Eventually pretty welds will have the needed strength with practice. Once you can strike an arc consistently, you can begin to experiment with wire speed and amperage.

I learned to fill holes by using a regular welding rod in the hole and "welding" it in place. I had to do this on the pig cooker I just restored, more than once. Unfortunately I burned a couple of holes as I was repairing other issues.
 
   / At Home In The Woods #4,998  
I reoriented the metal and welded the first side. It came out fairly ugly. I'm having a little difficult starting a weld where I ended the previous weld. By the time I have heated the metal enough to get a puddle, I have a large glob of weld resulting from feeding the wire while I'm waiting for the metal to get hot.

How thick was the base metal, and what setting did you have the welder set to?

The metal doesn't look that thick, and when you are learning thinner metal can be a bit of a challenge.

You should have a puddle of molten metal VERY soon after striking an arc.


The last side came out even uglier. At the end, I melted away my metal leaving a large gap at the bottom.

It may be obvious, it may not... you burn though when you leave the torch in one place too long. That end of the piece weld goes faster than the in the middle of the weld.


I used the grinder to cut off the excess and then tried to fill in the gap by adding more welding wire. That didn't turn out too great either.

You can do that... you've burned a "U" in the end of the weld. Trace around the inside of the U once, and then stop. Let it cool. Clean the slag. Now you should have a smaller U. Trace around the inside of the U, cool, clean, repeat. Eventually the U closes up.

The downside to a flux-core welder, is you MUST clean your old weld before putting new weld over, or near the old weld. If you don't you'll get slag in the weld , and that will create a weak spot.

I think I should have left a slightly bigger gap between the pieces before I welded them to let a little more weld penetrate a little deeper.

What you do for deeper penetration on thick material is bevel the edges at a 45 degree. Then you weld straight down the middle. Then clean, and lay another pass on top. This time you weave a bit from side to side to make a wider weld. Repeat until full thickness welding has occurred.

If you have a very wide bevel, you might have to do 2 or more passes one on each side to fully cover the gap, but that is probably not something you are likely to get into with this welder.

My other suggestion is to practice laying good looking welds on a thick (so you don't burn through) flat plate. This will let you work out your hand motion, travel speed, machine settings etc... and get a good looking bead of weld. Once you can get a good bead, repeatably, then you can move to a work piece, and put that good bead where it needs to be.

Looking at your welds they are 'tall' i.e. standing up off the base metal. This is usually due to too fast of a wire speed. But it looks like on your machine you only have 1 control. Most mig machines have 1 for wire speed and 1 for voltage. So I'm not sure what to tell you to adjust as I've not worked with this kind of machine.
 
   / At Home In The Woods
  • Thread Starter
#4,999  
How thick was the base metal, and what setting did you have the welder set to?
jdonovan, thanks for the tips. They are very informative. My practice piece is pretty thin; it's 1/16" thick. The welder was set to low current and wire speed 3.5 out of a possible 10.
It may be obvious, it may not... you burn though when you leave the torch in one place too long. That end of the piece weld goes faster than the in the middle of the weld.
I think that's the part I didn't realize - that the end of the piece weld goes faster than the middle. That seems to be what I observerd.
You can do that... you've burned a "U" in the end of the weld. Trace around the inside of the U once, and then stop. Let it cool. Clean the slag. Now you should have a smaller U. Trace around the inside of the U, cool, clean, repeat. Eventually the U closes up.
I guess that takes some practice. I probably should have waited until I was done filling before removing the excess with the grinder.
The downside to a flux-core welder, is you MUST clean your old weld before putting new weld over, or near the old weld. If you don't you'll get slag in the weld , and that will create a weak spot.
Yes, that seems to slow things down considerably. It makes you not want to stop your weld bead once you start it.
My other suggestion is to practice laying good looking welds on a thick (so you don't burn through) flat plate. This will let you work out your hand motion, travel speed, machine settings etc... and get a good looking bead of weld. Once you can get a good bead, repeatably, then you can move to a work piece, and put that good bead where it needs to be.
I should get some thicker stuff on which to practice, especially since my box blade parts use thick metal.
Looking at your welds they are 'tall' i.e. standing up off the base metal. This is usually due to too fast of a wire speed. But it looks like on your machine you only have 1 control. Most mig machines have 1 for wire speed and 1 for voltage. So I'm not sure what to tell you to adjust as I've not worked with this kind of machine.
. The tallness of the bead along the middle/top of the piece was about what I wanted. It could have been a little less tall. I had more trouble along the sides where I was trying to get the weld "started", i.e. hot enough for a puddle to form where the previous bead ended. The previous bead was already tall enough so when I started the new bead where the previous bead ended, I ended up with too much material. I think that I was also going too slow which allowed the weld material to build up too much.
 
   / At Home In The Woods #5,000  
It makes you not want to stop your weld bead once you start it.

Exactly. This is one of the major down sides to any flux shielded process... including stick welding. But my flux doesn't blow away when I weld outside like my gas-shielded mig/tig does.


I think that I was also going too slow which allowed the weld material to build up too much.

To slow should have lead to too much heat in one spot, and a flatter, wider weld profile. If the bead is tall/narrow it usually means a cold weld, with too much wire feed.
 
 
Top