You are using an out of date browser. It may not display this or other websites correctly.
You should upgrade or use an alternative browser.
You should upgrade or use an alternative browser.
Building a flail mower
- Thread starter Renze
- Start date
/ Building a flail mower
#11
Got a little progress last saturday. My coworker milled the radius in the 2 by 4 tubes so i didnt have to do it with an angle grinder, creating large gaps that need to be welded and distort uneven.
This still needs some gusseting, and once those welds are cold i will weld the bushings in the tubes at the exact location. It doesnt make sense to be precise when theres lots of welding to be done that distorts my fit.


This still needs some gusseting, and once those welds are cold i will weld the bushings in the tubes at the exact location. It doesnt make sense to be precise when theres lots of welding to be done that distorts my fit.
ArlyA
Super Member
- Joined
- Mar 18, 2016
- Messages
- 9,557
- Tractor
- Polaris Boss 6x6 with pods (tracks) Center actuating lawn mower by Husky
just following neat project.
Another saturday of slow progress: after i welded the arms, i welded the bushes on their ends. Whatever the arms would warp during welding wont effect the bushing alignment when i weld them last.
Pins installed, the trolley crane is pure joy, even when its only two directional because this old chicken barn doesnt have more headroom to make it three directional


Pins installed, the trolley crane is pure joy, even when its only two directional because this old chicken barn doesnt have more headroom to make it three directional
The drawback of long drawn out jobs is that you forget the plan:
2 months ago i figured the rearmost arm should be welded against the backside of the existing vertical C channel reinforcement so the gearbox will line up to the pulley.
2 weeks ago i started fabricating, saw that the flail housing was too short to weld both tubes to its side so i moved them back so both would fit.
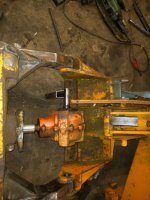
When putting the gearbox on the 6 splined sleeve i noticed that my input shaft wouldnt line up to the pulley on the headstock. After a week of making myself feel like doing so i cut up my work to move both arms an inch forward.
Last saturday i welded it back in the right position, tomorrow i will offset the other arm.

ArlyA
Super Member
- Joined
- Mar 18, 2016
- Messages
- 9,557
- Tractor
- Polaris Boss 6x6 with pods (tracks) Center actuating lawn mower by Husky
Ya, I do the same the same thing. I have parts and forget where they are!
I am an engineer, others work by my plans. And sometimes they think theres an easier way and deviate from the plan, to discover later on that things dont work out in the end. I shared my fault in the WhatsApp group from work, admitting that even an engineer should stick to the plan when hes executing oneYa, I do the same the same thing. I have parts and forget where they are!
Theres no better way to illustrate that a drawn out execution phase of a plan often doesnt mix well with the planning phase, resulting in oversights
Last edited:
Because i use a smaller diameter pulley, the belts are going to get too close for comfort, to the bolt heads of the guard bracket. I was thinking of machining down a drill shaft so i could drive it through the M8 hole, or lathing an adapter with thin shaft which clamps the drill with a bolt.
Eventually i just beat it out of the way with a sledge, countersunk the holes, mounted it back the other way around and beat it back straight


Eventually i just beat it out of the way with a sledge, countersunk the holes, mounted it back the other way around and beat it back straight