Building a stick frame house in the woods in 90 days

   / Building a stick frame house in the woods in 90 days
  • Thread Starter
#371  
How much behind do you think the upcoming snow storm will slow down progress? Looks like a solid 12 inches plus for you folks.
What? I'm enjoying nice blue skies today. :D

Hmm, just took a look at the forecast and yeah, it looks like we might be in for some of that white stuff on Wednesday. I hope the forecast changes before then. I don't think 12 inches of snow on that sub floor would be the best thing for it. :( I'd like to think the builder plans to shovel the snow off the exposed wood. Back filling is supposed to take place Wednesday, but that will likely not happen if we do get a snow storm.

Trusses are supposed to be delivered and set this Friday. Hopefully that can still happen, even if we do get snow mid week. Keeping my fingers crossed that the forecast changes. I love snow, but if only it would wait until the house is sealed from the elements!
 
   / Building a stick frame house in the woods in 90 days #372  
Just a couple of thought/comments (what, me?!).

Our 1969 house has 2x8 fir joists. The floor has some squeaks. It would have been nailed (and I hope most of the nails are actually in the joists). The addition we put on a couple of years ago are 9 1/2" TJI over the LVL (laminated) headers (where needed). The new stuff is glued, then nailed. We did the finish work on most of the house (save the bathroom) so I had plenty of time to screw the floor down. I used (ok, bought -- it was cheap enough, but rented would have been just fine) a long shaft strip-screw (deck/drywall) gun. Once I figured out how to do use it (pull the trigger, walk the chalk line and push down on the floor, don't stop the motor until the strip is empty), I bet it only took 30-40 minutes to do each room. I figured it was cheap insurance for joist movement & squeaky floors. It certainly is out of view compared to any other solution for 'after the flooring is in and you get squeaks' (or worse with a floating floor and tile weight). You have solid joists and live where the humidity changes a lot, just something to consider.

We sprayed open cell foam in our addition and any open walls of the existing floor. About the same cost R value wise as closed cell (which has a higher R value per thickness than open cell). I am not sure how effective it was price wise, versus cellulose (I thought it was expensive). An interesting detail is that they spray under the roof sheathing & trusses (which really works well in the shallow top plate to truss bottom area). That makes the entire house conditioned space (heat/cool). It means that the can lights don't matter, leak wise (too bad we already put in sealed & insulation contact cans -- could have saved a few bucks). It will also mean easy circuit/light/switch moves/additions. Even though I was sure I had spent more than enough time thinking about where switches,lights, and comm/internet cables should go (I used cat5 cables for both -- usually ran 2 lines to every spot I had plans for one or the other), there are still a couple that are not in the right spot, or I need somewhere else.

I put LED strip lights in the old hallway. Built a coved (french curve profile) piece of moulding up and rabbited a groove in the back, had the drywaller mold it into the wall. Worked better than I expected. One thing with LED lighting: confirm the light 'temperature' is the color you want. Same deal as choosing fluorescent lighting. Another solution would be to use crown moulding and just lower it an 1-3 inches (some use rope lighting here). All I needed was a laptop PC power supply (~$10). I had the electrician put in an outlet in the attic switched by the old 2 way switches, and poked the wires through the wall from the trough (DC to the power supply). Works good, with indirect lighting and I don't stare into the light when using the stairs, or have a light blocked by someone else walking above the stairs (no shadowing). The LED strips are segmented so they can be cut into sections and wired together (for example, I had 3 sides of the hallway to run the lighting in, I just cut them in 3, connected them with jumpers). Likewise, it can be cut for short runs or jumpered together for longer runs. Came on a super 8 film sized reel. ~$15 each reel ($/ft I think) 2 years ago (Amazon). Great way to do underneath cabinets too. Came backed with 3M double sided tape.

Our architect recommended Panasonic bath fans. I researched them, then tried to find something else that was as good. At the time, I couldn't find any, noise wise (they use 'sons' in the fan industry). The options were almost endless: motion detectors, low speed always on (adjustable speed -- used when a house/building needs some fresh air exchange), timed, night light (basically a C7 bulb), fluorescent U bulb (which they don't tell you is the same as all the other U bulbs -- I wanted a yellower temperature bulb). Anyhow, they are pricey, but what makes them quiet (besides a good fan/motor design) is that they use a DC motor and controller that slowly ramps the fan speed up. It works. I added in fan timers for the common bathroom/powder rooms. Lowes Depot sell different brands. Turned out my local Lowes stocked the uncommon color of almond (yes, there are two colors of almond), so I went with a different color to make the LED auto night light switch match in one room (found this out when I was buying something at an electrical supply house). I think Depot now carries the combination I wanted (I was picky).

Digital Timer, RT1W | by Legrand Works by hitting the large button, uses the last timing length selection (or just select a different timing length button and it comes on) .
Dimmable LED Nightlight Combination with Switch - 7738 Offered plenty of ways to have a lighted switch. Light almond is (I think) the common almond.

Just thoughts. My wife commented that the fart fans may be too quiet and visitors may be inclined to turn the water on to cover up their sounds. The water cop (me) will have to inform them that aint cool.

Oh, one thing we found was that there are a number of companies that make pretty cool fan/return air/supply air vent covers for more prominent areas of the house (Lowes Depot only carry the fairly generic). And not all of them are that much money (in the grand scheme of things). Selections of wood, metal, old style stamped, etc.

Just helping you spend money!
 
   / Building a stick frame house in the woods in 90 days #373  
What? I'm enjoying nice blue skies today. :D

Hmm, just took a look at the forecast and yeah, it looks like we might be in for some of that white stuff on Wednesday. I hope the forecast changes before then. I don't think 12 inches of snow on that sub floor would be the best thing for it. :( I'd like to think the builder plans to shovel the snow off the exposed wood. Back filling is supposed to take place Wednesday, but that will likely not happen if we do get a snow storm.

Trusses are supposed to be delivered and set this Friday. Hopefully that can still happen, even if we do get snow mid week. Keeping my fingers crossed that the forecast changes. I love snow, but if only it would wait until the house is sealed from the elements!

Pete, you might want to consider calling the contractor in advance and see what his plan is for snow. Unless you say something, there's a better than even chance he'll just let the snow sit on your floors.

See below for my experience with snow on the subfloors. During the bid process, I asked the contractor what he would do if we got snow on the subfloors. He said he would shovel off the snow. Then when we got snow on a Friday night, I called the contractor. He told me that he doesn't work weekends. Guess who shovelled the snow? You got it; I did. Fortunately, the Advantek subfloors we used seemed to handle the wetness well.

I'm going to be sore tomorrow. My back is already extremely tired. I shovelled snow off of 2/3 of our subfloor until I tuckered out about at about 4:30 PM. The main floor is 2100 square feet. Man that's a lot of snow. Thursday I borrowed a snow shovel from my father-in-law in anticipation of the forecasted snow.

While shovelling the snow this morning, it became painfully obvious that the snow shovel by itself was not adequate for this size job. It's too bad I couldn't figure out some way to use the tractor. So I got a sheet of OSB and used it as a giant scraper. This device helped alot but it was still slow going and back-breaking work. Plus, I couldn't just push the snow out of the house. I would first use the OSB sheet to push the snow into a pile by a window. I then had to throw the snow out the window shovel full by shovel full. The snow was very wet and extremely heavy. By the end of the day, the wet snow was sticking/freezing to the shovel and was making it hard to throw the snow through the window.

I'm not sure that I've got it in me to shovel the remaining 700 SF tomorrow.

Obed

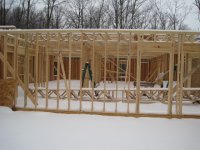
153665d1264895376-home-woods-img_3091.jpg


153667d1264895376-home-woods-img_3094.jpg


153669d1264895390-home-woods-img_3083.jpg


I'm tired of snow. I had to remove the snow from the attic this afternoon. After having cleared over half the snow off the attic, the framer's son arrived and helped me clear the rest of the attic. I used the 3'X5' piece of OSB again as a giant scraper. This time it was easier because I didn't have to shovel the snow through windows like I had to for the main floor several days ago. I was able to just push a lot of the snow right over the side. However, most of the attic has a 2x6 plate on top of the subfloor at the edges for attaching the rafters. So I had to push the snow over to the garage where the 2x6s had not yet been installed in order to be able to push the snow over the edge.

155680d1266288488-home-woods-img_3190.jpg
 

Attachments

  • 153669d1264895390-home-woods-img_3083.jpg
    153669d1264895390-home-woods-img_3083.jpg
    126.4 KB · Views: 124
   / Building a stick frame house in the woods in 90 days #374  
Pclausen---you won't need the rock rake to get the rocks out. The tiller will bury them---and most anything else-- if you till real slow. I have an LR108 as well and never use it.

You'll need a harrow of some sort and a packer to press the rocks back into the soft dirt. Search for my "cultimulcher" rebuild project from last spring for ideas.
 
   / Building a stick frame house in the woods in 90 days #375  
I had 3 different snows/rains with my floor holding about 3" of slush at one point as i was shoveling it off myself as I didnt hear from the builder for about 2 weeks on my barn project.
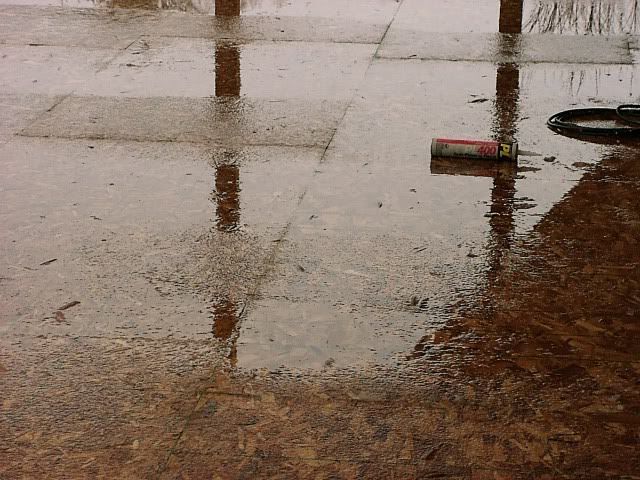
the next day after I shoveled off 2 or 3" it turned to rain as seen here

11220013.jpg


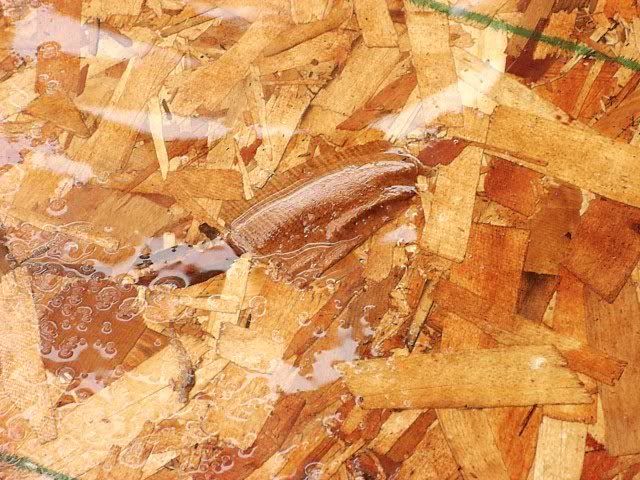
after 2 days more of freezing nights warming up to rain next days floor looked like this

11220006.jpg


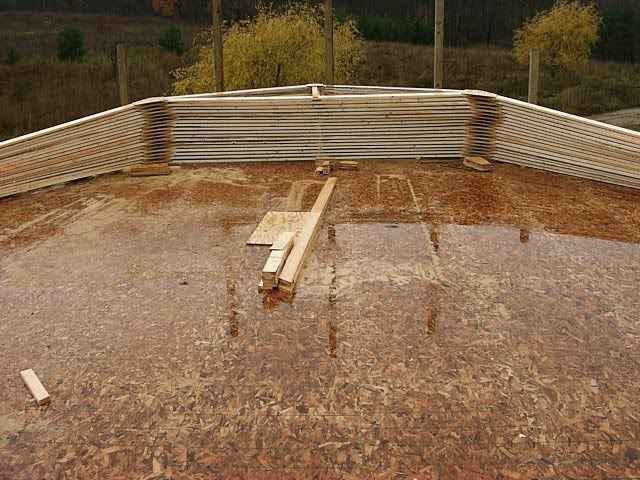
It did turn out a bit better after a while I ended up having to scrape off loose fibers

wide area shot
11160003.jpg


weather can be really damaging and something to be aware of so best of luck.

Mark
 
   / Building a stick frame house in the woods in 90 days
  • Thread Starter
#376  
Yikes, I sure hope this storm is a false alarm, I would have for mom's floor to end up looking like the pictures above!

I wonder if putting down tarps would be of any benefit? I have about a dozen of them ranging in size from 10x20 to 20x40. Not sure how effective they would be with the interior walls up...

I did go pick through the left over wood and scored all 7 6x6 scraps. They will be great for holding up implements and such.

day41-1.jpg


Also picked up most of the 2x12 scraps:

day41-2.jpg


I was half tempted to go ahead and do the back filling myself before the weather front moves in...

day41-3.jpg
 
   / Building a stick frame house in the woods in 90 days #377  
You will find all sorts of uses for the scrap lumber. Hopefully the snow will miss you and come my way instead, I could go for a good snow before winter wraps up.
 
   / Building a stick frame house in the woods in 90 days #378  
Those are some good lookin scraps :)

I'm part of that club myself, just hate wasting it.

David Sent from my iPad using TractorByNet
 
   / Building a stick frame house in the woods in 90 days #379  
Yikes, I sure hope this storm is a false alarm, I would have for mom's floor to end up looking like the pictures above!
I wonder if putting down tarps would be of any benefit? I have about a dozen of them ranging in size from 10x20 to 20x40. Not sure how effective they would be with the interior walls up...

Pete,
I would discuss any things you would like to do at the site with the contractor before doing it.
He may have even been going to use some of the scraps for blocking.
Perhaps, since the interior walls are up you could convince him to bridge the tops by laying some 2 x 4, 6 whatever is there and putting your tarps on them. Then put a few on top of the tarps to hold them down or even use some of the nails with the plastic washers on them. Watch for snow loading though; you don't want the walls to rack.
My house roof was 75% covered with tarps from the end of may till Oct because a storm took most of the shingles off.
No leaks during that time, but no rain either. Snow on flat tarps might be another matter.
Let them do the back filling, in any case, Even contractors buckle walls sometimes. Look at Motor Seven's Log cabin project if you want to see a messed up basement wall.

I think I pretty much have the direction and location of your mom's house figured out. I said the front was primarily west from the shadows in some pics and the time of taking the images.
I think it is still west but southwest after viewing from Bing.
Ron
 
   / Building a stick frame house in the woods in 90 days #380  
Your plumbers, electricians, and HVAC guys will need some of those scraps for blocking. Also, you might want some for blocking for towel bars, curtains, handrails, etc.

I would highly recommend having the sub floor screwed down at some point since you are using conventional lumber for joist. Glue and nails may or may not be enough to stop squeaks. Pine is very good but today's lumber moves a whole lot more than yesteryears.

Advantech is some good stuff. I wouldn't be too concerned about it getting wet. I have it in my tool trailer for the floor. You would not believe the abuse it has seen over the years and it's still in good shape.


Thanks for taking the time to share. I am really enjoying having a front row seat watching the progress.
 
 
Top