DIY Cab - Finally decided it was time

   / DIY Cab - Finally decided it was time
  • Thread Starter
#71  
Oops, I forgot I already suggested McMaster-Carr. That "D" shaped material you got from Lowe's looks pretty good. The McMaster-Carr weatherstipping you got was exactly the style I was thinking about for your build.

The McM/C weatherstripping looks like it was custom made for my cab. I'm really glad you mentioned them because even though we buy things from them at work, I wouldn't have thought to look there.

There's a 50% chance I'll get the cab back together on the Kubota today. It depends on how the window adhesive is setting up. I glued them in Wednesday afternoon and although the tube says the adhesive is popular due to its fast skinning and curing, it was still pretty gooey last night. It took a fair amount of force, but the glass could be wiggled slightly as late as yesterday afternoon. My plan is for a finish bead of black silicone on the outside. I assume the window adhesive needs air to cure and I'm hesitant to run the silicone and block that air route.

When I glued the glass in, it was with everything laying flat and it's still in that position. Excess adhesive was squeezed out the back (or inside) of each assembly and will need to be trimmed off and the glass scraped clean. Since there won't be any silicone applied on the inside, the adhesive will still be exposed to air on that side.
 
   / DIY Cab - Finally decided it was time #72  
You're welcome on the McMaster-Carr suggestion, and they are my go to place for things I know I can't get readily elsewhere. I know they are pricey; but I just accept it as best as I can to get what I want.

How cold is the shop that your cab is in? Maybe the temperature is too low for normal curing times. I would think the adhesive should be plenty for water and air infiltration sealing. Any chance you may have gotten a bad batch of the stuff? Personally I hate silicone and only use it as a last resort because it's such a PITA
 
   / DIY Cab - Finally decided it was time #73  
How cold is the shop that your cab is in? Maybe the temperature is too low for normal curing times.

When I installed the velcro to hold the clear vinyl panels on my cab, I found out that most adhesives don't work below 40 degrees. After a lot of searching the net I found that Tite Bond Provantage - Heavy Duty Construction Adhesive -is supposed to be workable from 0 to 100 degrees. It was well below 40 when I used it and it adhered well, gave a little working time to position parts then set quickly and sure seems to be stuck permanently. It was a shelf item at our local Lowes.
 
   / DIY Cab - Finally decided it was time
  • Thread Starter
#74  
Mjncad - The weatherstripping was around $60, but "perfect" has a price. I was looking over the different costs and was able to come up with right around $1,000 total. I believe there may be a couple hundred bucks of odds and ends that I bought cash and don't have receipts for. The build has been running around 6 weeks and SHOULD wrap up early this coming week. It's easy to lose track of the $10 or $20 spent out of pocket for fasteners, sandpaper, another can of this or that, hose clamps, etc. Slips for a cash purchase are not needed to verify charges on the credit card statement and tend to get tossed.

The shop is maintained in the 60's. One day when it was pretty chilly outside, I had to get down to a T-shirt to be comfy while working. The adhesive is curing, but slowly. It is a butyl goo that comes in a regular caulking tube and made for window installation. Bought it at NAPA. I'm going to cap the outside with silicone. The butyl formed a continuous bond and made a nice consistent black stripe on the inside of the glass where the glass and inside metal overlap. A little squeezed out around the glass, but not enough to make a finished-looking product on the outside. I hope silicone around the perimeter of the glass to provide a more finished look (and add another means of ensuring the glass will be held in place).

I did an application of silicone yesterday afternoon and am unhappy with the first window I did. After not being satisfied with the "finger method" of smoothing out the material, I found some heavy plastic that worked much better. Sometime this afternoon I'll head to the shop for a do-over on that one. It seemed like it would be easier to deal with if the silicone was cured and trimmed rather than slopping about in the schmootz*.


*Uncertain of spelling. Rhymes with books. Used in Lancaster County to refer to uncured silicone, roof mastic, Penetrox, anti-sieze and similar stuff
 
   / DIY Cab - Finally decided it was time #75  
To me the $60 spent on weatherstripping is a reasonable amount, especially to get the job done right.

I hear you on the odds-n-ends causing petty cash amounts to disappear. :laughing:

Schmootz...neat word. Maybe it's the Amish version of spooge, which I hear has pornographic connotations. :laughing:
 
   / DIY Cab - Finally decided it was time #76  
To me the $60 spent on weatherstripping is a reasonable amount, especially to get the job done right.

I hear you on the odds-n-ends causing petty cash amounts to disappear. :laughing:

Schmootz...neat word. Maybe it's the Amish version of spooge, which I hear has pornographic connotations. :laughing:
 
   / DIY Cab - Finally decided it was time #77  
When siliconing, try running a length of masking tape each side before applying silicone - then run finger around, remove tape & you get a perfect, uniform edge, looks great & easy to do in kitchens & bathrooms, maybe not so much on a tractor!!
 
   / DIY Cab - Finally decided it was time #78  
Chim, this has been a fascinating story! Like a few other posts, I don't add much, but have been following them for -- well, you know how long. Absolutely great job! I'm betting it will certainly turn out much better than "factory" or add-on manufactured cabs that I've seen.

I've thought about a cab for mine, but the idiot (me...:ashamed:) that put the lean-to addition to my garage roof made it a bit shorter --well, a LOT shorter-- than it needed to be, so I'm not sure I'd ever be able to get a cab to fit under it... so I just wear the layers and brave the elements; the parking space is just too convenient not to use it.

Drooling over your cab, however! WBB in NH

08.JPG
 
   / DIY Cab - Finally decided it was time #79  
For silicone and other caulks a DIY trick that I read and tried is to use an ice cube to push/spread the caulking.
It works!
Sure better than wetting the finger tip.
 
   / DIY Cab - Finally decided it was time
  • Thread Starter
#80  
When siliconing, try running a length of masking tape each side before applying silicone - then run finger around, remove tape & you get a perfect, uniform edge, looks great & easy to do in kitchens & bathrooms, maybe not so much on a tractor!!

One of the guys in the weld shop suggested that and I used the idea. Inexperience with caulking resulted in me messing up the first window. The square tubing I used has radiused corners and I apparently wasn't careful about where I ran the tape. A few places where the I ran the tape over the edge of the radius the edge of the tape got behind the silicone. The other problem I had was Inconsistent Finger Syndrome. This was on the window I need to re-do today (got stuck painting family room all day yesterday). When I used my finger to smooth the caulk I used too much force and my finger became a squeegee. Too much silicone was removed from the joint. That's when I made a flexible putty knife from a piece of real heavy clear plastic I'll be using for seals on the cab.

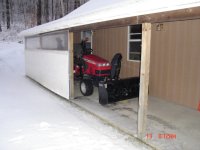
Irvingj - The cab is being made so it allows for my height on the inside and yet fits in either a 12 x 24 prebuilt shed or my garage. Should be OK by a couple inches.
 
 
Top