for those yet to come with questions like I had about 318 starter replacement - FINALLY, some step by step replacement instructions - :thumbsup:
My steps taken to replace a starter in 1983 JD 318 with an Onan B43G Engine & Bendix starter
THERE IS AN IMPLIED "REMOVE" before each sentence
1. battery posts (negative then positive) then loosen neg cable from engine and draw negative cable thru firewall as you will be tilting the engine later
2. battery and battery tray(4x bolts -2x right and 2x left) this is done to access / disconnect 4x bolts holding the drive shaft to the flywheel assembly
3. mower deck, front grill, and the front pulley block assembly
4. 4x bolts(2 left, 2x right) on vertical/upright posts that attach to hidden frame dog ears / this upright is used as support for front of hood. Note - not the 4x bolts above muffler used to attach the hood to the upright. Now disconnect wire block for head lights.
5. Grasp and lift the u-shaped structure while holding onto the hood too, then tilt slightly forward as you are lifting and it will slide off the 8" frame ears holding the structure in place
6. turn off fuel valve and then at the fuel pump(on right side of motor near fire wall), remove the fuel line and route it back through the fire wall
7. choke and throttle cables (also pull these back thru the firewall) for less inhibited access to the driveshaft union
8. 4x bolts on drive shaft where it attaches to flywheel mount point. Large screwdriver helpful to hold shaft or put it in gear and set brake. Note there's a line on the flywheel mount point -it aligns with one of the screw positions. Use this indicator later to start your first bolt when reinstalling the shaft
9. left / driver side engine cover (it's the one encompassing the spark plug). I found zero need to remove any other covers incl. the flywheel enclosure
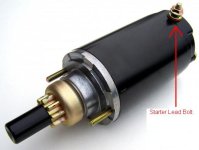
10. nut on front of starter + the positive battery cable lead
11. 4x engine mount bolts - the two up front require a wrench for the topside and socket + extension for the underside the two rear are removed from the bottom side and require you to remove the screen on the bottom of the frame - remove the screws with a very very small socket or standard screwdriver(totals of approx 10x screws)

12. Finally, carefully tilt the engine from the left side towards the right side to a stable resting point. While holding the motor, remove, with a wrench, the two bolts attaching the starter to the engine
13. install the new or rebuilt starter and reverse the instructions (last step to first) and you'll be up and running!
useful tools - standard screwdriver, sockets: 3/8, 7/16, 1/2, 9/16, 5/8, 11/16 swivel head attachment socket, + open/box wrenches: 7/16, 1/2, 9/16
local dealer wanted $600 for their new starter, 3rd party was $119