New patio project

   / New patio project #1  

steveinmo

Silver Member
Joined
Apr 16, 2005
Messages
184
Location
NW MO
Tractor
Deere 3320 & Ford 861
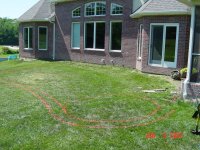
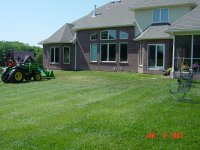
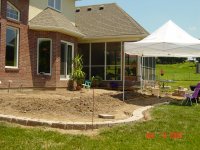
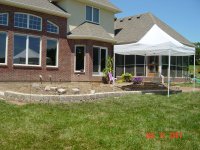
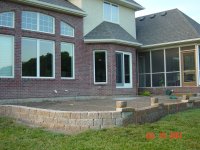
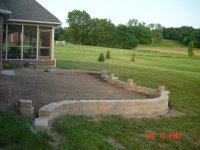
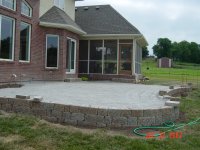
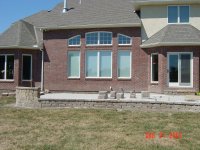
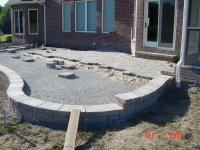
Some of you may remember my new house thread a couple of years ago. Well, the thought was to let the ground settle around the house before putting in a patio off the back porch area. Two years sounded like long enough to me, so we got out the garden hose and started laying out a rough design. I don't know what I was thinking that day......seemed so easy laying out all of those beautiful curves. There were several times during the project that I cussed that day and longed for a nice rectangular design.

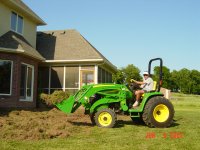
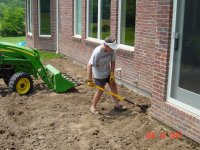
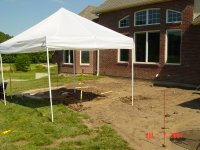
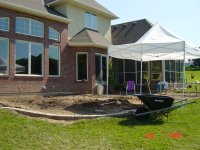
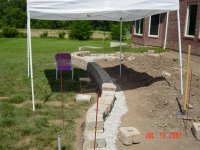
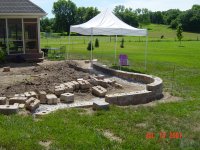
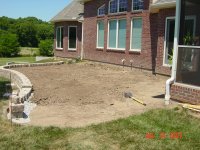
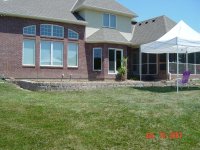
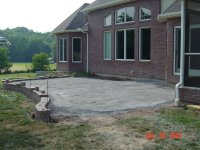
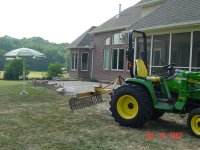
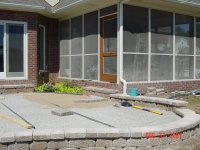
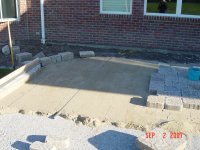
Anyway what things looked like after we layed it out and laid some paint lines down and the obligatory tractor pic. :)
 

Attachments

  • DSC02210.JPG
    DSC02210.JPG
    485.6 KB · Views: 445
  • DSC02211.JPG
    DSC02211.JPG
    485.7 KB · Views: 383
   / New patio project
  • Thread Starter
#2  
Seemed a shame to dig up all that grass I worked so hard to get planted and looking nice, but.........let the excavation begin!
 

Attachments

  • DSC02212.JPG
    DSC02212.JPG
    496.5 KB · Views: 372
  • DSC02216.JPG
    DSC02216.JPG
    483.7 KB · Views: 334
   / New patio project
  • Thread Starter
#3  
Once the grass was all removed it was time to start on the retaining wall to level out the area. We had a really hot and dry summer and it was brutal in the sun. The EZup canopy offered a little relief. :)

Here I've started the lowest coarse of wall stones. Don't pay any attention to elevations in any of these pic's - there are so may curves going on that things look distorted.
 

Attachments

  • DSC02257.JPG
    DSC02257.JPG
    488.9 KB · Views: 351
  • DSC02258.JPG
    DSC02258.JPG
    485.4 KB · Views: 328
   / New patio project
  • Thread Starter
#4  
It's starting to take shape now. I'm leaving an opening in the wall on the right hand (east) side for tractor access to bring in fill and crushed stone later.
 

Attachments

  • DSC02260.JPG
    DSC02260.JPG
    496.4 KB · Views: 333
  • DSC02261.JPG
    DSC02261.JPG
    485.6 KB · Views: 269
  • DSC02265.JPG
    DSC02265.JPG
    494.1 KB · Views: 269
  • DSC02268.JPG
    DSC02268.JPG
    487.9 KB · Views: 250
  • DSC02270.JPG
    DSC02270.JPG
    488.7 KB · Views: 321
   / New patio project
  • Thread Starter
#5  
The wall is pretty much done here except for the open access end, and I've leveled out the existing dirt using my landscape rake. Here's some shots from different angles of the semi-finished wall. I'm using Keystone Country Manor wall stones which is a relatively new product. I chose it because it's finished on both sides. The wall on the left hand side will go up another three courses to provide a small seating wall.
 

Attachments

  • DSC02271.JPG
    DSC02271.JPG
    489.2 KB · Views: 277
  • DSC02272.JPG
    DSC02272.JPG
    488.1 KB · Views: 238
  • DSC02280.JPG
    DSC02280.JPG
    493.8 KB · Views: 228
  • DSC02281.JPG
    DSC02281.JPG
    486.1 KB · Views: 274
   / New patio project
  • Thread Starter
#6  
Next came about 15 yards of crushed stone compacted in 2" lifts.
 

Attachments

  • DSC02283.JPG
    DSC02283.JPG
    487.8 KB · Views: 301
  • DSC02284.JPG
    DSC02284.JPG
    493.3 KB · Views: 266
  • DSC02285.JPG
    DSC02285.JPG
    491.9 KB · Views: 268
  • DSC02295.JPG
    DSC02295.JPG
    487.1 KB · Views: 331
   / New patio project #7  
It's looking great, steveinmo. I'm currently working on a walkway with curves and things and am getting pretty close to the end of the project. Where the walkway meets front door, there's an 8'x8' patio area. Getting the compacted stone among that whole area was very, very challenging and time-consuming. We stayed in the parameters of "no more than 3/8" variance" which was quite frustrating, frankly.

Come next summer, we'll be putting in a patio probably somewhat similar to what you're doing. I cringe at the thought of trying to get that large of an area that perfectly level! How did you do it? It appears that your ground is pretty level to start with, whereas ours is on a hill, but either way, I'm sure your ground isn't all level within 3/8".
 
   / New patio project
  • Thread Starter
#8  
Thanks Ray! :)

It's not as level as it looks in the pic's. From the edge of the house out to the edge of the patio there is about a 2'-0" drop. It's not easy getting it level that's for sure. I say level but flat would be a better word. There is actually about 4" of slope away from the house on the left (west) side.

This slope (for drainage) was somewhat of a problem as there is a door off the screened in porch and also a sliding door out of the kitchen area at ninety degrees to each other. I didn't want as much slope as the surface transitioned past the porch steps.

I basically just used a bunch of strings to get the surface of the compacted stone where I wanted it. It was a pain in the "you know what" stringing all of the lines at the finished elevation, then measuring down from the strings and marking (with spray paint) how much shy it was in each spot, then taking the strings down so I could wheelbarrow in more stone. Whew! I was shooting for no more than 3/8" variation and I think I came pretty close.

In this shot you can see the seating area I mentioned earlier on the left hand side. Also, all of the wall caps are on and I'm ready to start laying pavers.
 

Attachments

  • DSC02314.JPG
    DSC02314.JPG
    485.6 KB · Views: 333
   / New patio project #9  
Steve its like watching HGTV or DIY network:D , looking good.

I will be paying close attention to your thread since I will be doing the same thing in a few months. It just depends on how much fill they do around our new house as to how long I will wait.

David
 
   / New patio project
  • Thread Starter
#10  
Starting to make some progress around the steps. Maybe this will give you an idea of what I meant earlier about the slope around/between the steps. I'm starting at the steps because it's about the only "straight" area of the whole thing and at ninety degrees I wanted to make sure it started right.

I'm using 3/4" EMT conduit as my screed rails.
 

Attachments

  • DSC02316.JPG
    DSC02316.JPG
    486.1 KB · Views: 311
  • DSC02317.JPG
    DSC02317.JPG
    492.6 KB · Views: 283
  • DSC02321.JPG
    DSC02321.JPG
    484.5 KB · Views: 261
  • DSC02323.JPG
    DSC02323.JPG
    500.1 KB · Views: 328
 
Top