As others have said, to adjust the top link you need to raise or lower the 3pt control slightly and slowly while watching for the link to go slack. I don't advocate turning the link when there is a lot of pressure on it. That is a sure fire way to wear it out quickly or even break it. And there is no need. Just use the hydraulics to help you. It doesn't take muscle, just brains.
You are using an out of date browser. It may not display this or other websites correctly.
You should upgrade or use an alternative browser.
You should upgrade or use an alternative browser.
Box Scraper techniques for basic box scraper
- Thread starter WAGIRL
- Start date
/ techniques for basic box scraper
#11
santacruzer
Bronze Member
Hey Wagirl,
Lots of us are new at this so all questions are fair game. That said, when I first started using this board I was not using the "search" part of the forum. When I got that figured out a whole new world opened up!!! There can be, in some cases, much more info that I can get in conjuction with a posted question. Using them both really expands your chances for both answers and other interesting info.
The folks on this board are among the most helpful people I have ever found...so thanks to all of you!!!!
Paul
3RRL
Super Member
- Joined
- Oct 20, 2005
- Messages
- 6,825
- Tractor
- 55HP 4WD KAMA 554 and 4 x 4 Jinma 284
pillar, I might be able to answer a couple of the questions?
But I'm sure there is plenty of advise from the other guys that will help too.
I can adjust the top link shorter or longer, this will control the front to back tilt on the box blade. So, with a short top link, the box blade will dig more when I pull. If I want to smooth, then I should lengthen the top link so that the front of the box blade is higher than the rear?
Yes, you are correct on both counts.
Here are some examples of what you can cut with the box blade.
This is a solid DG (decomposed granite) that is harder than heck. I used my scarifiers to break it up and the used both the FEL bucket and box blade to get material out of it. You can clearly see the difference from the top layer of dirt and then the DG.
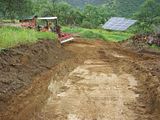
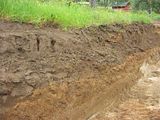
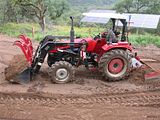
The next adjustment I can make is with the lower links. The links can be adjusted so that one is longer than the other. What would this be used for with the box blade?
The next adjustment I can make is to change the height of my lower links, level, right side lower, or left side lower. This will give a sideways tilt to the box blade. What is this used for?
Both are really handy features when you want to windrow material from one side to the other, like when crowning your road.
With the box blade, since it "captures" the material, you will want to adjust the side links when doing this. Shorten up the side link where the lower link is longer. That picks up that side of the box blade. That will allow some of the material to escape when using that feature. That is how I crown my road and dig gutters. For crowning your road, one side link is only a couple inches shorter than the other. It's important to use your position control so that the box blade, when lowered to the ground, retains that left to right (or visa versa) tilt. If you lower the 3pt all the way, chance are the box will lie flat on the ground. You want only the lower side to cut until you have the contour you want, then you can set the box blade level and it should follow the newly made contour.
These are some photos I've shared before about gutter cutting and some are new.
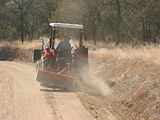
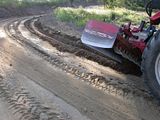
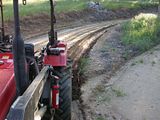
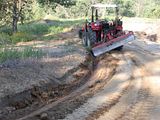
Crowning the road can take many passes because you can't do it all in one pass. Most box blades aren't heavy enough. So you let the lower side cut a little at a time and only 1/3 or 1/2 of your cutting blade is actually contacting the road. If you lowered your rippers on that lower side only (just a little), it would bust up the road a little better and this would work better that way. Then move them back up to smooth. Some guys start on the edge near the gutter and some start near the middle. I start near the middle of the road for my first pass and move to the edge for the second pass. My third pass is again on the edge of the road and by this time, the full width of the tilted blade should be touching and moving material to the middle of the road.
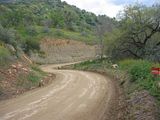
Here are a couple photos of part of my road.
The first one is when the road was first cut and the second one is after I got a nice crown on it several months later in the year.
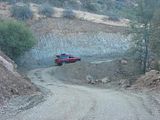
Do you ever just use the box blade completely level? What's the best setup for smoothing? What about for driveway work, crowning, or ditches?
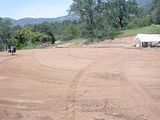
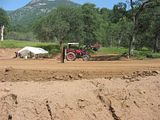
Yes, you use your boxblade completely level for maintenance purposes. I use it like that once I have my road all fixed up ... ruts and pot holes filled and gutters all cut and it's all been compacted and fairly hard now. That's when I set it completely level so the front blade AND rear blade touch at the same time. Then I drag the road like that to smooth it out flat. Some material will ride along with you in the box but that's OK. I also used this setting when build the pads for my home and barn once they were compacted and hardened.
One thing about smoothing.
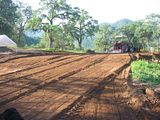
That's when you have the top link long and the box blade rides only on the rear blade. I use this feature on soft material or freshly cut soft material. It helps not only to smooth what you've cut, but also compacts it a little. Once the material gets compacted or hardens up, I use the completely "level" setting as described above.
Does one generally just pull forward with the box blade or alternate between forward/reverse pushing/pulling?
Generally most guys pull the box blade forward. But it is made so you can push in reverse too. This is where you have to be really careful not to bend your lower links since our tractor's links are not set up for a lot of stress pushing on them. They already have the "S" shape and without having them beefed up to take the stress, you will pretzel them.
But pushing or bulldozing in reverse is very handy to move the dirt or material you just accumulated inside the box to it's final resting place. For example, say you finish dragging your road and you are left over with a pile of material on the road. Well, you can "feather" it out or leave it a pile. Turn around and push that pile in reverse to off the side of the road or into a corner or wherever.
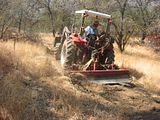
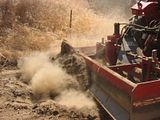
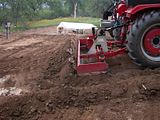
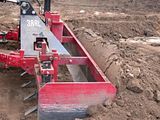
Another example would be say you are cutting gutters by pulling the box blade. What I do is cut my gutters so they exit onto a low area next to the road. Sometimes I can keep driving off the road and curve the gutter out to the field. But sometimes it's a steep drop off. That's when I turn around (reset the side links) and push in reverse continuing the curve of the gutter OFF the road. You get your boxblade behind you and part of it might be in air, but your rear tires ... actually all 4 of them are still on the road and not off the drop off.
Here you can see where I pushed off the road in reverse.
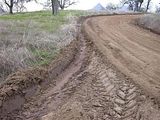
Finally, what about the position/draft controls? Does one pretty much just use position control?
I use position control when the side links are tilted and also to determine or limit the depth of cut. That means when crowing or cutting gutters. Once I have an established compacted and hardened surface of the road, I let the 3pt all the way down into "float" and let the box drag along the surface in the "level" position. Once you have your crown established, the box blade should follow the contour.
If you don't want it to follow the contour like many of the guys want to do when "establishing" a surface, that's when you make it cut, tilt it, use the rippers etc. I know some of these photos were on that thread that Mike pointed out, but some are different ones.
I hope they help.
Rob-
But I'm sure there is plenty of advise from the other guys that will help too.
I can adjust the top link shorter or longer, this will control the front to back tilt on the box blade. So, with a short top link, the box blade will dig more when I pull. If I want to smooth, then I should lengthen the top link so that the front of the box blade is higher than the rear?
Yes, you are correct on both counts.
Here are some examples of what you can cut with the box blade.
This is a solid DG (decomposed granite) that is harder than heck. I used my scarifiers to break it up and the used both the FEL bucket and box blade to get material out of it. You can clearly see the difference from the top layer of dirt and then the DG.


The next adjustment I can make is with the lower links. The links can be adjusted so that one is longer than the other. What would this be used for with the box blade?
The next adjustment I can make is to change the height of my lower links, level, right side lower, or left side lower. This will give a sideways tilt to the box blade. What is this used for?
Both are really handy features when you want to windrow material from one side to the other, like when crowning your road.
With the box blade, since it "captures" the material, you will want to adjust the side links when doing this. Shorten up the side link where the lower link is longer. That picks up that side of the box blade. That will allow some of the material to escape when using that feature. That is how I crown my road and dig gutters. For crowning your road, one side link is only a couple inches shorter than the other. It's important to use your position control so that the box blade, when lowered to the ground, retains that left to right (or visa versa) tilt. If you lower the 3pt all the way, chance are the box will lie flat on the ground. You want only the lower side to cut until you have the contour you want, then you can set the box blade level and it should follow the newly made contour.
These are some photos I've shared before about gutter cutting and some are new.


Crowning the road can take many passes because you can't do it all in one pass. Most box blades aren't heavy enough. So you let the lower side cut a little at a time and only 1/3 or 1/2 of your cutting blade is actually contacting the road. If you lowered your rippers on that lower side only (just a little), it would bust up the road a little better and this would work better that way. Then move them back up to smooth. Some guys start on the edge near the gutter and some start near the middle. I start near the middle of the road for my first pass and move to the edge for the second pass. My third pass is again on the edge of the road and by this time, the full width of the tilted blade should be touching and moving material to the middle of the road.
Here are a couple photos of part of my road.
The first one is when the road was first cut and the second one is after I got a nice crown on it several months later in the year.


Do you ever just use the box blade completely level? What's the best setup for smoothing? What about for driveway work, crowning, or ditches?
Yes, you use your boxblade completely level for maintenance purposes. I use it like that once I have my road all fixed up ... ruts and pot holes filled and gutters all cut and it's all been compacted and fairly hard now. That's when I set it completely level so the front blade AND rear blade touch at the same time. Then I drag the road like that to smooth it out flat. Some material will ride along with you in the box but that's OK. I also used this setting when build the pads for my home and barn once they were compacted and hardened.


One thing about smoothing.
That's when you have the top link long and the box blade rides only on the rear blade. I use this feature on soft material or freshly cut soft material. It helps not only to smooth what you've cut, but also compacts it a little. Once the material gets compacted or hardens up, I use the completely "level" setting as described above.

Does one generally just pull forward with the box blade or alternate between forward/reverse pushing/pulling?
Generally most guys pull the box blade forward. But it is made so you can push in reverse too. This is where you have to be really careful not to bend your lower links since our tractor's links are not set up for a lot of stress pushing on them. They already have the "S" shape and without having them beefed up to take the stress, you will pretzel them.
But pushing or bulldozing in reverse is very handy to move the dirt or material you just accumulated inside the box to it's final resting place. For example, say you finish dragging your road and you are left over with a pile of material on the road. Well, you can "feather" it out or leave it a pile. Turn around and push that pile in reverse to off the side of the road or into a corner or wherever.


Another example would be say you are cutting gutters by pulling the box blade. What I do is cut my gutters so they exit onto a low area next to the road. Sometimes I can keep driving off the road and curve the gutter out to the field. But sometimes it's a steep drop off. That's when I turn around (reset the side links) and push in reverse continuing the curve of the gutter OFF the road. You get your boxblade behind you and part of it might be in air, but your rear tires ... actually all 4 of them are still on the road and not off the drop off.
Here you can see where I pushed off the road in reverse.

Finally, what about the position/draft controls? Does one pretty much just use position control?
I use position control when the side links are tilted and also to determine or limit the depth of cut. That means when crowing or cutting gutters. Once I have an established compacted and hardened surface of the road, I let the 3pt all the way down into "float" and let the box drag along the surface in the "level" position. Once you have your crown established, the box blade should follow the contour.
If you don't want it to follow the contour like many of the guys want to do when "establishing" a surface, that's when you make it cut, tilt it, use the rippers etc. I know some of these photos were on that thread that Mike pointed out, but some are different ones.
I hope they help.
Rob-
piller
Gold Member
3RRL: Thanks very much, excellent information. I will hopefully be trying it out soon.
