piper184
Platinum Member
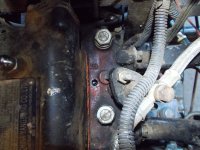
Did you remove the buss bar when you checked resistance? If not you were measuring a parallel circuit and not the individual glow plugs.
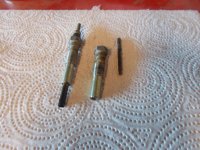
My glow plugs died one at a time, and I watched it happen as the amp draw decreased as each one went open. It is quite possible that you had the same think and it didn't become obvious until the last one burned out.
Since you have battery voltage to the buss bar, there are no issues in the circuit to that point. If it were me, here is what I would do.
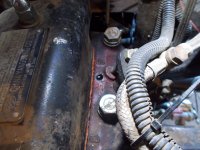
Measure resistance from the negative battery terminal to a good ground point on the engine block. A good clean bold head will do or remove any paint on a spot on the block itself. Bad grounds are the number one cause of electrical issues on any vehicle. As a general maintenance issue it would be a good idea to remove the battery ground cable and clean both ends down to shiny metal as well as the spot on the tractor where it attaches. That way you are sure the problem is not there.
Once you have established a good clean no resistance connection from the battery to the engine test the individual glow plugs for resistance values between the end that attaches to the buss bar and the known good ground point on the engine. Remember, testing from buss bar to ground won't tell you about individual plugs only the total circuit.
I think I have a new glow plug. I will go measure the resistance and get back in a little while.
My glow plugs died one at a time, and I watched it happen as the amp draw decreased as each one went open. It is quite possible that you had the same think and it didn't become obvious until the last one burned out.
Since you have battery voltage to the buss bar, there are no issues in the circuit to that point. If it were me, here is what I would do.
Measure resistance from the negative battery terminal to a good ground point on the engine block. A good clean bold head will do or remove any paint on a spot on the block itself. Bad grounds are the number one cause of electrical issues on any vehicle. As a general maintenance issue it would be a good idea to remove the battery ground cable and clean both ends down to shiny metal as well as the spot on the tractor where it attaches. That way you are sure the problem is not there.
Once you have established a good clean no resistance connection from the battery to the engine test the individual glow plugs for resistance values between the end that attaches to the buss bar and the known good ground point on the engine. Remember, testing from buss bar to ground won't tell you about individual plugs only the total circuit.
I think I have a new glow plug. I will go measure the resistance and get back in a little while.


")
