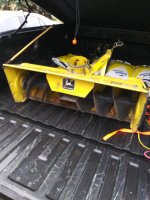
Well some time has passed since my last post. I have been busy though- I scrapped, wire wheeled, welded up the inside of the housing then painted it. I also scrapped, sanded and painted the auger. I had to "fix" a few ding in it and straighten the blades out a bit.
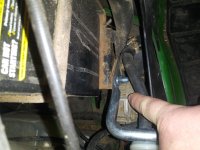
I got the rotating assembly together yesterday. Somethign worthy to note for people in the future that may find this thread, the drive dog fits loose to the shaft. The drive dog has "pads" cast into the hole that the sahft passes thru. The shaft is 1018 CRS 1" diameter, so it comes in the door .002-.003" smaller than 1". What happens is the drive dog will wear into the shaft a little bit, pushing material making it not round. So the entire shaft can not pass thru the bearings without a fair amount of sanding. I opted not to sand, so I just assembled it differently. Note I ended up using the stock "Fafnir" shaft collars with set screws as there is a counterbore to fit the bearings sleeve into (more on that next). To assemble I put the saft into the auger, key onto drive dog end, slide drive dog in. Loosely assembled drive dog side bearing (not the belt side). Slid it all in then I did the belt side bearing. This is where it got tricky as it kept binding up. After multiple attempts (and many colorful words) of tring to rotate the eccentric bearings I discovered the real issue. The bearings sleeve wasnt sliding into the shaft collar fully. So to fix this I put the first bearing plate on, assembled sleeve to bearing, inserted onto shaft and followed up with the extiror bearing plate. Everything worked out well then. Spun freely without much drag. I did notive the auger is a bit loose to the shaft so it moved and makes some noise.
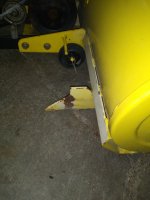
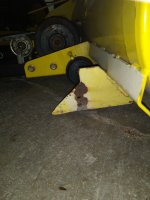
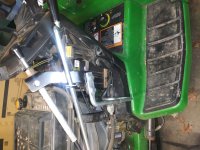
My thrower didnt have the wear plate M142891 instsalled ever. I did not like the $43.75 price tag. Instead I used conveyor belting, McMaster Carr #6001K4 10" Wide and 1 FT lg. I cut down the length as required and used Marine Shoe Goop 1 full large tub to stick it down. Followed up with the two 1/4" carriage bolts on the wear strip and the one large carriage bolt in the upper rear center. FOr the flapper portion I used 4" wide 4 plat flat belting, McMaster Carr #5753K433. I fit to the high spot the best I could, marked holed and drilled. I used (4) 3/8"X1" LG bolts with a flat washer on both side and distorted thread locking nuts (not the nylon junk ones) so they will not fling off. Then I freely rotated it and used my dremel with sanding drum to make it as close to perfect as possible.
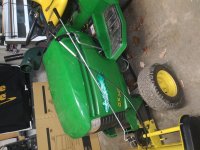
Then came the install onto my JD GX345. The previous owner had it on a manual lift, so the setup was way off for me. I had to used (3) washer per side on my mounting lugs on the tractor to get more room for this unit to latch on. The next issue is the holes where the U hangers attach to provie the lift are not on center with my lift arms. Its close enough it can work but the bolts are on a slight angle which I dont like. Next I had to goto 1 3" LG bolt to get any threads in, and that is even to short.
Functionally it works! I have to replace the chute hinge and get the rod to tie back to the tractor, but otherwise it works.
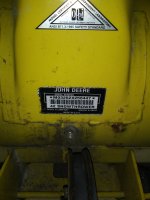
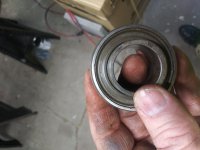
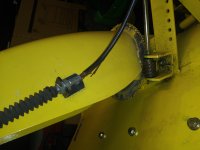
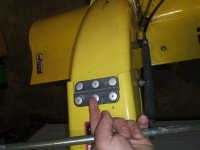
Attached are some pictures someone in the future may find helpful. The BRG# is clearly shown on the one picture so you can source it anywhere.