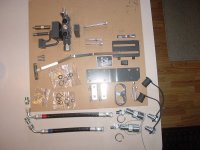
I got the remote valve installed without much trouble and it seems to be functioning properly although I won't know for sure until I hook something up to it. I'd like to have a hydraulic top link on my tractor in the next few weeks.
Some notes:
The dealer that ordered the kits for me said I should not have to remove the rear wheel to do this install. That may be true but I went ahead and removed it and I'm glad I did. Having to reach in from behind the tractor would not have gone well for me. Removing the wheel/tire gave me straight-on access to the area I was working on. The only downside was having to get the loaded tire back on the studs.
The instructions say to apply grease to the o-rings that get sandwiched between the three main parts of the valve assembly. The dealer said that any kind of grease will do and the only reason for it is to keep the o-rings from falling away or shifting when putting the pieces together. However, the parts that required o-rings (items 1, 2 and 3 in the first picture) were shipped in plastic wrap and were quite oily. Just the oily film was enough to keep the rings in place.
Bolt the three valve components together, and the whole unit is ready to be mounted to the tractor.

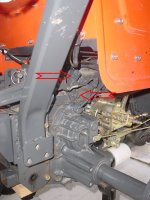
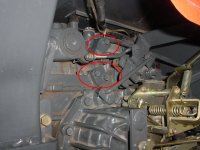
The remote hydraulic ports on the
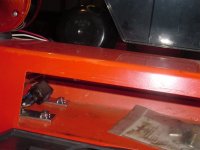
B3030 are capped off in two different spots, shown in the next two pictures. The upper cap is a rectangular plate with one bolt holding it. I removed the plate as well as a rubber plug that the plate was covering. This plugged hole is where the return pipe coming from the valve assembly goes to. The bolt hole is used to accept a long threaded stud that runs through the entire width of the valve assembly. The original bolt, plate and rubber plug are no longer needed.
The other ports are covered with a diamond-shaped cover - held on by two bolts. Underneath is an oblong-shaped o-ring. The bolts, cover and o-ring get removed and are no longer needed. The portion of the valve with the two rounded pipes (item 1 in the previous picture) goes in its place using the kit's bolts and o-rings. These two bolts and the longer threaded stud hold the whole thing in place. The return pipe does not provide any support - it just shoves into the holes on the valve end and the tractor end. Each end gets an o-ring. There was a small amount of fluid loss before I got the assembly mounted - just a few drops on the floor plus whatever else oozed out but never made it to the floor.
The hoses and hose fittings went on next. The two hoses have slightly different lengths and the fittings are also slightly different between the two hose sets.
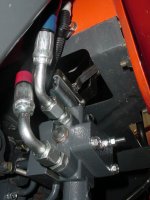
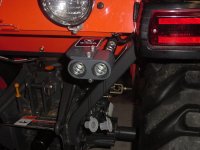
The couplers mount to a bracket that gets bolted onto the underside of the tool box. Getting the bracket secured was a little cumbersome because I had to reach through the toolbox with my right hand while trying to feed the bolts up though the bottom from around back with my left hand. A second person would have come in handy here.
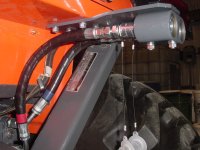
The quick-disconnect couplers are held into the rounded housing with "Cir-clips". These were difficult for me to get in and may be next to impossible to remove without the proper tool or without scratching the heck out of the housing. I'm sure there is a Cir-clip remover tool out there somewhere.
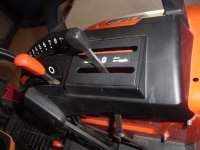
The new lever guide replaces the blank that was there and has a longer slot on the outer side (valve 2). Apparently, a second remote valve can have the float feature with a forward locking detent position, hence the longer slot. The first valve cannot have float if using these factory kits.
When I started up the tractor and checked for leaks everything was fine. However when I operated the valve I had a serious leak near the tail end of one of the hoses - just before the quick-disconnect. It turns out I forgot to tighten one of the connections beyond finger tight and made a bit of a mess. My suggestion - test everything out under pressure BEFORE securing the quick-disconnects into place with the cir-clips. Fortunately that is what I did and I was able to fully tighten the fitting without having to remove the clips.
The end result is a factory-look remote and lever addition. I was not happy with the price but I went with the kits because they are tailor-made for the
B3030 (or
B2630 or
B3000). The alternative is to try to piece together all the piping and valve parts, most likely mounted somewhere on the exterior of the tractor rather than under the fender. For me it would have meant having a shop do the work for me, plus having someone trailer the tractor to and from the shop. It may have actually turned out cheaper going this route.
I'm now on to shopping for my hydraulic top link.
