Berniep
Platinum Member
One of my winter projects for the last few winters has been a waste oil burner.
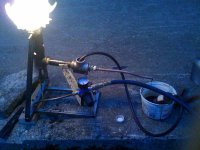
I started with a standard mother earth news type drip design scaled down but never really got a clean burn. Then I happened upon the Babington ball stetup and tried for a while with that and a vertical version where the jet is submerged just under the oil. Basically a babbington setup uses one or more very small holes(one ten thousandth) in a sphere then oil is pumped over the ball and air is forced out the hole. When it is running right this will form a fog of oil that burns very well. Unfortunately variations in oil delivery and temperature seem to make it hard to make stable. I never really got it to where I wanted it. The vertical setup uses a jet submerged just under the surface of the oil to atomize the oil. Here is my experiment with that.
Please excuse the grainy cell phone pics but that I always have my cell phone with me but hardly ever the camera.

I never got it stable.I think a bigger pool of oil would help to stabilize the oil depth over the jet.
I had been fooling around with more drip and forced air setups when Letsroll posted his build. Here is a link to it.
I think the success of his setup is the high heat in the burner chamber. Plus the flow regulator valve.
Regulating the air and fuel is vital to getting a clean burn.
If you don't get a clean burn you can soot your exhaust closed very quickly.
I really wasn't sure what kind of valve to get and ran across a metering pump on ebay, with a max output of 24 gallons per day, I figured it would be perfect. It has a high speed and a low speed. High speed is about 2 strokes per second and low is about 1, and the stroke is adjustable via a dial. I don't know if these things are meant for continuous use but I will find out. I already had a small squirrel cage type fan from my earlier experiments and used a regular ceiling fan control to regulate it.
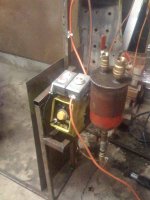
Here is the pump and control setup. along with the oil tank(made from and old fire extinguisher that was going to be a water separator but I decided to use it as the main tank.

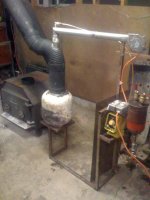
Here is the whole setup

I started with a standard mother earth news type drip design scaled down but never really got a clean burn. Then I happened upon the Babington ball stetup and tried for a while with that and a vertical version where the jet is submerged just under the oil. Basically a babbington setup uses one or more very small holes(one ten thousandth) in a sphere then oil is pumped over the ball and air is forced out the hole. When it is running right this will form a fog of oil that burns very well. Unfortunately variations in oil delivery and temperature seem to make it hard to make stable. I never really got it to where I wanted it. The vertical setup uses a jet submerged just under the surface of the oil to atomize the oil. Here is my experiment with that.
Please excuse the grainy cell phone pics but that I always have my cell phone with me but hardly ever the camera.

I never got it stable.I think a bigger pool of oil would help to stabilize the oil depth over the jet.
I had been fooling around with more drip and forced air setups when Letsroll posted his build. Here is a link to it.
I think the success of his setup is the high heat in the burner chamber. Plus the flow regulator valve.
Regulating the air and fuel is vital to getting a clean burn.
If you don't get a clean burn you can soot your exhaust closed very quickly.
I really wasn't sure what kind of valve to get and ran across a metering pump on ebay, with a max output of 24 gallons per day, I figured it would be perfect. It has a high speed and a low speed. High speed is about 2 strokes per second and low is about 1, and the stroke is adjustable via a dial. I don't know if these things are meant for continuous use but I will find out. I already had a small squirrel cage type fan from my earlier experiments and used a regular ceiling fan control to regulate it.
Here is the pump and control setup. along with the oil tank(made from and old fire extinguisher that was going to be a water separator but I decided to use it as the main tank.

Here is the whole setup


