BigBoyToys
Gold Member
After building this 6' Dethatcher last fall, it was too aggressive for the yard lawn. Works great for the field and such, so I decided to build a toned-down version to use with the zero-turn.
Here's the HD one I built first with the removable 3 pt hitch setup using a standard 2" receiver...
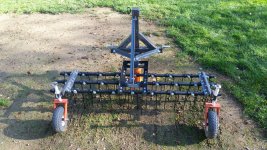
First thing was to fine the proper tines to use. I located these for a good price... Lawn Tractor Dethatcher Attachment Spring Tine | Part Number 46761
| Sears PartsDirect
I decided to make it 60" which is a good size to pull behind the Bad Boy mower. I spaced the tines properly and mounted the first one, and then realized that it wasn't sitting at 90* to the angle stock when sitting flat. So I ended up taking 2" pieces of angle and "flattened" them slightly on my press to increase the angle from 90* to around 110*. I welded them to the bars where the cross-member supports will be welded.
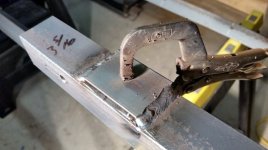
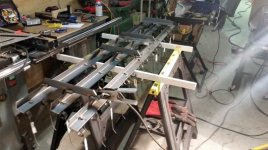
Once the 4 cross-members were welded, I then welded two 2" x 3/16" plates between the center cross-members to attached the square tubing to for the main mount to the mower.
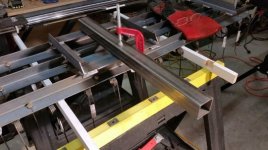
I decided to use a piece of angle to insert into the tube to make the mounting bracket/pin assembly. This way if i wanted to use this lighter duty dethatcher with the universal 3 pt hitch mount, all I have to do is insert the tubing it into the 2" receiver.
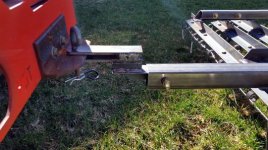
Universal 3 pt mount for the HD Dethatcher.

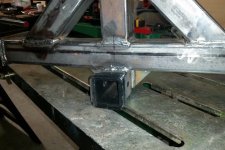

Next was to fab up some guide wheels. I picked up a couple tires at Tractor Supply that looked like they would be the right size.
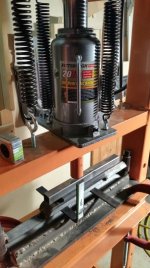
I used some 1" flat bar and bent a "U" and welded some 5/8" round bar to them. I cut a 45* angle in the bar to have the wheels "follow behind" to track properly. This is the same approach I used when I built my York Rake. I used PVC spacers to adjust the height. I went tall just in case I wanted to lift it high enough to have the tines off the ground to transport it. The press is a Harbor Freight 20 Ton Press with an air jack. I fabed a bending press years ago when doing some fabrication work on the Jeep. When bending the second angle in the bracket, I had to offset it to clear the press arm. I had to use another piece of steel to balance out the pressure keeping the press bending arm level.
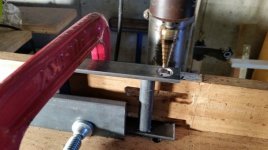
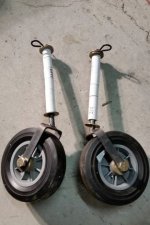
I used some square tubing to attach the guide wheels to. They are bolted in place to the outer most cross-members.
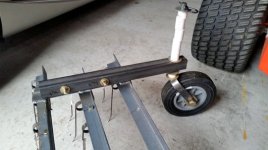
Now with it complete, it was time to put it to the test...
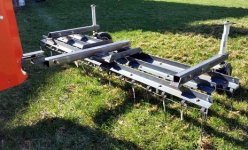
WORKED LIKE A CHAMP!!!
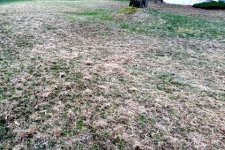
Really happy with how it came out and it only took around 5 to 6 hours to fabricate.
Here's the HD one I built first with the removable 3 pt hitch setup using a standard 2" receiver...

First thing was to fine the proper tines to use. I located these for a good price... Lawn Tractor Dethatcher Attachment Spring Tine | Part Number 46761
| Sears PartsDirect
I decided to make it 60" which is a good size to pull behind the Bad Boy mower. I spaced the tines properly and mounted the first one, and then realized that it wasn't sitting at 90* to the angle stock when sitting flat. So I ended up taking 2" pieces of angle and "flattened" them slightly on my press to increase the angle from 90* to around 110*. I welded them to the bars where the cross-member supports will be welded.


Once the 4 cross-members were welded, I then welded two 2" x 3/16" plates between the center cross-members to attached the square tubing to for the main mount to the mower.

I decided to use a piece of angle to insert into the tube to make the mounting bracket/pin assembly. This way if i wanted to use this lighter duty dethatcher with the universal 3 pt hitch mount, all I have to do is insert the tubing it into the 2" receiver.

Universal 3 pt mount for the HD Dethatcher.


Next was to fab up some guide wheels. I picked up a couple tires at Tractor Supply that looked like they would be the right size.
I used some 1" flat bar and bent a "U" and welded some 5/8" round bar to them. I cut a 45* angle in the bar to have the wheels "follow behind" to track properly. This is the same approach I used when I built my York Rake. I used PVC spacers to adjust the height. I went tall just in case I wanted to lift it high enough to have the tines off the ground to transport it. The press is a Harbor Freight 20 Ton Press with an air jack. I fabed a bending press years ago when doing some fabrication work on the Jeep. When bending the second angle in the bracket, I had to offset it to clear the press arm. I had to use another piece of steel to balance out the pressure keeping the press bending arm level.


I used some square tubing to attach the guide wheels to. They are bolted in place to the outer most cross-members.

Now with it complete, it was time to put it to the test...

WORKED LIKE A CHAMP!!!

Really happy with how it came out and it only took around 5 to 6 hours to fabricate.
