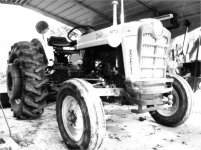
Fuel Petcock leaking 861D

   / Fuel Petcock leaking 861D #1  

MitchellB

Gold Member
Joined
Jul 22, 2012
Messages
384
Location
Greensboro, NC
Tractor
1958 861D Ford Powermaster Diesel & 2016 Husqvarna YTA24V48
My diesel fuel tank petcock has been leaking under my '58 861D Ford. It wasn't too bad at first, just a little drip every 15-20 minutes and then only when it was opened. However this last time I used the tractor it has gotten so bad that it is time to fix it. It does not leak when turned off, only when the fuel is on, so I don't believe I need to remove the valve case from the tractor. In addition, I have added two inline fuel shut offs. One between the fuel pump and fuel filter, and the other cut-off on the return fuel line. Once I repair the main petcock, I will just leave it open all the time and use these other two inline shut-offs to stop the fuel flow to the pump.

I've read online about how it is just an O-ring that needs to be replaced on the shaft of the screw that is turned in/out with a screwdriver that control the fuel flow. It seems to be a pin in the housing that keeps the flow screw from backing all the way out. I found one online site that the guy tapped the hole and replaced the pin with a small machine screw after prying the old pin out with a sharp knife edge. Tapping the hole for a screw looks like it would involve removing the tank. I'm looking to keep the tank and hood in place for a quick/easier fix if that is possible.

My question is: How is that pin held in place, friction or adhesive?
What's the best way to remove it?
And, how do I reinsert it and keep it from falling back out once the leaking O-ring is replaced?

Thanks
 
   / Fuel Petcock leaking 861D #2  
QUESTION.. why are you adverse to removing the fuel petcock to repair or replace it?

2 screws hold the valve to the bottom of the tank.

just undo the line and remove the screws, AFTER you have drained the tank, then remove the valve.


it is a tight fit, but the valve can be cocked at a slight angle, slid out and down besde the valve cover, then straightened up to get the filter out the hole.. then you can work on it.

the 'pin' is a drive rivit. it prys out with a chissle edge.

people tap the hole for a small machine screw to make it easier to service 'the next time'.

While there are a couple valve types, usually it is just an oring on the stem you can get in a multi kit. same for the one under the tank and fuel valve. sure there is a cnh specific oring, but i have found ones from a universal kit can be made to work fine.

remember, when you pull the valve, you will still have some fuel in the tank, so part lopsided, with the left of the tractor downhill, and the right side uphill. this will keep fuel from pouring out.

now.. if you are oringing it and not using it, you could also simply pull it , celan it, and then epoxy seal it open as a place holder, but I would just oring repair it.

I've written an article in the Ford N-News magazine on this very topic, R&R of the valve.
 
   / Fuel Petcock leaking 861D #3  
if you email me, i'll send you a series of pics showing the valve coming out . I used my 1963 4000 as a test case. it's a gasser, but the procedure is functionally the same. same pics i used in the article.

i'll pm you my email address
 
   / Fuel Petcock leaking 861D
  • Thread Starter
#4  
Thanks, I'd love to see your pictures of how to fix the valve & PMed you a message. I had found some pics online with the thread tap idea to replace the pin.

'55-'64 Fuel Valve Repair - Yesterday's Tractors

I was not sure if the entire valve would come out of the tank without removing the tank or valve cover, so I thought I'd see about just pulling out just the adjustment screw and leaving everything else in place if possible, but removing the entire valve would make it easier to work on. It sounds pretty simple if the valve come out easily.

Thanks.
 
   / Fuel Petcock leaking 861D #5  
pics and a pdf is on it's way to you, the pdf explains how to remove the valve with the tank and hood in place. the pics will illustrate what the text tells you.

from there you will have the valv ein hand as as you have heard, it is a simple matter of prying out the drive rivit , unscrewing stem, cleaning, re-oring, then tap the hole for a small screw, or even drive the old rivit back in in a slightly different position, replacing oring on valve top where it bolts to tank, clean tank bottom, reinstall, hookup fuel line and go.
 
   / Fuel Petcock leaking 861D
  • Thread Starter
#6  
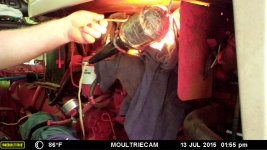
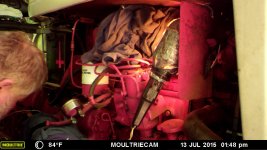
Whew! Such a simple repair that due to the location was a PITA, but I got 'er done. Draining the almost full tank took a while. The screws holding the valve to the tank on mine was slotted screws for a flat blade screwdriver. They were a pain to take out and reinstall with my little bent right angle screwdriver. Then the fuel line fitting was also a pain to get loose. No room to turn a wrench. So I waited until I had the valve loose before I could get my wrench on the fuel line. The pin did not pop out either. I had to drill out the pin, but it was soft aluminum and easy to drill. I tapped the hole and replaced the pin with a screw. Replaced the O-rings and goopped some RTV on the threads as insurance leaving the screw in the open position as the inline shut-off valve I installed earlier is easier to get to and use. By this time thunder-boomers and hail were coming down all around me under my little metal carport cover I was working under. I can't say putting the valve back on the tank was any easier than taking it off. I just got big hands and had to get some help from my wife to reach in between the valve cover and tank to get the mounting screws started.
MFDC0231.jpg
MFDC0248.jpg
MFDC0434.jpg
MFDC0619.JPG
 

Attachments

  • MFDC0238.jpg
    MFDC0238.jpg
    248.5 KB · Views: 473
   / Fuel Petcock leaking 861D #7  
yup, the mounting screws are a pita.

and the 2" clearance from valve cover to tank leaves little room for big hands or tools.

the line wrenches, i happen to have a flair wrench set that makes it a little easier.
 
   / Fuel Petcock leaking 861D
  • Thread Starter
#8  
yup, the mounting screws are a pita.

and the 2" clearance from valve cover to tank leaves little room for big hands or tools.

the line wrenches, i happen to have a flair wrench set that makes it a little easier.

Thanks again for the pics & tips. I got a set of line wrenches, but the only way I could tighten the fuel line fitting was with a 7/16" crowfoot wrench on an 3/8 extension & shorty ratchet; and then it took three hands to hold it all in place to turn. On mine, there was not enough room between the bottom of the fuel tank and the top of the fitting for my wrench to fit unless I ground the sides of the wrench off or bent the end in a 90. With the crowfoot, I could come at the fitting from underneath. The ideal time to fix this would have been when I had the fuel tank off last fall, but I never suspected the valve to start leaking so soon and so bad back then. Ford seems to love O-ring seals.
MFDC0189.jpg
I have just turn my first 10 hours on my proof meter since I had the engine apart last fall, so I'm still getting accustomed to all it's design flaws, other worn parts, peculiarities and pampering needs. On the plus side, I still prefer my 861D over my old 8N, but they both seem about as maintenance needy as the other one. I work on them more than I use them, but they didn't cost me much either compared to a comparable new tractor expense. It seems I'm paying the difference with my wrench time, but I work cheap too :)
12-7-14_DIESEL decal 4_FotoSketcher.jpg
 
   / Fuel Petcock leaking 861D #9  
yup, i hear ya.

i have a set of stubby wrenches, and a few with the open end at a hard angle.. helps out alot
 

Tractor & Equipment Auctions

UNUSED JCT HYD AUGER (A51248)
UNUSED JCT HYD...
2012 CHEVROLET SILVERADO SINGLE CAB TRUCK (A51406)
2012 CHEVROLET...
2011 Jeep Wrangler (A51694)
2011 Jeep Wrangler...
2021 KOMATSU D39PX-24 CRAWLER DOZER (A51246)
2021 KOMATSU...
2008 Chevrolet Malibu Sedan (A51694)
2008 Chevrolet...
2006 Magnolia Dry Fertilizer Tender Trailer - Dual Stainless Compartments, Hydraulic Doors (A53472)
2006 Magnolia Dry...
 
Top