FYI about painting with spray bombs

   / FYI about painting with spray bombs #1  

Smoody

Platinum Member
Joined
May 30, 2008
Messages
632
Location
South Carolina
Tractor
YM226D
I have researched this prior and read mixed reviews about the quality of a spray can paint job. I am in no way implying that this method is anywhere near as good as a good automotive paint, however those on a shoe string budget with a rusted tractor that really don't care to have a "show room" finish I thought I would share my experiences. I have not completed my project as I was skeptical, I painted one fender on my yanmar and it turned out great, I will post photos soon.

Material Used:

Rust-o-leum Heavy rust Primer - Brown
Rust-o-leum Automotive Wet/Dry Sand Primer - Grey
Rust-o-leum Professional Series Enamel - Regal Red - Gloss
Rust-o-leum Professional Clear Coat Enamel - Gloss

1st, I sanded all rusted areas down to the bare metal and put 3 coats of Rust-o-leum Heavy Rust primer on the area, waited to let dry, sanded.

2nd, I scuffed the original paint up a bit using 80 grit and cleaned entire fender using simple green degreaser.

3rd, I sprayed 3 coats of the automotive wet/dry primer, then sanded the entire area using 600 grit sandpaper between each coat! very important.

4th, I sprayed 1 really light coat of the regal red and let dry, sanded with 800 grit and applied 2nd coat at medium coverage, let dry then sanded again with 800 grit, finally I finished the 3rd coat at medium/heavy coverage and let dry.

5th, I waited 48 hours for the base coat to cure and then applied 4 coats of the clearcoat finish.

I have to say this thing looks great, extemely shiny. I don't know how well it will resist fading I guess time will tell. I do however believe you can achieve great results if your patient and put in the proper prep work, which is 90% of the outcome.

Caution - Please wear proper safety equipment and work in a well ventilated area! I am not sure but I bet the original yanmar paint was a lead base and sanding that will release lead into the air and it can cause all sorts of lung issues even resulting in death.

TIP
Follow Manufacturer recoat times and use the same brand as it may chemical react with others.


I am not a professional so results may vary! I just seen alot of topics on this and thought I would share my own personal experience.
 
   / FYI about painting with spray bombs #2  
Sounds like a great job. Looking forward to photos. What info do you have on matching the Yanmar red. Mine is a 1996 Jap tractor AF33
 
   / FYI about painting with spray bombs
  • Thread Starter
#3  
Stirling Wine said:
Sounds like a great job. Looking forward to photos. What info do you have on matching the Yanmar red. Mine is a 1996 Jap tractor AF33


Im not familiar with that model, but I really didnt care to much to get the exact color, I dont think they have it. I read Massey Ferguson Red is close, but Regal Red was close to Massey Red so I bought it, I like it better then the red/orange anyway. Good luck
 
   / FYI about painting with spray bombs #4  
Sounds like you did a great job.

I painted the wheels on my bota using rattle cans and they turned out great. You're right, preparation is the key to a good finish.
 
   / FYI about painting with spray bombs #5  
I made a good living painting cars for 30 years, and have some suggestions, if your interested, on improving your "system."

Step 2: 80 grit is much too coarse. This will guarantee sand scratch swelling in the future, as the finish expands and contracts, in the sun. Scuffing for adhesion mostly requires only "dulling" the finish. In automotive refinishing, when hand sanding, 500 grit or a grey Scotch Brite pad is more commonly used here. Even if you only go up to 320 or 400 and a red Scotch Brite pad, it would be a great improvement. If coarser paper is used to remove defects, you should never use anything coarser than necessary, any work up to finer paper removing the scratches from the last grit as you go up.

Step: 3 If your applying the primer properly, under normal conditions, there is no need to sand between coats. Do allow a good amount of "flash time" in humid conditions, as the evaporation of solvents, will cool the surface, and can cause some condensation to form. allow this to dry before the next coat. Sand the last coat with 500 grit, (if by hand).

If all the sanding is because the coats of primer are going on dry and or rough, it is important to address this issue for good adhesion. Using a slower drying product, or working in cooler temperatures, (early morning or at night), can work.

Step: 4 Try to apply the paint so that you don't have to sand it at all. worst case, you only have to sand the last coat. Sand with 600 grit, (by hand).

If your using a sander such as a "DA" you can generally use paper 2 grits coarser when finish sanding.

These changes can not only save you time, and money, they will result in a better job in the end.
 
   / FYI about painting with spray bombs
  • Thread Starter
#6  
ray66, thanks for the input, I will keep those in mind..

I used 80 grit because the rust was extremely bad in the areas sanded, on the OK areas I did not apply to much pressure, just scuffed it.

Reason for the sanding between primer coats was for the reason you mentioned and thanks for the tip .

"Step: 4 Try to apply the paint so that you don't have to sand it at all. worst case, you only have to sand the last coat. Sand with 600 grit, (by hand). "

This confuses me a bit, why would I sand my finish coat at all?


Also if you don't mind what are your thoughts on the quality of spray cans? you think they can be just as effective if applied properly?
 
   / FYI about painting with spray bombs #7  
I just started painting my Oshkosh yesterday, some of it with bombs.

The best thing I found, change the nozzle on the can to a nozzle from a brake clean can. You can shoot an entire can in under 2 minutes and it covers great. Not recommended for the finer finish areas, but to bomb a frame it works great!
 
   / FYI about painting with spray bombs #8  
May be common knowledge but one tip I came across recently for spray cans...
Always turn the can upside down and "waste" some propellant to clear out the nozzle between coats.
A clogged nozzle is surefire way to ruin a paint job.
 
   / FYI about painting with spray bombs #9  
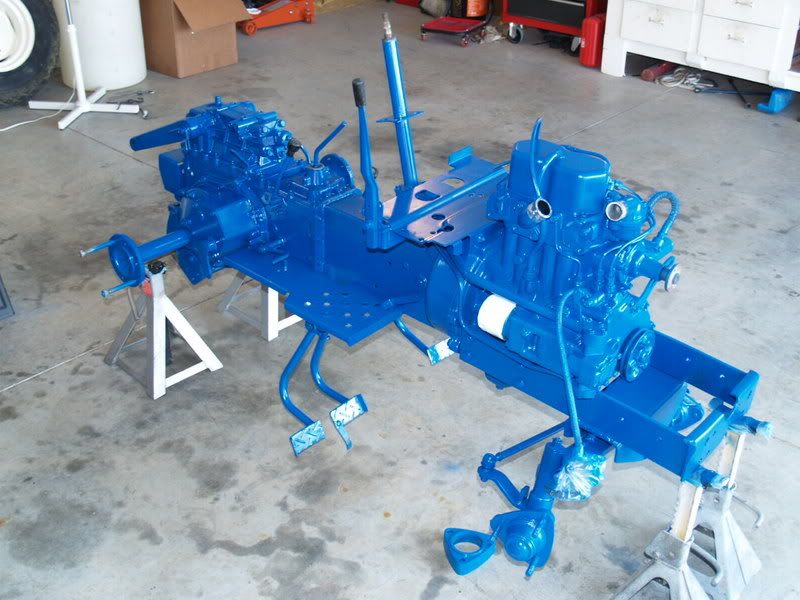
I used spray can paint on my entire tractor frame/chassis but would recommend if you want to use spray cans on sheet metal that PREP is the main thing. I have done small pieces of sheet metal but went with normal automotive paint on this one for the sheet metal. I have painted Jeep sheet metal and used 3 coats of auto primer(sand between each coat) 4-5 light coats of color and 3 coats of clear. All out of a can and was about 90% close to an average job. It does take a LOT more prep time than conventional spraying.

aquarium031508095.jpg

muletractor060908012.jpg


Bill
 
   / FYI about painting with spray bombs #10  
Smoody said:
ray66, thanks for the input, I will keep those in mind..

I used 80 grit because the rust was extremely bad in the areas sanded, on the OK areas I did not apply to much pressure, just scuffed it.

Reason for the sanding between primer coats was for the reason you mentioned and thanks for the tip .

"Step: 4 Try to apply the paint so that you don't have to sand it at all. worst case, you only have to sand the last coat. Sand with 600 grit, (by hand). "

This confuses me a bit, why would I sand my finish coat at all?

Only sand the last coat of primer!;)
 

Tractor & Equipment Auctions

GENERATOR HOUSE POEWERED BY TWIN 12.7 DETROITS (A50854)
GENERATOR HOUSE...
2014 UTILITY 53X102 DRY VAN TRAILER (A50046)
2014 UTILITY...
Lift station Pumps (A49461)
Lift station Pumps...
Vermeer SC802 (A50322)
2003 Ford F-650 Flatbed Truck, VIN # 3FDNW65243MB03484 (A48836)
2003 Ford F-650...
2019 Isuzu NPR-HD 24ft. Box Truck (A50323)
2019 Isuzu NPR-HD...
 
Top