Hobart Stickmate LX235 welder

   / Hobart Stickmate LX235 welder #11  
Enjoy your new welder.

I just bought the same recently for about the same $.

If you don't have the house circuit for the welder, don't forget to budget for that too.

Today is the first day I hope to do something with my new welder. (if the rain holds off)
 
   / Hobart Stickmate LX235 welder
  • Thread Starter
#12  
DavidVT thanks!

I just picked it up today and everything looks as it was described to me. I got two pairs of gloves in really good shape, a really nice looking jacket that fits me well, enough rods to keep me going for a while.

I also ran into some great deals at the local Princess Auto store. Found a steel welding cart on clearance for $12.50, bunch of clamps for a good price, 25ft welding extension cord for $25 and some magnets, an extra chepo 4" angle grinder and a wire wheel. Anything else I am missing to get started?

Also picked up a DVD on SMAW fundamentals.

Need to start getting stuff together to install the 230V circuit in my shop. I noticed today at the hardware store that Siemens breakers for my panel only come in 40A and 60A?? The manual calls for a 50A breaker. I'm guessing that I'll just be safe and go with 40A and it might limit the upper end that I can operate at a bit. What do you think?
 
   / Hobart Stickmate LX235 welder #13  
Sounds like your all set. Gotta love P Auto for the deals. I'd use the 60A breaker and size your wire accordingly, 6/2 should be plenty as you'll likely never come close to the full 60A. The breaker is there to protect the wire, not the machine. Best of luck and practice practice practice.
 
   / Hobart Stickmate LX235 welder
  • Thread Starter
#14  
Scooby, you might be able to help me with this. I looked around at Lowes for 4 wire cable that would be able to handle the load but could not come up with any. By 6/2, are you suggesting that I should run two lengths of 6 guage wire to the receptacle?

I've got to try to figure out exactly how to wire a 230 V outlet among other things :)
 
   / Hobart Stickmate LX235 welder #15  
Well, your going to need a welder receptacle, your breaker, a length of cable, a couple of box connectors (CI806 or equivalent) and some cable staples to get going.

If you go to HD or lowes and you ask for x feet of 6/2 they'll give you a length of cable that has 2 coloured (hot) wires and a ground. It will be 6 gauge.
It will look similar to dryer cable but be missing a neutral (White).

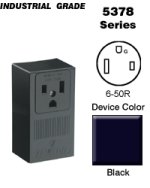
Welder receptacles can be purchased at P Auto or HD. It will look like a single very large 120V receptrical.Its "official" name is NEMA 6-50R. Your welder should have the male version already on the cord leading to the machine. If not these can be purchased too.

The thing to do first is shut off your MAIN breaker. Don't take chances with electricity!

Remove the cover off your panel. Find a free location inside the panel and insert your new breaker. Look on the side of the panel for a Knockout you can use to install the box connector into. Make sure this KO is in the area of the breakers, and not where your mains com into the panel.You'll need to find one of the larger KO's that will allow the box connector to seat. Install the nut onto the connector and tighten.

Strip the outer jacket off your wire, insert into the connector and tighten down the connector. Strip the conductors and insert one into each side of the breaker. Insert the ground into the ground bar on the outside edge of the panel ( look for the other bare wires).

Run the wire down the inside of the wall and staple if possible. Knock out the hole in the receptacle. Install the box connector. Strip off the outer jacket and run the conductors to the "right and left"terminals in the recept. Hook up the ground to the bottom green screw.Tighten the box conn. Attach the recep to the wall.

Reinstall the cover on your panel, turn on the main and welder breaker and you should be in business.

If you have any questions have a ELECTRICIAN install this for you! No warranty is expressed or implied. Best of luck! Be Careful!
 

Attachments

  • cd-5378.jpg
    cd-5378.jpg
    23 KB · Views: 228
   / Hobart Stickmate LX235 welder #16  
This is how I wired mine for use just outside my basement (under cover):

I had a new subpanel from a project that never came to be. I decided to include that in this project so I can have a breaker for lights and a grinder.
New 50 amp breaker for the main and another for the subpanel. I have small breakers in the original subpanel so I will not add that cost here.
New 40' of #6 SCR (main to sub, sub to outlet. it has an extra conductor for the neutral of the 120 circuits.) Aluminum wire cable.
New 50' #10 extension cord from HD.
New 50amp plug and socket to adapt the extension cord.
New 10 clamps to mount the #6 SCR to the basement ceiling.
New 4 3/4" bulkhead clamps for the #6 SCR to both panels and the wall socket.

As this subpanel will be in a sometimes moist area (large below grade basement entryway) I will mount it and the 50amp socket in a recycled weathertight fiberglass panel that is large enough to hold the #10 extension cord coiled up for storage.

The #6 SCR was very reasonable at about $1 per foot. I could have bought #6 SEU at $.75/foot but wanted that neutral for 120v circuits. An electrician at work talked me out of running #10 from the main to the subpanel, despite the duty cycle argument. That #6 SCR is aluminum and was cheaper than the #10 extension cord from HD. The #10 extension cord will be used from the exterior subpanel to the work area which this summer will be primarily outside in the gravel driveway.

----
Notes after the installation:
1 My electrician friend told me that if he did the job he would have had to add a 'main' breaker to the subpanel since it is beyond line of sight to the main panel that is feeding it. That simply means an additional 50amp breaker in the subpanel with the #6 entering it rather than the top feed posts.
2 He was also concerned that none of the breakers were GFI. I will probably change the subpanel's two 120v breakers to GFI breakers since this is outside the house and could see some moisture. I don't see the point of a GFI on the 50amp welder breaker since the neutral is not being used for the welder. Any other electricians have an opinion on that one? No interest in frying myself but not clear on how the welder would be protected by a GFI??
2 I scored a cord end female socket for the #10 extension cord so I don't have to kludge a wall socket onto the end of the cord now!!
 
   / Hobart Stickmate LX235 welder #17  
I don't think a welder circuit would have a GFI...and as far as a subpanel: my memory's a little hazy, but it seems like the NEC has a provision for small 6 breaker-or-less panels, they don't require a main breaker. But I'm no expert.
 
   / Hobart Stickmate LX235 welder #18  
canoetrpr said:
a steel welding cart on clearance for $12.50
25ft welding extension cord for $25
Please, a picture if you would, I've got to see these.
 
   / Hobart Stickmate LX235 welder
  • Thread Starter
#19  
Gentlemen - thanks very much for your posts. I believe that I can handle the project now.

6/2 wire up here was pretty darn expensive! $14 per meter! Luckily I only needed two meters.

Will, I'll get the cart assembled sometime this week and get a picture up. To be honest I have no clue either what it will look like. My original plan was to get a small steel table from somewhere so hoping this works out.
 

Tractor & Equipment Auctions

LIKE NEW 2023 Rhino 84in Reverse Rotation Rotary Tiller (A53473)
LIKE NEW 2023...
2024 Cynergy Cargo 2 Enclosed Trailer (A53117)
2024 Cynergy Cargo...
2013 W-W TRAILER ENCLOSED TRAILED (A53843)
2013 W-W TRAILER...
2018 FREIGHTLINER CASCADIA TANDEM AXLE SLEEPER (A54313)
2018 FREIGHTLINER...
2020 Bell B30E Off Road Dump Truck (A53117)
2020 Bell B30E Off...
2010 Ford Edge SE SUV (A51694)
2010 Ford Edge SE...
 
Top