SmallChange
Platinum Member
- Joined
- Apr 19, 2019
- Messages
- 735
- Tractor
- New Holland WM25 with 200LC front end loader, filled R4 tires 43X16.00-20 and 25X8.50-14 (had a Kubota B6200D with dozer and R1 tires)
Just installed a fiberglass canopy on my NH tractor. It went well and I'm happy -- but still there are some directions I wish were included, which I'm posting here in case they're useful to somebody else.
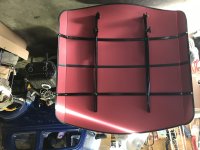
The dealer who sold me my tractor 4 months ago just sold me this canopy for it. It's made by Firebird Fiberglass Products, of Arizona. It seems well made and sturdy and the blue color looks exactly the same as my tractor. It's not a FOPS, but if somebody were going to drop a bowling ball on me, I'd be much happier with this thing breaking the fall. It included a single piece fiberglass shell, two brackets each comprising a length of square steel tubing and a trapezoidal steel plate bolted to it, and a box of U bolts and other hardware.
Right off the bat, I should have spotted that the two trapezoidal plates weren't mirror images of each other, as should the dealer. One was for a 2x2 tubing ROPS instead of my 2x3 tubing. Got that swapped. Advice: verify the two side brackets match.
The trapezoidal plates were about 3/16", and were drilled and slotted for the U bolts to allow adjusting the fore and aft tilt of the canopy. The lower U bolt fits a hole on one end and a short slot on the other, which could be OK. But the upper U bolt fits two longer slots, which really remove a fair bit of material from the plate. The two U bolts on each side are about 3" apart vertically. I think it would be almost impossible keeping the canopy from creeping down in front, as almost all of it is forward of the ROPS, and the U bolts don't cover much of a lever arm vertically, and especially, tightening the upper U bolt is going to flex the plate with those long slots. Meanwhile, I'm making a point of noticing canopies on other tractors, and I see many have scuff marks and other wear around the mounting bolts suggesting that they often come loose and droop and it's a struggle to keep them tight enough.
This will never do, I thought. So I made two improvements. First, I added a cross piece to the two steel tubes, fitting against the back of the top bar of the ROPS, with a small plate on it that fits against the top of the ROPS. Thus, the top of this assembly can't move forward or down. Second, I made extra plates of 3/8" steel, 6" long and 1 1/2" wide, that the upper U bolt passes through before I put the nuts on. After I assembled everything, I can sight along the more solid lower U bolt holes on the plate, with one hole and one short slot, and see that tightening caused the plate to curve ever so slightly. But the more flimsy upper U bolt area of the plate, carved up with the long slots, didn't curve at all that I can see because of my extra plates. Advice: if there is a way to positively block the canopy from drooping, it won't droop, though many of them out there apparently do.
This cross piece is an aluminum extrusion made by the 8020 company. I use this stuff a lot at work and have done a few things at home with it, including the large L shaped custom desk I'm sitting at now to post this. Great stuff. It sort of makes up for the fact that I don't weld. So, I made two more of these identical cross pieces, mounting them toward the front of the canopy at different locations, to use for mounting as many nice mirrors as I can, because my neck is a mess. Advice: check out 8020.net, and if you like mirrors, add mounting points to your canopy installation.
Once the steel was installed I had to get the fiberglass shell on top of it. So I held the fiberglass shell on one hand, like waiters carry big trays, as I climbed up a stool and onto the tractor deck facing rearwards. Physically, this isn't hard to do, as it probably only weighed about 20 lbs. But I'll tell you what turned very very ugly: the bottom side of this thing has wicked exposed fiberglass splinters, and as I shifted my grip or balance a little, I picked up some splinters of the nightmare inducing variety. It took some digging under a magnifying glass, and I'm not sure I got it all. Advice: tape some kind of pad onto the bottom before this operation.
To install this canopy, you rest the fiberglass on the frame and drill upwards through the mounting holes in the steel tubes, then put bolts and rubber cushions through it all. I realized it could make a mess when the drill finally breaks through and chips the top of the canopy, so I went slowly and thoughtfully, but still had a bit of chipping (hidden by their rubber lined flat washer once everything's together). On the second hole I was smarter, and got up higher on a ladder so I could see the top of the canopy, and back way off on the drilling force when I saw the bit starting to break through. By the fourth hole I probably kept the worst chip down to 1/16". Advice: watch the drilling operation from the top surface to minimize splintering.
Finally, don't be fooled by the instructions. The middle step is: "Make sure the Tubes are equally level. Next, lower the front end of the Tubes equally about 2" to 4", (so when the Canopy is mounted it appears 'level'). Now, fully tighten all nuts and bolts." It took me a while to figure out what they were driving at (and I'm still not 100% certain). The fiberglass shell has four flat regions for the mount points, and they all lie in a plane parallel to and maybe 3" above the plane of the bottom edge, so clearly we want both these planes to be level, we don't want either of them drooping down by inches. Eventually I decided they were saying we should first make the tubes perpendicular to the ROPS, and then shift them both down in front to accomodate the backward tilt of the ROPS. Which my ROPS does not have (though my previous tractor's ROPS did). Advice: if the instructions seem a bit nutty, trust yourself.