Let there be light - L4060 light bars & nice auxiliary fuse box

   / Let there be light - L4060 light bars & nice auxiliary fuse box #1  

Fallon

Super Member
Joined
Aug 25, 2013
Messages
6,981
Location
Parker, CO
Tractor
Kubota L4060hstc, formerly L3200hst
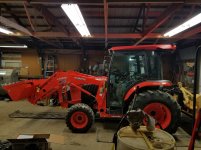
The 2 halogen cab lights on my new L4060 didn't cut it at all, and I wasn't about to pay $150 for 2 more of the same $10 lights & a $5 switch for the OEM solution on the back.
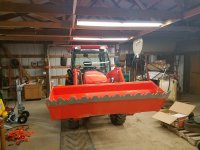
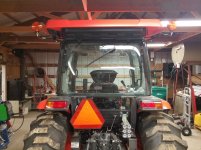
1-stock_front.jpg3-Stock_rear.jpg2-Stock_side.jpg

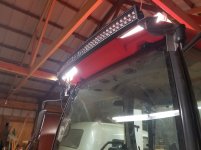
Picked up a $50 43" curved LED light bar up front Amazon.com: Led Light Bar, Senlips 43" 24W Curved Light Bar Off-road Light Bar Flood Spot Combo Beam IP 67 Waterproof for Off-road Vehicle, ATV, SUV, UTV, 4WD, Jeep, Boat- Black (43"): Automotive & $65 52" curved LED light bar for the rear Amazon.com: Led Light Bar, Senlips 52 inch 3W Curved Light Bar Off-road Light Bar Flood Spot Combo Beam IP 67 Waterproof for Off-road Vehicle, ATV, SUV, UTV, 4WD, Jeep, Boat- Black (52"): Automotive. They claim to be 240 & 300 watts, but when I hooked them up to my power supply (after I started planning the wiring) they topped out at 175 watts or so.

I welded up some brackets to mount the front bar onto the mirror mounts out of some angle iron & bar stock. Painted Kubota grey.

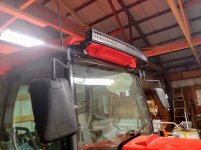
5-Front_brackets.jpg5a-Front_mounted_no_OEM.jpg4-Front_brackets.jpg

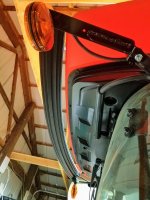
I removed the rear hazard lights & pumped the hollow mounting stud full of some sealant so they wouldn't fill up with water then flipped them upside down. Loosened up the mounting bolts a bit & they folded back to align with the mounting holes on the light bar. They upside down hazard studs now the mount point for my rear bar. The bent bar stock arms flexed a bit, so I removed them & welded on a vertical piece to support it better then painted them Kubota grey. Amusingly they were originally black rather than Kubota grey. The rear bar still bounces a bit & I can see the light shake a hair when driving. Might get around to adding more reinforcement later... Maybe.
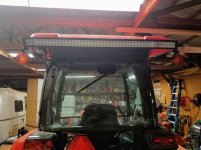
6-Reinforced_rear_hazard_brackets.jpg7-Mounted_rear_bar.jpg8-Mounted_rear_bar.jpg

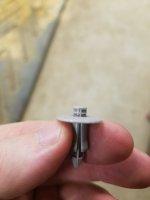
Figured out how to remove the buttons holding the pillar covers on. Just push the center in, then pry them out. To reinstall, pop the center out a bit & they go back, push the center level to lock
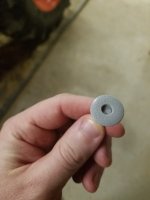
8a-Button_in.jpg8b_button_out.jpg
 
Last edited:
   / Let there be light - L4060 light bars & nice auxiliary fuse box
  • Thread Starter
#2  
Re: Let there be light - L4060 light bars

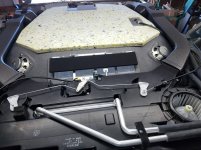
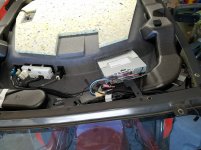
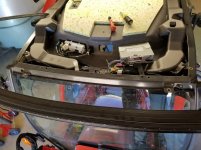
Popped the top. To do that you just remove all the round grey caps inside in the cab & undo the bolts underneath them. Leave the ones with the Philips socket alone. Also remove the bolts on the black bit around back around the edge. After that the roof just slides off. I managed to wrangle it solo despite having a back back, but 2 people would be easier. As suspected there is plenty of space up there next to the radio. Not much room in back as all the HVAC gear is there.

10_Open_top_rear.jpg9-open_top_front.jpg

For my wiring, I basically decided to use DIY Bussmann RTMR Fuse Block, Part 2 – Parts | Bodenzord as a guide. Getting the Metripack connectors & crimper was a bit expensive, but I love the way it came out & how professional the results are. I have 10 fuses & 5 relays sitting in that box now. Only using 2 relays & fuses for the LED bars & another to power the USB charger & lighted switches running the relay.

Designed a template to match my fuse box & cut a hole in the headlinder.

11-Open_top_hole.jpg

Wired it all up, dedicated circuit for each light bar with relay & fuse.

11-Open_top_wiring.jpg

Another 5@ circuit running down to the side panel feeding the USB charger & the 2 new switches. The switches went into the cutouts for the OEM power SSQA switches I think. I would have put them on the pillar but I wanted them together & didn't want the USB charger laying flat so junk would fill up the ports. So I put the USB charger in the hole for the OEM rear lights. As a side node, the plug for the OEM rear lights is right behind the cover, just plug in the OEM lights & plug in the switch to get the OEM solution working. I left the OEM front light switch there. It does nothing for now, may use that circuit for something else later. Or may just pop the switch out & put a cover on it if I get motivated.

10b_New_switches.jpg

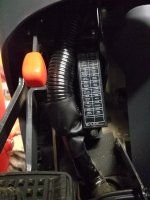
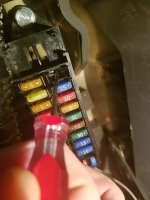
For years nobody has ever been able to figure out what terminals to use for the OEM fuse box. I didn't fair any better, but still didn't want to tap a wire. So I popped out the radio terminal. From the front use a tiny screwdriver to press in on the center side of the terminal & pull it out the back. Soldered on the wire I ran to run my front relay & popped it back in. I have a Add-A-Fuse, but it was kludgey & the OEM cover wouldn't have fit on afterwards.

10c-OEM_fuse_panel.jpg11a-Removing_OEM_pin.jpg12_OEM_block_pin.jpg13-Solder_on_wire.jpg
 
   / Let there be light - L4060 light bars & nice auxiliary fuse box
  • Thread Starter
#3  
Re: Let there be light - L4060 light bars

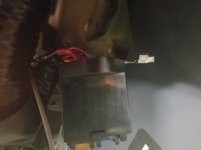
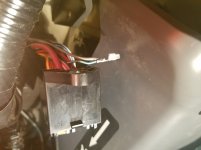
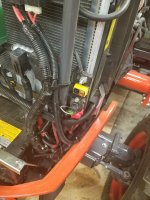
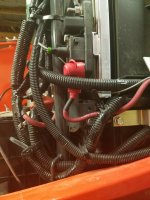
I stuck a 60@ fuse & relay unit up front. It provides a 60@ always hot (unused, didn't put in that fuse) & a 60@ relay switched circuit. EATON's Bussmann Series 3772-1AN22 Power Relay Module | Waytek Gets me the relay closer to the battery & protection right next to the battery. I ran 4ga (I think, got it from Napa & can't double check gauge without running up to the shop) wiring for everything, which is way overkill, and now that I look at it the same size as the ground going from the battery to the chassis. I should have gone a size or 2 down to save on cost, but I was planning for a fair bit of headroom in the new fuse box & trusting the OEM claimed wattage ratings on the light bars. $40 for a cheap hydraulic crimper 16 Ton Hydraulic Wire Terminal Crimper Battery Cable Lug Crimping Tool W/dies - - Amazon.com (same as from Horrible Freight) made short work of the battery cable crimping. Overkill for just this project, especially if you use smaller wire, but I'm crimping a lot of big Anderson 175 plugs for some nice jumper cable setups & while re-wiring my 25kw PTO generator.

14_relay_open.jpg15_relay_open_side.jpg

Now that it's all together I'm loving it. Took some action shots at dusk.

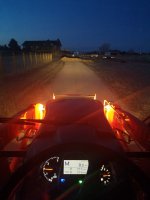
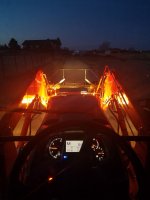
OEM running lights (not front cab lights, those are gone) & brights with the loader in the normal traveling height & all the way down. Lots of glare off the forks (bucket is even worse), but not a lot of light on the road in either case.

16-OEM_brights_loader_low.jpg17-OEM_brights_loader_normal.jpg

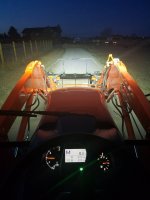
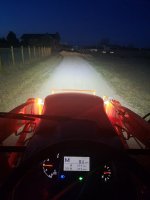
Front LED light bar only with loader at normal traveling height. Piles of light everywhere & no glare off the forks.

18-Bar_only.jpg

All lights on, light bar, running lights & brights with the loader down. Not really any more light on the road than just the light bar.

19-All_lights.jpg

I didn't grab any shots of the rear light, but it's coverage is as good as the front. And there is absolutely no light back there stock, unless you get the puny OEM light kit.

I really love the light coverage of the curved light bars I got. Not only do they match the Kubota cab roof line front & rear, but they give a nice wide even coverage. Really happy with how this project turned out. I can see REALLY well in the dark now & have all the electrics I need for any future mods I'm likely to do.
 
   / Let there be light - L4060 light bars & nice auxiliary fuse box #4  
Very nice job.... usually when it gets dark out and the street lights come on.... I automatically go in the house :D :D

Serious, nice job :thumbsup:
 
   / Let there be light - L4060 light bars & nice auxiliary fuse box
  • Thread Starter
#5  
Used Astro Pneumatic Tool 9478 Weather Pack Interchangeable Ratcheting Crimping Tool & Accessory Set (22 Piece) - - Amazon.com as my crimpers. & should have used those plugs in that kit for all my connections. I'd previously gotten a kit of Deutch connectors when I was planning on using a different fuse box. As the Bussman fuse box is all Metripack connectors I'd have been able to use just 1 crimper. Deutch connectors are better, but probably not worth the extra price.

Annoyingly the 60@ relay/fuse up front uses Metripack 150 connectors for that plug, so yet more different connectors to get. And apparently they use different seals as that's my only remaining action item. Replace the seals on that connector because the ones there now are to big & just sit flush with the connector not actually sealing.

Amphenol-Deutsch vs weatherpack plugs when wiring up a truck - Pirate4x4.Com : 4x4 and Off-Road Forum has a great comparison of Deutch vs Metripack vs Weatherpack connectors. I'd disagree on him saying there is no reason to go Metripack over Weatherpack though. Metripack is the newer standard & a little bit better designed. Both Metripack & Weatherpack use the same crimper. I ended up with Metripack as that's what the Bussmann fuse block took.
 
   / Let there be light - L4060 light bars & nice auxiliary fuse box #6  
Nice work! I'll bet those bars turn night into day.
I woozed out and mounted 54w 9" lights on the OEM brackets. When I plowed at 0500h a few days ago I got my first real use of the led lights... they did not disappoint.
 
   / Let there be light - L4060 light bars & nice auxiliary fuse box #7  
Very nice, thanks for all the documentation.

1) Appreciate the info on the pop-out pillar fasteners. I have a hate-hate relationship with automotive panel fasteners.
2) What else are you planning with all that new power capacity?
3) Noticed you have your farm tank (assume that is diesel) inside your shop. Seems unusual, do you like having that indoors?
4) What is that trench across your driveway? (Just wondering.)
 
   / Let there be light - L4060 light bars & nice auxiliary fuse box #8  
Excellent.

I recently began changing over from stock to LED. Its been a lot of trial and error, given my dirth of knowledge. I needed to 'help' you do this to save your back, while I learned a good way to add these without the frustration I have been undergoing with a 'that doesn't work' routine.
 
   / Let there be light - L4060 light bars & nice auxiliary fuse box
  • Thread Starter
#9  
Very nice, thanks for all the documentation.

1) Appreciate the info on the pop-out pillar fasteners. I have a hate-hate relationship with automotive panel fasteners.
2) What else are you planning with all that new power capacity?
3) Noticed you have your farm tank (assume that is diesel) inside your shop. Seems unusual, do you like having that indoors?
4) What is that trench across your driveway? (Just wondering.)

Ya, those things drove me nuts until my dealer told me you just push the center in. Some of the easiest ones to remove once you know how.

Not sure at the moment. I was designing for over double the advertised wattage of the bars, then found the advertised wattage was double the actual wattage. Probably adding a backup & bucket cam. Maybe some side & rock lights along with some better hazard lights or a hazard bar on top. Figure I'm pulling 25@ tops at the moment & it's fused for 60@. Wire is good for more than 60@ by a fair bit, but the fuse/relay up front tops out at 60@. Forget what the Bussmann fuse box is rated to... 80@ maybe.

Ya, diesel. I put it inside to minimize the potential for getting water in the tank & to keep it out of sight. No theft problems around here, but better safe than sorry. I expect the 300 gallons to last me a year or 2 at least at my usage rate, so want to make sure it stores well & stays dry.

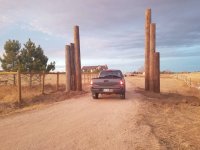
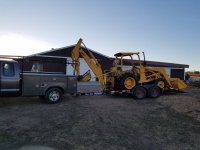
I borrowed a 40 year old backhoe from a friend to put up a ranch arch. Still have some pole trimming to do, then put up the crossbar.
20170309_180653.jpg

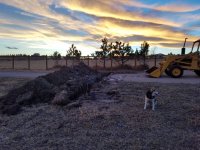
While I had it, I dug a 3' ditch across the driveway where my driveway branches up to the barn & shop. Water just washes stuff down the branch across my main driveway. Gonna put a culvert under the driveway & re-slope the branch so it leans towards the "front" side where the culvert is rather than the back side near the house. Front of the hoe bucket is hiding the driveway branch
20170314_191126.jpg
20170315_184314.jpg

Old *** sloppy hoe. Some of the pins have almost a quarter inch of slop visible between the pin & bushing. But it was free & works way better than a shovel. My bucket spade on my L4060 couldn't have done that work if I had unlimited time. Took me under 2 hours to dig that trench. Did the last third the fastest & most level, despite it being dark & digging by braille.
 
   / Let there be light - L4060 light bars & nice auxiliary fuse box
  • Thread Starter
#10  
Excellent.

I recently began changing over from stock to LED. Its been a lot of trial and error, given my dirth of knowledge. I needed to 'help' you do this to save your back, while I learned a good way to add these without the frustration I have been undergoing with a 'that doesn't work' routine.

What help do you need?

Car Alarm, Car Stereo, Mobile Video, and Cruise Control Info for Installers is a good learning resource. Don't have my normal bookmarks on my phone but that looks like the site I've used in the past.
 

Tractor & Equipment Auctions

John Deere 336 Square Baler (A46502)
John Deere 336...
Blank Skid Steer Plate (A49339)
Blank Skid Steer...
42x16 Rim (A49339)
42x16 Rim (A49339)
Gas Powered Water Pump (A49339)
Gas Powered Water...
2010 CHEVROLET SILVERADO 2500HD (A47001)
2010 CHEVROLET...
3030 (A49339)
3030 (A49339)
 
Top