BravoXray
Elite Member
- Joined
- Dec 17, 2019
- Messages
- 2,583
- Location
- Nothern Indiana
- Tractor
- Kubota BX2230, John Deere 430 Diesel
I have been wanting to put some flashing LEDs on the rear of my BX for visibility when I'm picking up trash or just working near the road.
I bought a set of four amber LEDs from Amazon that have twenty some flashing modes for $26.99.
Link: Amazon.com: ASPL 4pcs Sync Feature 12-LED Surface Mount Flashing Strobe Lights for Truck Car Vehicle LED Mini Grille Light Head Emergency Beacon Hazard Warning lights (Amber): Automotive
Each light has four wires, positive, negative, function select and synchronization. By connecting all the sync wire together, thay synchronized and flash in the same pattern. Grounding the select wire changes the flash pattern.
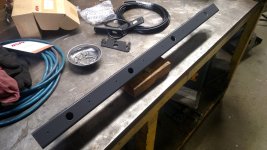
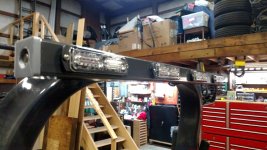
I used a piece of 1 1/2" square tube 28" long, laid out the mounting screw and wire holes and another hole on the bottom for the power cable to exit. Welded a couple of tabs on the top to use to mount it to the flood light mounts I put on a few weeks ago. Blasted the tube, primed it and painted it Kubota dark gray to match the ROPS. I tapped the holes for the light mounting screws 4mm, as there would be no way to get nuts on them inside the tube. Installed all the lights, soldered all the same colored wires together and added a couple of wires for a push button switch to change the modes, power and ground. I grounded the negative wires to the tube at one of the screws at the outside end of the tube, and added a length of wire for power with a weather tight grommet where it enters the tube.
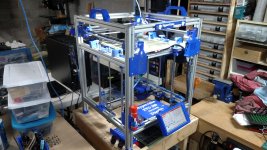
I 3d printed a pair of end caps for the tube, one plain and one with a recessed
hole to mount the push button. Hooked up the push button to the wires I ran for it, and drove the caps into the ends of the tube. A quick check with the bench power supply showed everything working properly.
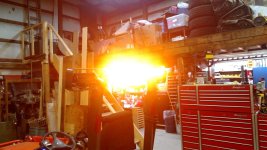
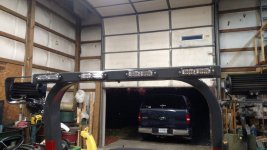
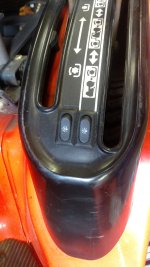
I drilled holes for mounting and one in the ROPS to run the power wire down to the lower left side, and was able to fish it out the same hole as the flood light wires. I cut another hole in the PTO console, made up one new harness for both switches, hooked it all up. Turned on the ignition switch and the new light switch and it worked just fine. Holy cow is it bright!
A pretty easy and cheap project, as I had everything but the lights on hand. Will add a little safety factor also.
I bought a set of four amber LEDs from Amazon that have twenty some flashing modes for $26.99.
Link: Amazon.com: ASPL 4pcs Sync Feature 12-LED Surface Mount Flashing Strobe Lights for Truck Car Vehicle LED Mini Grille Light Head Emergency Beacon Hazard Warning lights (Amber): Automotive
Each light has four wires, positive, negative, function select and synchronization. By connecting all the sync wire together, thay synchronized and flash in the same pattern. Grounding the select wire changes the flash pattern.
I used a piece of 1 1/2" square tube 28" long, laid out the mounting screw and wire holes and another hole on the bottom for the power cable to exit. Welded a couple of tabs on the top to use to mount it to the flood light mounts I put on a few weeks ago. Blasted the tube, primed it and painted it Kubota dark gray to match the ROPS. I tapped the holes for the light mounting screws 4mm, as there would be no way to get nuts on them inside the tube. Installed all the lights, soldered all the same colored wires together and added a couple of wires for a push button switch to change the modes, power and ground. I grounded the negative wires to the tube at one of the screws at the outside end of the tube, and added a length of wire for power with a weather tight grommet where it enters the tube.
I 3d printed a pair of end caps for the tube, one plain and one with a recessed
hole to mount the push button. Hooked up the push button to the wires I ran for it, and drove the caps into the ends of the tube. A quick check with the bench power supply showed everything working properly.
I drilled holes for mounting and one in the ROPS to run the power wire down to the lower left side, and was able to fish it out the same hole as the flood light wires. I cut another hole in the PTO console, made up one new harness for both switches, hooked it all up. Turned on the ignition switch and the new light switch and it worked just fine. Holy cow is it bright!
A pretty easy and cheap project, as I had everything but the lights on hand. Will add a little safety factor also.