Redlands Okie
Veteran Member
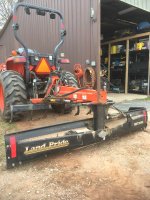
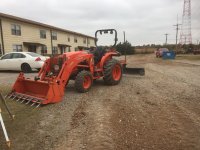
Recently purchased a Land Pride RBT 3596 grader blade to install on a L3560 Kubota.
Got all 3 hydraulic cylinders for it.
One cylinder allows for sweeping the whole blade to the left or right. Gets the blade well out past the tractor tires and allows the tractor and that darn front end bucket to stay away from objects your grading close to.
One cylinder for tilting the blade up and down on each end for crowning drives for example.
One cylinder so the blade can be pivoted to allow the dirt to move off to the left or right edge of the blade.
Purchased the bolt on end caps for the blade so that it runs a bit like a box blade. They are somewhat teardrop shaped and depending on the setting of the hydraulic top link and the resulting vertical angle of the blade the end caps can allow a little material past the ends or keep it in. These end caps just about make or break the use of this blade for my needs and works well.
Used one of the three remotes to run the top link on the tractor. Still wanted the ability to operate all 3 blade cylinders so to make up for the lost remote I set up a diverter valve on the front end loader remote hydraulic line so it has a line running to the front end loader and to the rear of the tractor. I can use the joy stick button to operate the FEL attachment (usually a 4 in 1) or in this case to tilt the rear blade up and down for crown work. The joy stick remote switch is either on or off and does not allow much fine control. Installed a restricted fitting on the blade tilt to slow its movement down for precise set up for the crown work. Even paid attention to the hose setup so that the diverter valve handle points to the FEL boom when it routes to the FEL. Handle points to the motor for rear blade use. Allows using front or rear hydraulic without leaving the tractor seat.
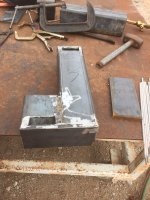
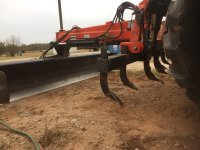
Blade worked great but had little ability to pull up gravel or work out pot holes on drives. Needed ripper teeth and did not want to haul and swap box blade off and on. So did a little welding to be able to use the box blades rippers on the grader blade. Welded a 4 inch square and 1/4 inch thick tube to the bottom of the 3 point hook up on the grader blade to get the teeth a little lower so they could engage better. Had to set the center two rippers forward of the 3 point hook up so as to clear the pivot point of the arm on the grader blade. By using a combination of the 3 point height setting and the ripper depth settings (usually in the middle) and the 3 point hydraulic top link I can get the rippers in contact or not and still allow the grader blade to be in contact or not.
Working really well so far. Have not had the box blade even hooked up to do grade work on the last few jobs.
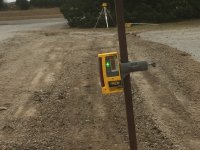
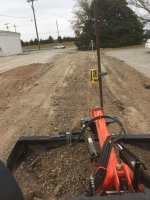
Set up a square tube on the rear of the blade to allow attaching a laser beeper so grades can be run with out having to leave the tractor seat to check grades.
Have a simple magnetic torpedo level on the blades end to check for level form the tractor seat.
Both items have zip ties on them just in case.
Still needs some cleanup and paint when the weather gets nice. Any suggestions to make it work better is more than welcome.


