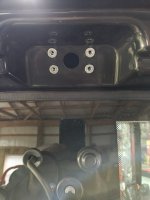
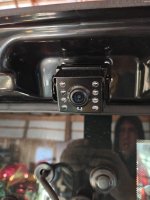
Got the backup camera and monitor installed this weekend. It took way longer than I expected, lots of issues. Went with a 9" monitor that supports two 1080P cameras. The new RX7340 has a spot on the back of the roof for a camera and even a fuse that says rear camera (didn't find any cable ran though). There is a metal plate held on by 4 screws. Behind the plate is a ~1" hole with a rubber grommet installed. Taking out the grommet gives you access to the roof. What wasn't obvious until I spent numerous hours trying to fish a cable is this is a sealed cavity that has no access to any other part of the cab or the side pillars. There is a large probably 3" rubber grommet on the bottom of this cavity that you can get access to lifting the roof up from the back. I cut a X shaped slit and fed my cables out of this cavity, this then got me into the main part of the roof, just above the headliner where I could then route cables down the rear pillar. I repurposed the metal plate and mounted the bracket for the backup camera to it. Reused the original rubber grommet with just a slit in it for my cable to fit through, so should be pretty water/dust tight.
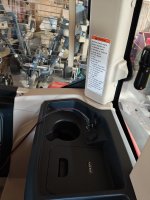
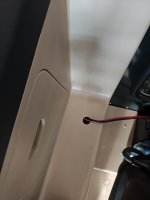
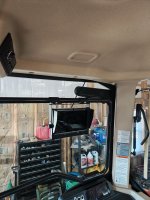
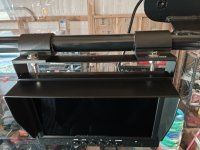
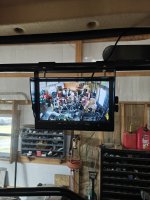
I then worked on the monitor. The new RX7340 has bars along the right door for mounting monitors. I used tube clamps and mounted the monitor to the upper tube. Tube is 27mm for reference. For the cable from the monitor, I just ran it up and over the headliner to the pillar where the camera cable already was. What I wasn't expecting and took a long time was getting power. Just below the pillar is a fuse box, I thought I would just use one of those piggyback fuses for positive and connect ground to an existing screw/bolt. What I eventually found was there was no good ground anywhere in that fuse area I could connect to. So, I punted the piggyback fuse idea, and I wound up just running power from the cigarette lighter on the other side of the tractor and hard wiring through this connection. There is a hole with a grommet pre-installed already below the fuse panel, so just ran cable through it. Cable is behind the seat and on the floor, so totally out of the way.
I also found the one time use retainer clips holding the plastic pillar cover and headliner a total pain. There was no way to remove these without destroying them. I wound up drilling them out and have ordered some similar ones, hopefully the color matches or is close. Below are some pictures of the setup.