Skid Steer Quick Tach Dimension Clarification

   / Skid Steer Quick Tach Dimension Clarification #1  

dkhntr04

Silver Member
Joined
Sep 26, 2010
Messages
169
Location
Northern MN
Tractor
Deere 3720 Cab
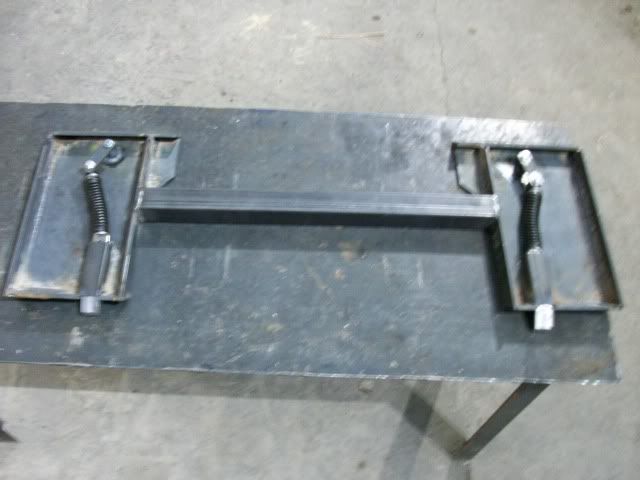
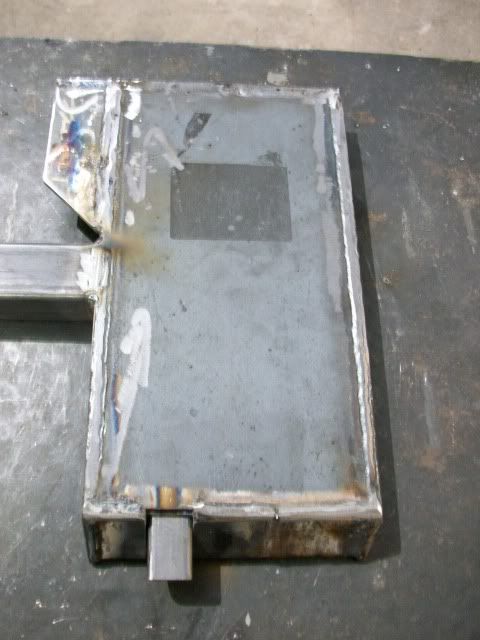
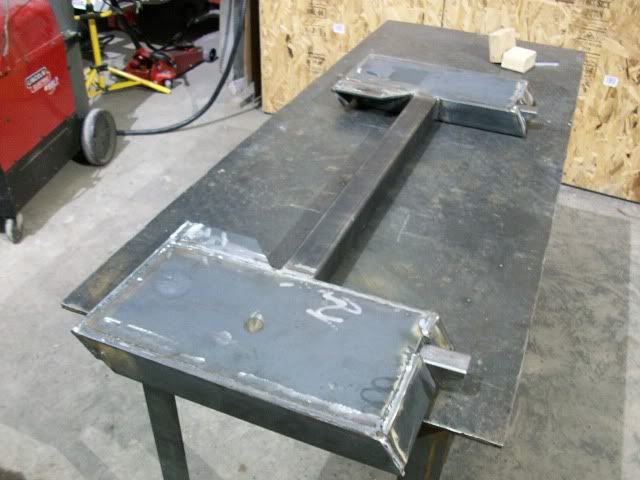
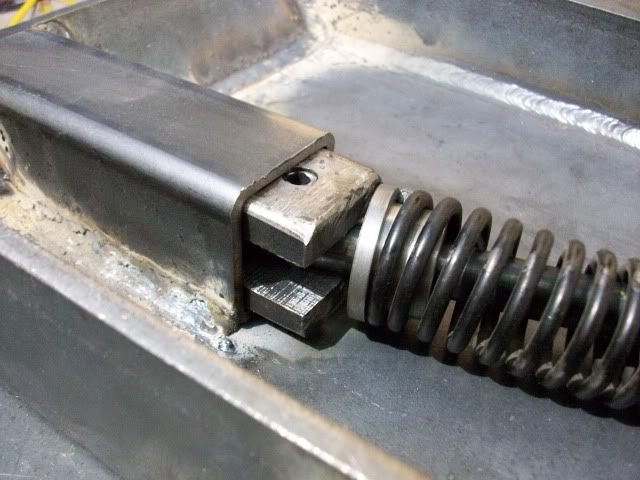
I am going to start building my quick-tach adapter for my pin-on style loader tomorrow. I am finding what seems like a discrepancy between the SAE standard and what many companies and TBN'ers are posting for the dimension.

On the tractor side, the dimension from the very top tip of the tractor adapter to the point where the 120 degree angle starts for the bottom pin flange is being listed at 16" by TBN members and several attachment companies. The first file below is a drawing that has been posted here before and shows that dimension at 16". But compared to the SAEJ2513 standard, 16" should be too big and not fit.

Link directly below shows 16" too.

Will it Fit My Machine

url


On the SAEJ2513 standard, the drawing shows the dimension on the implement size as being 15 7/8". The second file below is the SAE standard.

I am going to find a skid steer in town to measure tomorrow, but right now it is confusing the heck out of me:confused:. I the 16" must be correct since mwb specs it in his prints here, and his setup works, and the 16" dimension appears in so many places.

http://www.tractorbynet.com/forums/build-yourself/141029-tractor-side-shuttle-shift-quick.html

Any input? What is this dimension or your loader? Thanks
 

Attachments

  • Quick attach - Universal drawing.pdf
    19.5 KB · Views: 732
  • QA specs.pdf
    120.6 KB · Views: 620
   / Skid Steer Quick Tach Dimension Clarification #2  
my build was done using the specs and I also used my neighbors bucket for fitting / squaring the tractor side up. I made the tractor side slightly loose - a lot easier to add material than to remove it from the entire fixture. I think I put a 1/16 steel sheet between the (tractor side) QA and the reference bucket - after welding, paint, dirt, there is absolutely no slop at all and I never have a problem latching.

P.S. The single engagement design that I created is awesome - I haven't added remote control (powered latch) but it would not be difficult to do.
 
   / Skid Steer Quick Tach Dimension Clarification #3  
16"will work fine. The pins that engage the implement are tapered so that it draws the implement in tight when engaged. If you want to go 15 7/8 on the tractor side, and 16 on the implement side, it will work fine.
 
   / Skid Steer Quick Tach Dimension Clarification
  • Thread Starter
#4  
Thanks for the replies. I ended up buying a Berlon universal mount plate to use as a guide. My local farm/home store had them for $105.00.

I have my latchboxes almost completed, the next part is to finish building my lock pin linkage.After getting this far into the project, I would not recommend trying to build an adapter without a plate or another bucket to use as a fixture.

Thanks again.
 
   / Skid Steer Quick Tach Dimension Clarification #5  
So are you building this using my design? Any pics of your build?
 
   / Skid Steer Quick Tach Dimension Clarification
  • Thread Starter
#6  
mwb,

I am not using your plan but I have referred to it and your posts numerous times. Thank you for posting that information.

I don't have "in-process" build pictures, but here are a few of what I have done at this point. What I have left to do is:

1. Make the latch handles and their stops (need to go to the metal store first).

2. Add grease fittings to the pins.

3. Cut off my bucket brackets and attach to the QA assembly.

4. Disassemble, de-bur and polish edges, clean up slag, and prep for paint.

100_0553.jpg


100_0550.jpg


100_0551.jpg


100_0555.jpg


The latch boxes are made from 1/4" flat. The lock pins are 1 1/4" solid steel and slide inside 1.5" x .120" square tube. The cross-tube between the boxes is 2" x .120" square tube. All the framework was welded with E7018 1/8" DCEP 110-135A. I was going to TIG the whole thing, but running 230A at 20% duty cycle was going to take way too long.

100_0557.jpg


The latch mechanism I built from scratch using 1/2" and 1" cold-roll stress-proof round bar with some 1/4" x 1" flat for the levers. I machined all the parts on my lathe and mill. The springs came from an industrial surplus store and are approximately 1" ID, 1 3/8" OD, and the wire is 3/16" diameter.

100_0554.jpg


100_0556.jpg


The bosses that serve as the pivots for the lever bracket are machined to .280" in height to allow the bolts to tighten and allow some clearance for movement. The 1/2" rod that extends from the lock pin to the lever assembly is drilled and tapped to 5/16-18 on the lever end, and a simple lock-washer and bolt act as a retainer. The lock pin side has a 5/16" roll pin to hold the 1/2" rod to the pin. I TIG welded the main pivot pins to the latch boxes.

100_0558.jpg


The last major design step is cutting the brackets off my old bucket at the proper length/angle so that my attachments can be in a full range of motion, especially when the loader is all the way down.
 
   / Skid Steer Quick Tach Dimension Clarification #7  
dkhntr04, I kept my old bucket so that if I ever sold my tractor I could put it back on and keep the quick attach. A new bucket at auction was only $400 and I have quite a few different buckets so keeping the original Kubota one was no big deal. I bought my quick attach from Horst (HLA) because I figured it wasn't worth the time making one and making different buckets was easier so I spent my time doing that.
 
   / Skid Steer Quick Tach Dimension Clarification #8  
Horst reccommends setting the angle of the SSQA plate at 65 degrees on the bucket to have proper curl back angle. Hope that helps
 

Tractor & Equipment Auctions

11' CONTAINER (A52706)
2014 INTERNATIONAL PROSTAR+ (A58214)
2014 INTERNATIONAL...
2010 Volvo XC90 SUV (A56859)
2010 Volvo XC90...
SUV (A59231)
SUV (A59231)
Greenworks Commercial 82V CZ60R Zero-Turn Mower- DEMO UNIT (A56438)
Greenworks...
DRAGON 500 BBL FRAC TANK (A58214)
DRAGON 500 BBL...
 
Top