Stupid Question part 2...

   / Stupid Question part 2... #1  

Typhoon

Gold Member
Joined
Jun 15, 2003
Messages
360
Location
Southern Illinois
Tractor
LS MT357HC
Another newbie question to go along with my question just previous to this one.... my tractor (TC29D) will be arriving with the rotary cutter from the same place "corriher implements", however, I have never personally hooked up an implement to a tractor and im wondering if it will come with a operators manual??? I know the tractor and loader will, but will the rotary cutter? I am very mechanically inclined, but have never actually hooked up a rotary cutter or finish mower before to a PTO. Could someone maybe give me a few pointers on how to do it properly in case the cutter doesnt have a manual with it? Thanks!
-Brad
 
   / Stupid Question part 2... #2  
Typhoon, no I can't give you any advice. I am just writing to thank you for asking these stupid questions so I won't have to ask them when I get my tractor.
 
   / Stupid Question part 2... #3  
Brad, hooking it up is quite easy, almost intuitive. The PTO shaft just slides onto the output shaft until it clicks.

Now, UNhooking it for the first time, especially if you were not the one hooking it up, was a different question for me. My TC18 was delived with the rotary cutter already hooked up, so it was easy to unload. The fellow from the dealership went over everything we could think of on how to operate the tractor. He stuck around until both my son-in-law and I had a chance to try everything and were fairly confident. After he left, we decided to try to box blade.

I'm embarrassed to say that the one question I didn't ask was how to unhook the PTO shaft. We looked everywhere, and just couldn't figure it out. Finally, Doug beeped a friend with a tractor (Nextel Direct Connect is wonderful), and he said to "push the button." Turns out the release button coincidentally ended up on the bottom of the shaft when it stopped, and we just never saw it. We're going to be a long time living that one down...

The only other thing you'll have to figure out to get started is how to adjust the cutting height. Adjust the rear wheel(s) to the height you want, then lower the 3PH so the front is slightly lower than the back, then loosen, move and tighten the set screw stop on the 3PH lever so it will stop in that position every time you lift and lower it. Helps to mark that spot so you can set it up easily the next time.

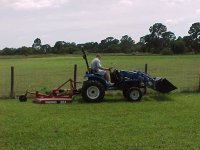
Attachment is Doug's very first time moving the brush hog - within an hour he had it mastered to the point he was comfortable. We still have a ways to go to be expert...
 

Attachments

  • 285800-hog3-0403.jpg
    285800-hog3-0403.jpg
    32.8 KB · Views: 217
   / Stupid Question part 2... #4  
Re: Stupid Question part 2... (long)

This is kind of generic but here goes...

- you will have to hookup the two lower draft links on the tractor to the mower, they do the lifting. Depending upon your tractor setup you will have to allow the arms to open wider so their female ends can slide over the male pins on the mower. Once you have the lower arms attached, you will need to remove most of the side-to-side slack so the mower trails directly behind the tractor. Leave a little sway so the draft arms don't bind up.

You will then hookup the center link which is part of the tractor. You will be able to adjust the length of this link. The will be a rear wheel or wheels on the mower which allows you to set the mowing height. Once you have determined the height, you'll want to adjust the length of the center link to have some slack when the mower is lowered to cutting height, this will keep the mower parallel to the ground if you are mowing on uneven surfaces. (This will make more sense after you actually do it.)

Then you need to hook up the PTO shaft. Best to shut off the tractor for this, PTO's can tear you up real fast. On the female coupling end of the PTO shaft, which is part of the mower, there will be a collar or sliding pin. You will need to push this pin/collar to the side to slide the female mower coupling onto the tractor's PTO shaft. Once in place the pin will snap back into place. This pin keeps the PTO driveline together at all times.

You may also need to adjust the length of one of the lower draft arms in order to level the mower - one side can be adjusted shorter-longer. I don't know your tractor but it is almost always a threaded shaft with some sort of locknut.

Those are the basics, the specifics I'm sure you'll figure out.

Good luck and be careful!!!!!!
 
   / Stupid Question part 2... #5  
1. attach lower left arm (viewed from rear)
2. attach right arm (the one with the adjustment)
3. attach the pto shaft
4. attach third arm ( top arm)

pto shafts have several different locking arrangements, if you have trouble with yours, tell us what it looks like so we can tell you how yours works. One some you pull a sleeve, on some you twist a sleeve and then some have a button.
 
   / Stupid Question part 2... #6  
Like the other guy said above ..

Heres a few more ... hope Im not insulting your mechanical knowledge.

- When you take something off the 3 point, think about getting it back on again. Best if you can park your implements on a hard flat surface (like concrete). Don't plan on doing too much moving of the implement unless you have built a dolly for it to sit on. Putting implements on when you parked them on a soft or uneven surface is a lot harder.
- When you take an implement off remember to drop the PTO down all the way to take the weight off the links.
- If the implement is still going to drop when you take it off (after you have lowered the links) think about propping it up with something (I do this with my back blade) or hanging it off something (I've done this with a post hole digger) so it's easier to put back on. Having to lift things to get them back on the 3 point is a pain.
- Remember to loosen the check chains etc before you try to spread the links to get them off the implement.
- Read your manual to find out whether the check chains should be tight or loose for a particular implement when you're putting an implement on.
- Some implements require that you lengthen / shorten the top link (its in two halves that screw / unscrew) in order to attach them
- Watch your fingers when you pull the pins. Those buggers pinch.
- I keep a rubber mallett handy as a persuader.
- If you have a protective cap for the PTO shaft, put it back on when you're done. It will keep it clean and easier to slide the splines together next time you do a hook-up.
 
   / Stupid Question part 2... #7  
One more thing not mentioned is to grease you PTO shaft every time you hook something up. It is no fun trying to get you mower off after using it and it being stuck to your shaft. I use high temp wheel bearing grease and it works great.

ChrisW
 
   / Stupid Question part 2... #8  
To add to the above....

You will have it easier than many: your tractor has extendable link ends. They can be unlatched and pulled out about 2-3 inches. If you can back to within an inch of the implement, you have enough "slack" in the end to prevent multiple micro-movements of the tractor or man-handling the implement to position it.

Mark
 
   / Stupid Question part 2... #9  
<font color="blue">…- I keep a rubber mallett handy as a persuader…</font>

Ummm… I have a 6’ steel bar and sometimes have a problem with an ~~ 1200 lb. three bottom plow… I’ll have to try that rubber mallet technique… /forums/images/graemlins/tongue.gif /forums/images/graemlins/smirk.gif

…and if it doesn’t work… I could always use it to kill the flies… /forums/images/graemlins/laugh.gif
 
   / Stupid Question part 2... #10  
One thing I didn't see mentioned, is to double check the PTO shaft for correct length. Attachments usually come with a generic length PTO shaft, and if someone at the dealership wasn't on the ball and didn't check the length of the shaft, you could create problems when you move your deck up or down. One way to check it is to mark the inner cover where the outer cover stops when the shaft is totally closed. Then install the PTO shaft, and very carefully raise and lower the deck to the ends of the 3PH travel. Check the cover marks you made and make sure there is some distance ~1/2" or so between your mark and the end of the cover. Then take the deck to both extremes (upper and lower) and adjust your top link in and out to cover any adjustments you might make to it. After you are sure there is some clearance at both ends, start your tractor, leave it at idle, engage the PTO, slowly release the clutch, and listen for any binding or BAD noises, then slowly raise and lower the deck while checking for binding. IMPORTANT: Do not leave the tractor seat for any reason while the PTO is engaged.
One little trick I've used to facilitate mounting a PTO driven attachment, is to mount one side of your lower arms, then mount the PTO shaft, then mount the other side arm, then the toplink. Doing it this way you have more room to muscle the PTO shaft on and off by swinging the one side away from the lower arm and actually getting in closer for more leverage. (Note: this will only work if you have a dolly or wheels under your attachment and are working on concrete. Both of which I highly recommend). IMPORTANT: Only do this with the tractor off, and the brakes locked.
Good Luck and congratulations /forums/images/graemlins/smile.gif


Tractor & Equipment Auctions

2019 Fecon BH74SS Hydraulic Mulcher High Flow Skid Steer Attachment (A51691)
2019 Fecon BH74SS...
2018 POLARIS RANGER 570 EFI UTV (A51247)
2018 POLARIS...
2017 Mower Max Flexwing Mower (A51573)
2017 Mower Max...
Tiger Mowers 80in Super Duty Twin Flail Mower Tractor Attachment (A51691)
Tiger Mowers 80in...
MAHINDRA MAX 24 HST COMPACT UTILITY TRACTOR WITH LOADER (A52748)
MAHINDRA MAX 24...
1996 CLEMENT END DUMP TRAILER (A52472)
1996 CLEMENT END...
 
Top