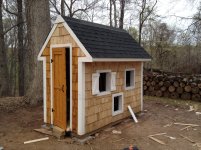
The Chicken Palace

   / The Chicken Palace #1  

The Suburban Farmer

Silver Member
Joined
Mar 14, 2015
Messages
194
Location
Northern Virginia
Tractor
Deere 2320
Since spring doesn't seem like it wants to show up here in Northern Virginia, I thought I'd post about last spring's first big project -- building the Chicken Palace. It all started with a family trip to Tractor Supply during Chick Days... before I knew what happened, we had added to our brood and it became clear that our little chicken coop wasn't going to be enough for our expanded flock.

First, we emptied out one of my old storage bins, hooked up an infrared light to keep it warm, and life was good:
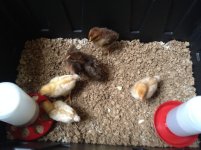
Image00002.jpg

It was the perfect size -- my littlest boy could still see them and play with them, and honestly, it was kind of nice hearing the "cheep cheep cheep" in the corner of our family room.
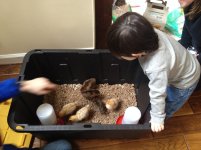
Image00001.jpg

But we knew this little box wasn't going to work for very long, so we started planning for a slightly larger coop. Honestly, we weren't sure how long we would keep chickens, so I didn't want to build a fit-for-purpose chicken coop, but rather something that we could use for something else if this whole "chicken farming" thing didn't work out... so I went into Sketchup and started playing around with ideas. After a few tries, I was confident that I had figured out a dual purpose "first it's a chicken coop, and then it can be a garden shed if we don't like it" design. My original inspiration was a picture I found on the web:
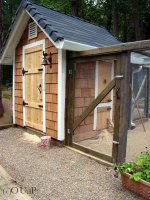
IMG_3390.JPG

After all was said and done, our "slightly larger coop" turned into our "massively over-engineered multi-purpose Chicken Palace." I really do need to learn when "good enough" really is good enough...
 
Last edited:
   / The Chicken Palace
  • Thread Starter
#2  
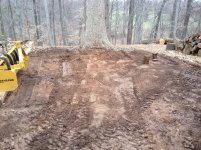
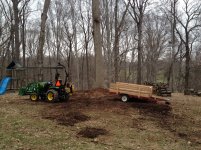
It took a while to figure out just where we wanted to put the coop. After a few different design ideas, we realized that the perfect spot would be right smack-dab inthe middle of an existing herb garden, so the first thing I had to do was clear out the area and flatten the ground. The box blade made quick work of it, and soon my oldest boy and I had graded a nice level patch close enough to the house to be convenient, but far enough away that it wasn't on top of our patio or play areas:

Image00003.jpg

Image00004.jpg

I know it doesn't LOOK level -- I think the wide angle on my camera skews the perspective a bit. The same caveat is going to hold for a few of these pics, I think... for some reason "level" doesn't look level with a wide angle lens.
 
   / The Chicken Palace
  • Thread Starter
#3  
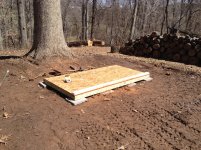
I wanted to make the coop movable in case we ever decided to relocate it, so instead of a foundation we decided to use 4x4s on top of concrete pavers, leaving enough room where I could get the pallet forks under it to lift up the coop in case I wanted to put rollers or skids underneath it. I built it extra sturdy and used more lag bolts that I probably needed, but I didn't want it to shift too much if it was ever moved. To keep it anchored, I filled two of the areas between the joists with some extra gravel I had from a driveway project and then laid the subfloor. I built it so that it would be 4x8 -- big enough for 10-12 chickens if we decide to expand the flock further, but still simple geometry to minimize cutting.

Image00006.jpg

Hard to see in the photo, but the paver blocks are sitting on about 4" of compacted gravel.
 
   / The Chicken Palace
  • Thread Starter
#4  
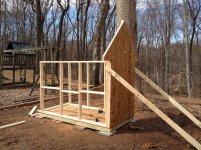
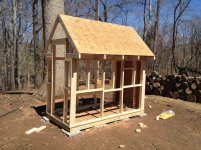
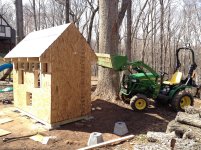
We were expecting some rain, and I knew I wouldn't be able to work on it until the following weekend, so the stick-frame was built relatively quickly. I roughed in the stick framing and then pre-built the rafters in the garage and lifted them into place with the front-end loader. We weren't sure of the exact placement of windows, doors and egg boxes, so I didn't fully rough-in all of the studs at this point - just enough to support the rafters and roof to keep the subfloor dry. Shed codes around here allow for up to 24" spacing of studs, but ultimately, I came back in with more lumber and ended up with something closer to 16" on center, with proper headers and supports for all of the windows and doors.

The roughed-in framing and one of the end walls:

Image00007.jpg

The tractor was a HUGE help in getting the roofing sheeting installed. As a one-man show, sheeting a 12-12 roof can be tricky, but I fabbed up a couple of supports on my pallet forks and used the tractor to place and hold the sheets in place. No pics of that unfortunately, but it's pretty straightforward.

Image00008.jpg
 
   / The Chicken Palace
  • Thread Starter
#5  
I spent the following week figuring out the final placement for the windows, doors and egg boxes. Since we wanted to be able to convert this to a "shed" if the whole chicken-thing didn't work out for us, I didn't want to lock myself into a layout or framing situation that I couldn't modify, so this took a little bit of time, but I finally got to what I thought was a workable solution.

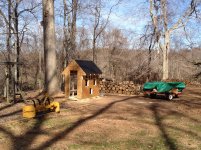
Luckily, the rain didn't amount too much during the week, so by the following weekend the ground was dry again and I hit it early on Saturday morning. Since I was still one-man-showing it, I didn't get a lot of photos during Saturday morning, but in about 3 hours I had managed to get all of the new framing installed to bring it to 16" centers. Again, the handy tractor made for a nice work platform -- although I'm sure it isn't an OSHA approved approach to working on roofs.

Image00010.jpg

I left the back wall open, because I planned to build the egg boxes and access lids in the garage, and then place it as a single unit. That way, if we convert it back to being just a shed, I can remove it without having to modify any of the support structures. By my lunch break, I had 3 sides finished, and then spent the afternoon finalizing the egg box insert. Unfortunately, I don't have photos of that part. I'll try to dig up my Sketchup plans of the egg box unit and post them later in case anyone is interested in how I built that feature.

Image00011.jpg
 
   / The Chicken Palace
  • Thread Starter
#6  
Once the sides were finished, including the egg box and the supporting studs/nailing joists, I started putting up the shake siding. I thought about using vinyl or even the pre-built shake panels, but I found a great deal on individual cedar shakes online and figured that an 8x4 building wouldn't be TOO hard to shingle using individual shakes.

For this, I used my trusty old Harbor Freight nailer / stapler with staples. This is one of the HF tools that doesn't suck -- it's worked flawlessly and I didn't experience any jams during the entire siding process.

Originally, I tried using pin nails, but I found that staples worked much better on the shakes. No splitting, and the extra surface area made the attachment seem much more sturdy. By adjusting the nailing depth, I was able to dial it in perfectly so that there was a TINY gap between the staple head and the shake to allow for expansion and contraction. I know that the purists out there will tell me I should have hand nailed shakes, but honestly -- for a chicken coop, I just didn't feel like doing each one by hand.

After the first few shakes, I was glad that I decided to go with individual shakes instead of panels. Much easier to work around the windows and doors and cut them for a precise fit individually.

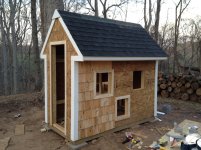
I also managed to get the shingles on the roof and by Sunday afternoon it was looking SOMETHING like the photo that was my original design inspiration.

Image00014.jpg
 
   / The Chicken Palace #7  
That's awesome! A chicken coop is on my list for this spring... but it's a long list... LOL

I'll be watching this!
 
   / The Chicken Palace #8  
Genius!

Feel like building one down here in the blue grass?

Hahaha!
 
   / The Chicken Palace
  • Thread Starter
#9  
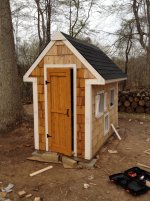
The next weekend I spent the morning building the doors and shutters in the garage, and then hauled them down to the coop with the tractor.

Although I like the look of naturally-aged cedar shakes, letting them go to grey wouldn't match the rest of the house or outbuildings, so I ended up getting a high-quality stain/sealer from Sherwin Williams to give them more of a "natural cedar" look. After I put it on a few test shingles, I thought it looked good, so I started applying the stain to the shingles.

Image00017.jpg

Image00018.jpg
 

Tractor & Equipment Auctions

Pallet Fees (A50775)
WITTIG VACUUM PUMP (A50854)
WITTIG VACUUM PUMP...
2005 Case IH 2062 Flex Draper Header (A50657)
2005 Case IH 2062...
WHITE CI-7 DRAW WORKS POWERED BY TWIN (60 SERIES) DETROIT 14.0L ENGINES (A50854)
WHITE CI-7 DRAW...
New Holland B95 Backhoe (A50490)
New Holland B95...
2011 CATERPILLAR D9T HI-TRACK CRAWLER DOZER (A51242)
2011 CATERPILLAR...
 
Top