OP
smithboy
New member
- Joined
- Aug 3, 2014
- Messages
- 14
- Location
- Carrollton, GA
- Tractor
- Yanmar 2010d, John Deere 2640, Deutz Allis 6250
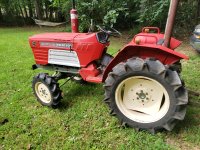
Just to provide a conclusion to the repair, the re-assembly was pretty uneventful and straightforward. In the reassembly and first startup, I ended up with a bad voltage regulator that kept my alternator from charging...that kept me baffled for a little while. I had a spare on the half tractor I bought, but it turned out to be bad as well. I picked up a $20 one ebay and it's been working fine ever since. The most difficult part of the assembly was the electricals. All of the wires were old, brittle, and didn't want to stay in one piece. In the end, I decided to simplify and eliminate blinkers, horn, headlights and other non-essentials...I don't travel on the road and don't use it at night and my horn was more of a buzzer anyway. I am now probably 20 feet of wire closer to being EMP-Proof.
As side notes:
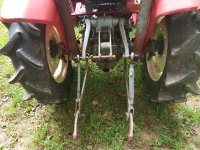
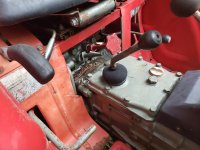
All gaskets I used upon reassembly were cut by hand with and Xacto knife and fellpro fibered or oil-proof gasket materials. They have so far been leak-free. I may not have mentioned it at the time of the clutch, but I had a stuck rock-arm. It took bunch of lubricant and a bit of serious sledge hammer work to free the piston from the cylinder, but it came out (the front). I had to remove both the back and front covers, the lift arms, and rock shaft to be able to hammer like a fool that I am. It also allowed me (required me) to replace the spline seals on the rock shaft, as they had turned to paste. That was fun. After a bunch of dumb attempts to push the seals in with my fingers, I realized you could just put both seals on oriented so that they are aligned correctly, and then use a spacer and the lift arms to squeeze them in, but you MUST do both left and right seals at the same time. At one point I was thinking "Do I really need these seals? I mean REALLY?!" The cylinder finish had a bit of rust and some pitting. I used a brake hone to refinish the cylinder and that's all working great now. I also changed the hydraulic fluid, because I suspect the rust came from moisture in the fluid that came from neglect. But, I can leave the lift up with a finish mower and it will stay up until I release it...days later. In the last picture, you may be able to see that I placed an o-ring on the shaft of the hydraulic adjustment knob, next to the nut...it's painted red along with the knob and shaft. I coated in grease and it has been able to keep water from getting around that spot and rusting it tight. I also replaced the original radiator (as it was having problems cooling). I noticed that parts of the radiator were hot and other parts were not, even when the temp gauge was midway up the scale and the water was hot enough to hurt a bit. As a gamble, I decided to purchase one of the aluminum radiators on ebay ($159+tax). It has made a huge difference and has drastically improved my temps under loads. Time will tell if it is a good long-term investment, but right now it seems to be...
Here are a few things to be careful of...
1) I totally forgot to run the adjustment out on the the clutch for the new disk in there...My first engine start and clutch pedal use resulted in a LOT of extra unexpected noise. I instantly knew my clutch adjustment was wrong...doh! I just hoped I hadn't screwed up a brand new pressure plate and T.O. bearing. Luckily I didn't...but, I certainly could have.
2) Also, the clutch splines were a little TOO tight on the clutch shaft and even though I cleaned it all very well and applied a light coating of grease to the new (used) clutch shaft end splines, it still didn't slide as freely as it should have upon re-assembly. I was hoping for some magic to happen after the tractor ran a bit. I have done this several times before on cars/trucks and just thought it would work the same...essentially, either the strength of the pressure plate springs and/or a little wear from some initial use and it would start to slide on the shaft easier. However, I thought I might have damaged something when I first cranked the tractor (see 1 above), because the clutch wouldn't DIS-engage at all for a while...even under load...However, I knew I could use the tractor's shuttle shift and get by, but I just hadn't considered pto implements starting and stopping...Shuttle shift doesn't really help there. Luckily 1) I didn't damage the clutch (enough) on the first crank and/or 2) I was right about the added slight wear needed on the clutch/shaft splines. It just took a little more time than I expected. About an hour of using the shuttle to go forward and then reverse, and BINGO, the clutch started disengaging like it was supposed to. WHEW! It has been working fine with a bush hog, finish mower, and a tiller as well ever since.
3) If you decide to do this, make sure you have the correct torque specs for your tractor, especially the bigger bolts. I found a chart that provides torques based on the bolts sizes from Yanmar (I forget where), but a couple of sources online were wrong (because they assumed another tractor model was a good proxy, and it wasn't). The use of these sources resulted in my snapping the heads right off of the first couple of bell housing bolts I tried to torque. Removal wasn't a much of a problem, and, since I had the spare half of a tractor, I had access to spare bolts, but it was irritating.


Last edited:
