ROPS: Epoxy light bar with front/rear lights

   / ROPS: Epoxy light bar with front/rear lights #31  
That's exactly what I'm doing but with rectangular KC lights. Very nice install you did.
 
   / ROPS: Epoxy light bar with front/rear lights #32  
Hey Bob and r^2,

Thanks for the nice words. Bob, how did you put the picture directly on the posting so that you don't have to select the "attachments"? That makes it muck easier for the reader.

r^2, I hope to someday set up a website for other 2210 owners and will have to use the link. (in my spare time I guess.)

Bob, I did some research on the supplier for JD's switches to see what they offered. Many switches use the ISO Icon standard to indicate their useage. I found Eaton Vehicle Controls at Eaton switches and I believe the supply at least the JD Ten series tractor switches. I didn't follow through trying to locate a distributor as I searched the JD Parts pages and found some to my liking. You could give them a try. They have many Icons to choose from and offer sealed versions and standard industry connector type.

Nice talking with the two of you.

John /forums/images/graemlins/wink.gif
 
   / ROPS: Epoxy light bar with front/rear lights #33  
Thanks Nick,

If you decide to add switches to the dash as I did, be careful. I thought I would take the dash off the tractor to work on it at my work bench. I spent hours trying to pull the steering wheel off per the servcie manual. I was elated that it finally came off with a gear puller and a bunch of clamps, only to find that the molded metal taper stayed on the shaft and did come off with the steering wheel. I think the new wheel was about ~$20 and apparently the dealers can't get them off in one piece either. So keep this in mind if you decide to remove your wheel.

I did use the old steering wheel as practice for drill a hole at the rim/spoke intersection for a spinner. The wheel is all plastic our there and is easily counter sunk with wood working bits. So I installed a spinner without that nasty clamp for the rim. It goes right through the wheel and looks like the factory installed it. Here's a picture.

John
 

Attachments

  • 428512-Steering Wheel-1.JPG
    428512-Steering Wheel-1.JPG
    85.3 KB · Views: 305
   / ROPS: Epoxy light bar with front/rear lights #34  
Nick,

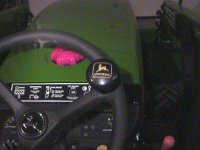
A bottom view of the spinner on the wheel. I used a butterfly bit to create a flat spot on the bottom of the wheel and before you drill completely through the wheel, I made another flat spot on the top side, but only large enough for a spacer to raise the spinner high enough to clear the rim.

The hardest part of the install is getting the rubber cover of and then back on. After much trial and error, I found nearly boiling water soften the rubber enought to remove it from the new spinner. I cut/grind off the mounting hardware and use my own carriage bolt. I also recommend popping off one of the bearings and placing the proper length spacer between the bearings so that they are not overloaded when you torque up the assembly. Heating the rubber again allows it to be reinstalled and low seating on a heat gun helps srink the material back up tight.

John /forums/images/graemlins/grin.gif
 

Attachments

  • 428517-Steering Wheel-3.JPG
    428517-Steering Wheel-3.JPG
    88.5 KB · Views: 295
   / ROPS: Epoxy light bar with front/rear lights #35  
I am just going to tie the lights into the factory switch. Much easier and it will work well since that's how it would come from the factory. Nice job on the spinner and I can say I have never seen it installed like that before but looks pro!
 
   / ROPS: Epoxy light bar with front/rear lights
  • Thread Starter
#36  
John
To put a picture into the body of the post you can attach the image the way you normally would do it. Then post the post. Open a second browser window and then go to your post in window #2. Then open the attachement in window #2. Highlight the URL of the picture and "copy" it. Then go back to window #1 and your post and select EDIT. Then go to the place in your post where you want the image and select "Image" from the TBN Instant Markup menu and "paste" in the URL for the picture. Close window #2.

It can also be done in a similar fashion if you have the picture posted under a different thread. You simply go back to that original thread and pull up the image, copy it, and place it in the new post of the new thread.

There are probably a few other ways to do it too.
 
   / ROPS: Epoxy light bar with front/rear lights #37  
</font><font color="blue" class="small">( George, the photo files started out a 5+MB files, I opened them in Photoshop and dropped the resolution down to 72 pixels/inch and then had to shrink the size down, the combination of the two was how I got the file sizes down to the 100,000 kb limit. If you want, I can send the files to you via email.)</font>
Bob, why not go to www.webshots.com and open a free account. You can make specific albums for your pictures and then just post the URL of the pics you want people to see by copying and pasting the address into your post. Then your pics can all be MUCH larger. I've found it to be far superior. This is what I get when I post a single pic:
Backhoe
And this one can direct one to the albums:
Albums
Try it, you'll like it! /forums/images/graemlins/grin.gif
Thanks to member Dewave for suggesting it to me. John
 
 
Top