Bob_Skurka
Super Member
- Joined
- Jul 1, 2003
- Messages
- 7,503
George, I'll have to keep working on the image resolution thing.
Until then, you will just have to trust me that the edges are all ground down smooth enough to drag your fingers across them, the radius of the curves match on both sides, the paint is as close to perfect as my hawthorn trees will permit me to maintain and that with the exception of the zip ties that run up the side of the ROPS, the thing looks better than the installs that I have seen come from the local dealer where they use u-bolts to clamp brackets on and they don't use matching swtiches.
I know HOW to do what I really want to do, I just have not had the time to source out a countoured wire chase that can be epoxied to the inside of the ROPS. I have seen them in offices where wires are run on the floor inside heavy rubber wire chases that are tapered to prevent people from tripping. They look like minature
rubber speed bumps on the floor. Using one would totally eliminate the zip ties on the ROPS (at least up to the top curve), would eliminate snag points completely and if painted to match the ROPS would not even be noticable from more than a few feet away.
If you can't tell, I am really biased against using zip ties. I don't believe they are UV stabilized so I expect them to degrade and become brittle with exposure to the sun. I also think they look like an amature (THAT WOULD BE ME) did the install. They are great to use UNDER the dashboard, or UNDER the hood, but not where they are both visible and exposed to the sun/weather. Plus, they create snag points and points to trap moisture & dirt (which could lead to rust).
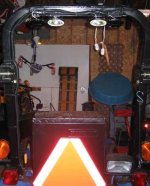
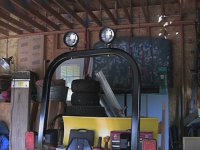
This photo shows the whole ROPS bar from the rear, you can get a view of the wiring along the back of the bracket as well. The lights are adjustable up to down and left to right, within the constraints of the light brackets. You will also see the zip ties that run up the side of the ROPS, but you can't see the zip ties used on the bracket to hold the wiring in place up there. I drilled several pairs of holes by the lights and in the center of the bracket so I could hold the wiring firmly in place to the bracket.
When mowing we brush against the hawthorn trees, and if you are not familiar with them, they have some very nasty 1" to 2" thorns sticking out of their branches that are tough enough to go through garden tractor tires or a pair of tennis shoes. Consequently having the wires protected and recessed out of the way was a MAJOR priority because if there are ANY snag points to catch, those thorns will find them and rip out whatever they catch onto.
