MotorSeven; The basement feels a bit cooler but I am not noticing a big difference on the main floor. I think I need to do a test of the air currents now & see how/where the cold air is returning to the basement. I knew this whole heating from the basement would require some modifications so I am trying go slow. I kinda wish I had several thermometers hooked up all over the house/basement tied to the computer so I could track & log the changes.[/QUOTE said:M-7,
Do you have a fresh air pipe to the basement woodburner dampner inlet from outside to replace the oxygen for combustion?
You are using an out of date browser. It may not display this or other websites correctly.
You should upgrade or use an alternative browser.
You should upgrade or use an alternative browser.
The Log house Project begins........
- Thread starter MotorSeven
- Start date
/ The Log house Project begins........
#2,031
OkieDiesel
New member
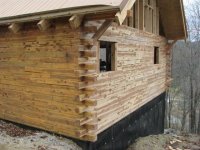
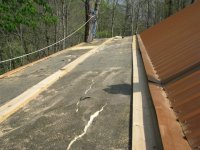
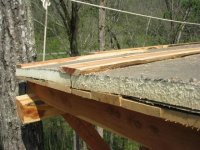
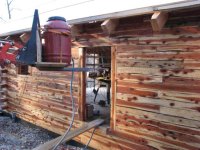
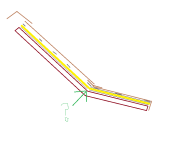
I've read your build from beginning right up to this point... never skipped a word. I'm amazed, and congratulate you on your progress. Regarding your transition point dripping... I think many on here are WAY over complicating it. Moisture is normal... that's why you have a moisture barrier. But, how did you make the transition from roof to overhang with that moisture barrier? It looked to me like you transitioned with the roof metal, but I couldn't see how you could have placed a moisture barrier transition UNDER the roof moisture barrier, and OVER the overhang barrier, to prevent water from getting through there. See the attached pic for an idea what I'm asking.


OkieDiesel
New member
Problem solved by this pic? Except... I seem to remember you saying something about putting the moisture barrier on top of the overhang foam, or not at all (it hand some built in or something?)? In which case, problem is solved by removing overhang metal, foam, loosening roof and tucking moisture barrier transition under existing, then placing moisture barrier on overhang (under transition barrier) then re-installing foam and metal. Hope I'm making at least some small amount of sense. You didn't post pics of the transition while making it, so I may be way off base here. 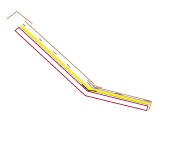

MotorSeven
Elite Member
Tony you may be right. I need to fire up a Maduro and walk around while the stove is at full bore to "see" the air currents. Once I know how the flow is I may be able to make adjustments.
Okie, no you are correct, I did not put a moisture barrier transition under the metal transition so there is a break there. Also and recently, I now have a full blown leak along the transition when it's raining so I made a mistake there someplace. Racking my pea brain I cannot remember if I caulked the overlapping 10' sections of the 10" transition metal, so water may be finding it's way back under each overlap(there are 4 I think). The leaks seem to correspond with those breaks...about every 9'. The weather is warming up so I will be able to get back up there in a week or so to see what's going on. I kinda hope I did forget the silicone which would explain a lot eh?
Pacer, no, I do not have a OAK(outside Air Kit)...yet. I can tell ya that without one I can easily find those gaps around doors and windows when the stove is running.....100,000 Btu's an hour sucks a lot of air to feed itself.
I initially planned for an OAK, but just have not got the big hammer drill out yet and installed one.
That and the gap leaks can also be contributing to your circulation problem.
Do you have an inside chimney or one up an outside wall?
OkieDiesel
New member
It's sounds like you've got the dripping whipped (except for the work part). Unfortunately, I don't see any way around the tin and foam coming off the overhangs to fix it. But, at least you don't have to pull the main roof  When you go to seal up that gap, I like to think of it like this: you should be able to go through a frog strangler with nothing but the moisture barrier, without a single leak. One seamless barrier, overlapping from top to bottom so water runs down all the way to the eves without being able to find a gap. One other thing... By running the moisture barrier top to bottom (and I completely understand working alone and why you had to do that), if the water hangs up anywhere and goes sideways, it can slip under the seams. If they are taped really really good, then you may be OK. But, the one thing water wont do is travel up-hill (usually), so having the overlaps top over bottom is always preferred. Also, moisture barrier to the warm side in winter on this style of roof.
If you do develop leaks, and have to pull the roof That would be a great time to double up the foam or add some high density. You could most likely do so without having to alter the tin with a little creativity. Up to 85% of the heat in a log cabin is lost through the roof, so insulation there makes a HUGE difference. Especially with open vaulted ceilings where the heat is all gathering way up where you're not. A ceiling fan or two (which I think I saw you purchased) to push the heat back down will really help.
As far as venting the roof... the tin is designed to do that. It looks to me like you installed it exactly like every other tin roof I've seen installed. I wouldn't jump through any hoops to try to make more air move through it. But, that's just me.
I am incredibly impressed with your work. Thank you for sharing it with us all!
MotorSeven
Elite Member
That and the gap leaks can also be contributing to your circulation problem.
Do you have an inside chimney or one up an outside wall?
Inside, 8' double wall black uninsulated in basement, then double wall SS insulated on main floor through roof. It is 25' long with 20' inside the house. I have wicked strong draft which is good considering only 5' of stack above the roof. So far I have been able to maintain an average of 65 degrees on the main floor....coldest here has been 11 this winter. 23 this AM, loaded the stove at 10PM last night & flue temp was at 265 this morning at 7:45AM. So I am happy with the performance of a 1986 non CAT stove although I am burning a good whack of wood to do it:laughing:
Okie & Massey thanks...it's been an "adventure":thumbsup: And yes 5 ceiling fans, all Hunter Originals...the Cast Iron one's & I always have the one in the loft & one over the Great Room running in reverse on low.
I'm shooting for Sunday to get up there and inspect the lapped seams. Without ropes and a safety harness I found the best way to keep from sliding around on the tin is to take my shoes and socks off...bare feet stick better then any shoes I have tried.
So I am happy with the performance of a 1986 non CAT stove although I am burning a good whack of wood to do it:laughing:
I'm shooting for Sunday to get up there and inspect the lapped seams. Without ropes and a safety harness I found the best way to keep from sliding around on the tin is to take my shoes and socks off...bare feet stick better then any shoes I have tried.
Nothing wrong with a good old stove. It will outlast the new ones!
Having an inside chimney is a great benefit over a cold outside one.
Old houses with coal furnaces had the chimneys inside because the heat was from the furnace at the center out, but
they also had much better draw than the modern fancy outside chimneys with very little height above the peak.
Get yourself a piece of soft foam rubber about 3 feet wide and 6 ft long and 4-6 inches thick. Use that on your roof to sit on and crawl on. Lot better traction and feels better on the piles..
MotorSeven
Elite Member
Well I got the van back together. This was my first time setting valves with Hydraulic lifters...what an "ordeal". The book I was using never mentioned having to warm up the engine first nor did it tell how to temporarily set them cold. So of course I had them all too tight even after re-doing them twice. After much head scratching & expletives, I finally had my neighbor come over and show me the right way & got it to start so the "real" adjustments could be made.
Another thing I did not know was that it takes the computer quite some time to re-map itself and that it needs to see everything, idle, cruise speed, throttle under load, wide open throttle etc. Anyway the timing is set and it is running well. I'm going to drive the snot out of it for a couple of weeks while checking the oil level.
Time to pick up a saw and work on the house a bit....don't even want to look at a wrench for a few days:laughing: