Jim's Pole Barn Project - hopefully

   / Jim's Pole Barn Project - hopefully
  • Thread Starter
#361  
Re: Jim\'s Pole Barn Project - hopefully

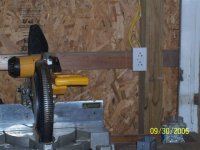
Here you can see the other duplex outlet. Currently that is the radio, battery charger, and the work light plugged into it. I haven't started running the wiring for the lights yet. Most of the lights I've looked at come with a plug. I think I'll just wire outlets into the light switch and plug the lights in. That'll allow some flexibility with moving lights around as needed (hopefully not too much of that, but you never know) and also easier/faster replacement.
 

Attachments

  • 747911-100_0738.JPG
    747911-100_0738.JPG
    52.6 KB · Views: 400
   / Jim's Pole Barn Project - hopefully
  • Thread Starter
#362  
Re: Jim\'s Pole Barn Project - hopefully

Last one for now. The picture of the GFCI outlet that protects the other duplex outlets at the work bench. This is one circuit. A total of 10 outlets, the GFCI, the 2 duplex, and an outlet on the back side of the garage for the dogs (they are really spoiled /forums/images/graemlins/laugh.gif). I've left a little slack in my wires in case (hopefully) I come back and build "walls." This will allow me to unattach the outlets from the pole, put a 2x4 in and then reattach to the 2x4 w/o having to redo the wiring. I did make sure as I was attaching the wire to the pole to keep it back away from where the 2x4s will go.

Just on the right of this pic you can see the door frame that I had for the door to what was going to be my air compressor room. I decided that I wanted the bigger workbench instead. /forums/images/graemlins/smile.gif Now there really isn't a good place for the compressor room. Guess I'll just have to listen to it. /forums/images/graemlins/frown.gif
 

Attachments

  • 747917-100_0739.JPG
    747917-100_0739.JPG
    55.3 KB · Views: 408
   / Jim's Pole Barn Project - hopefully #363  
Re: Jim\'s Pole Barn Project - hopefully

</font><font color="blue" class="small">( Most of the lights I've looked at come with a plug. I think I'll just wire outlets into the light switch and plug the lights in. That'll allow some flexibility with moving lights around as needed (hopefully not too much of that, but you never know) and also easier/faster replacement. )</font>

Jim, that's what I did too. Maybe down the road I'll stumble onto a great deal for some nice commercial hardwire fixtures but until then, I need light now and the cheapie plugins do fine. I wired one circuit to feed three ceiling duplex receptacles which in turn powers two rows of (3) 4' strips in the rear shop area. The other circuit feeds two ceiling duplex' and (4) 4' strips over the car bay area. Think I paid less than $6 ea. for the double bulb strips w/ fast start cold weather electronic ballasts. Even caught a sale on a case of T8 bulbs for 1/2 price. Don't think I have $75 bucks invested in everything. /forums/images/graemlins/smile.gif Heck, I just realized ONE outdoor carraige fixture cost more than ALL of my interior lighting combined! /forums/images/graemlins/blush.gif
 
   / Jim's Pole Barn Project - hopefully #364  
Re: Jim\'s Pole Barn Project - hopefully

Jim,
They cost me $48 per fixture but I have all the light I will ever need in my pole barn for most of the things I do. I installed 8 dual tube florescent lights with reflectors, wired to four switches, two fixtures per switch. I bought them from a local electric supply company and found them the most reasonably priced of anyone in my area. The lights probably won't light in real cold weather but I keep my pole barn heated in the cold season so they should be okay. The ballast hum bugs me once in a while.
I do use tungsten lights on my mill, drill presses and metal lathe when I do critical work because the overhead lights aren't quite enough.
Farwell
 
   / Jim's Pole Barn Project - hopefully
  • Thread Starter
#365  
Re: Jim\'s Pole Barn Project - hopefully

Thought I would post kind of a follow-up to this thread to where it started from. The kids have gotten into raising goats for 4-H. Last year they just did Market Wethers so we didn't have to worry about housing them over the winter. Well, now my daughter decided she wanted to do a dairy goat and a breeding doe so now we had a need for winter housing. That brings us back around to this thread. We needed to move the 8x16 shed again that started this whole process. Couldn't do it the same way we did before as Dad is no longer with us, but I'm sure he was there in spirit helping us do this move again. I learned a little bit since the first time. I wish I would've gotten some pics, but unfortunately, I didn't think about it and didn't really have time. We needed to rotated it 90 degrees and then back it up about 40'. First thing we did was jack it up using my 3 ton hydraulic floor jack and put 2x8x16 under the back and front at an angle. I then took the little New Holland and pulled up to the edge of the outside 4x4 running along the edge with the bucket. Bumped up against it and then stepped on the go pedal. That little New Holland rotated that shed quite easily. I think we had to do that one more time. Then when it came time to roll it back. Between taking pressure off it and the floor jack again, we removed the 2x8s and put a piece of PVC at the back and then one just a little bit past half way. Again pulled up to it with the loader bucket and shoved the shed again. As the PVC came to the front and the back piece about mid-way, we put a 3rd piece at the rear and shoved it some more. Once in place we jacked it up put some blocks under and it was solid and level. I think all said and done it took about 2 hours. Wouldn't have been quite that long if the ground wasn't so dry trying to dig holes for the jack to sit in. It was certainly a lot safer doing it this way vs. the train that we did before, but it wasn't near as much fun.
 
   / Jim's Pole Barn Project - hopefully
  • Thread Starter
#366  
Re: Jim\'s Pole Barn Project - hopefully

Funny looking back at these pictures. How much things have changed since this thread. We had the house fire and built a new house. That consisted of changing how the power was run to the barn. I had to unwire the barn, pull the supply line out of the conduit, cut the existing conduit off (leaving it intact under the concrete), installing new conduit, pulling a new much longer supply line to the house. Then some of the yard items that were pulling their power from the power pole in the yard are now powered from the barn so that also involved digging up wire and such. We've bought a couple of campers since these pics. Added gravel to the left (facing the front of the barn) to park the camper on. Added a turn around to the driveway.

Then even looking at some of the stuff inside. We have one of those canvas car ports. It is still stored in the tote under the work bench in the same place. The 3 file cabinets are still in the same place, extension ladder is still hanging in the same spot. Now instead of the 1 tool box, I have 3. A 40" stainless steel stack and then I brought Dad's home, repainted it, and lined it up beside my other two. Then you have my miter saw and stand that I think has been in 15 different places.

Still not finished on the inside, no HVAC but it does have a heat pump that isn't hooked up. It does have hot and cold running water, and does have propane run to it. Has spouting, but no downspouts. Oh, and you can barely walk through it :)
 
 
Top