Please critique my welds

   / Please critique my welds #1  

Teikas Dad

Gold Member
Joined
Aug 21, 2012
Messages
394
Location
Live Free or Die
Tractor
Kubota B3200
Getting ready to start welding things on the bucket of the tractor, but I haven't really welded anything in a couple years. I'm going to weld a length of 3/16" angle on the back of the bucket lip, then weld hooks and clevis mounts to that.

Before I screw up my bucket I figured it would be smart to do some practice runs.

I got some scrap pieces of 3/16 to keep everything the same and a couple extra hooks for a practice run. Running a Hobart HH187 with solid .35 wire and argon/co2 mix.

According to the chart (it's a tap machine so voltage/speed are machine settings), for 3/16 with AR/CO2 and .35 wire, the wire speed should be set at 50 and the voltage at 6 (out of 7). I kinda figured out the wire speed to the tap setting using simple math. The machine has settings from 10 to 100 for wire speed. The minimum speed on the unit is 40 IPM and max is 700 IPM, so hopefully my math was correct.

WS 10 20 30 40 50 60 70 80 90 100
IPM 40 114 187 260 334 407 480 553 627 700

Apparently the voltage is a sliding scale because it's effected by the wire speed. But, I calculated this out. The machine has settings from 1 to 7.

Setting 1 2 3 4 5 6 7
Voltage 13 19 21 23 25 27 30

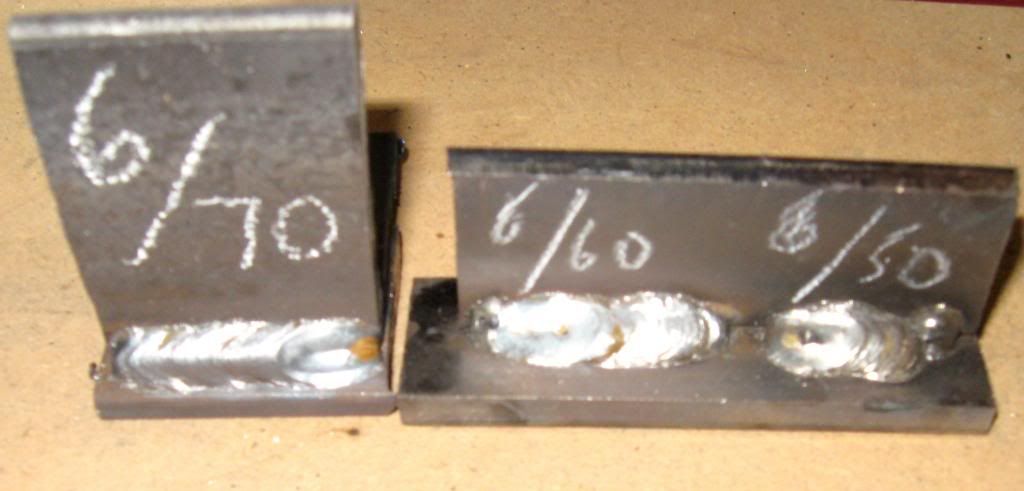
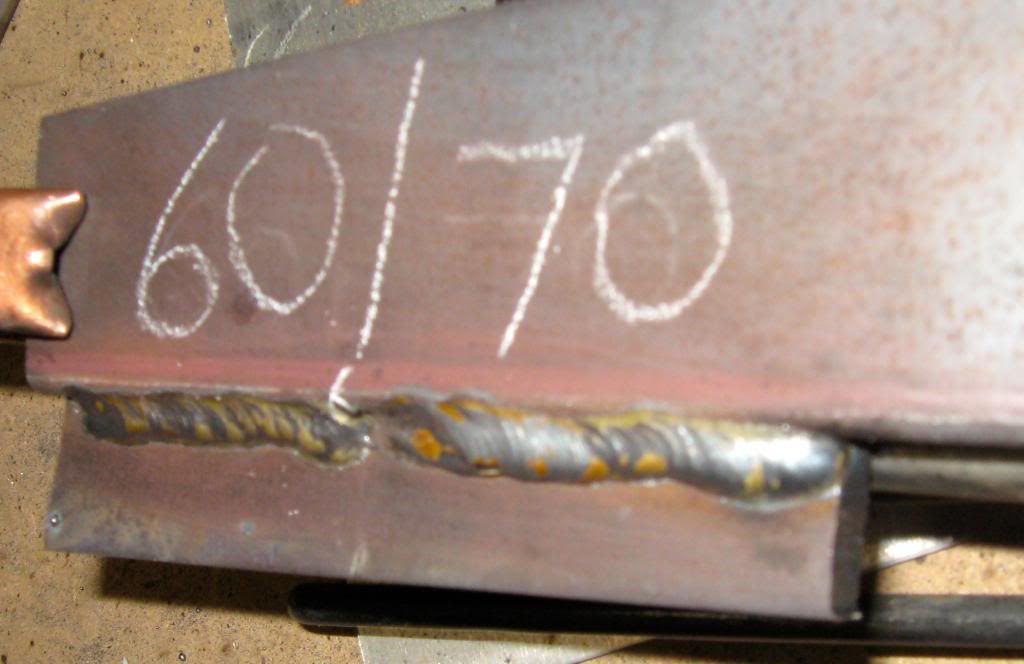
Based on the settings it looks like the initial setup is 27 volts and 334 IPM. I ran a bead at that setting and I thought it was kind of thin. I upped the WS to 60 (407 IPM) and left the voltage on setting 6. That bead seemed to run pretty good. I figured I'd jack up the WS to 70 (480 IPM) and see what happened. The bead ran OK but it seemed to stick up more in the center compared to the WS of 60. The WS setting of 60 sounded the best too. It wasn't popping, sputtering or crackling, it was more of a steady sizzle/hum.

Here's what the three test beads look like:

IMG_5277_zps83c2edcc.jpg

IMG_5279_zpsfcbd64ef.jpg

IMG_5278_zpsa42292ce.jpg


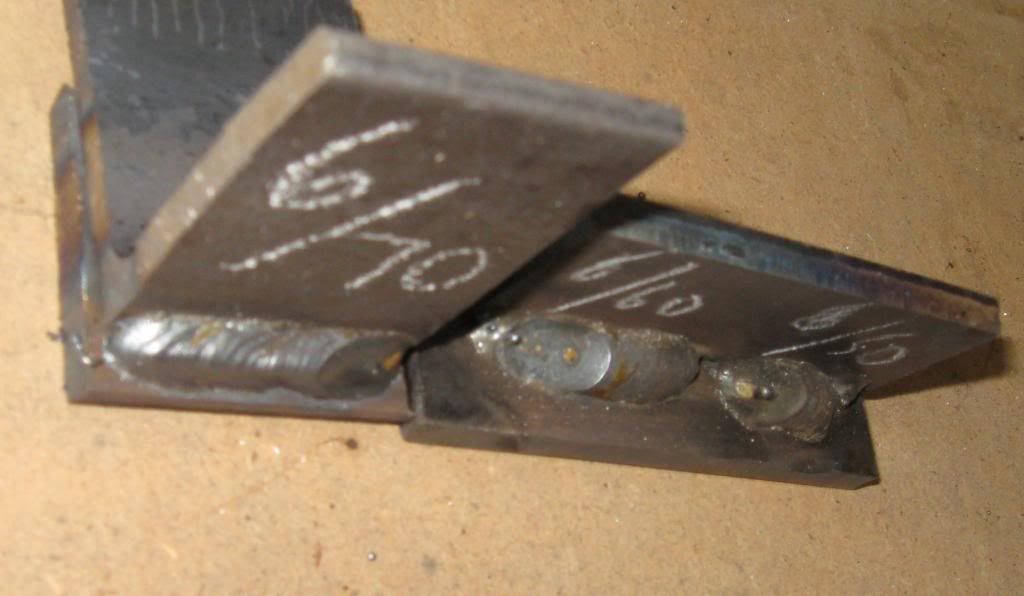
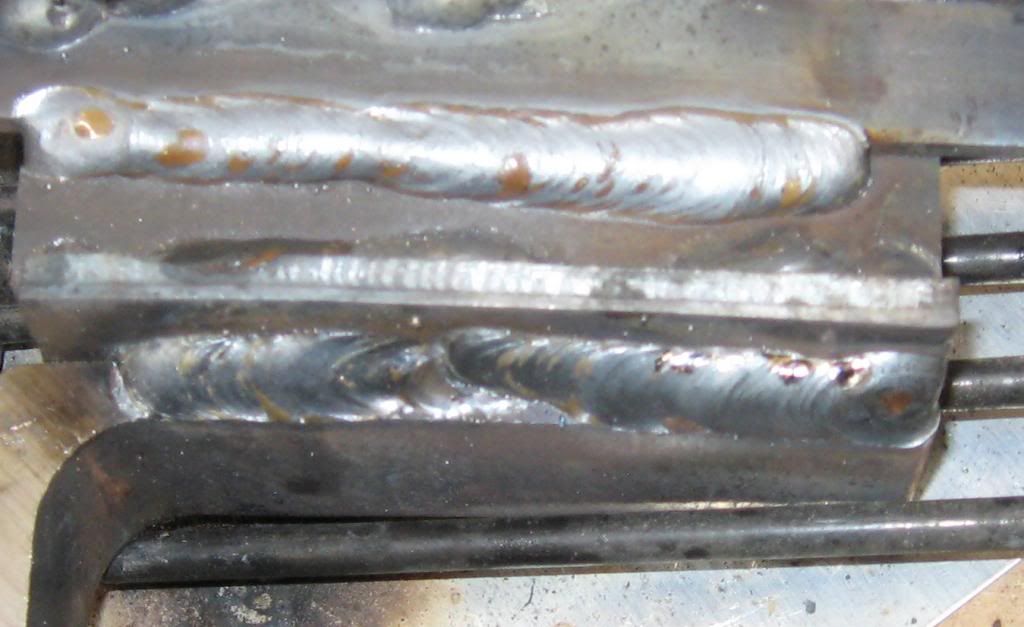
I ran some more beads at the 60 and 70 settings, leaving the voltage on 6.


IMG_5284_zps7f2c1ffb.jpg


Sorry, camera took some crappy pictures.....
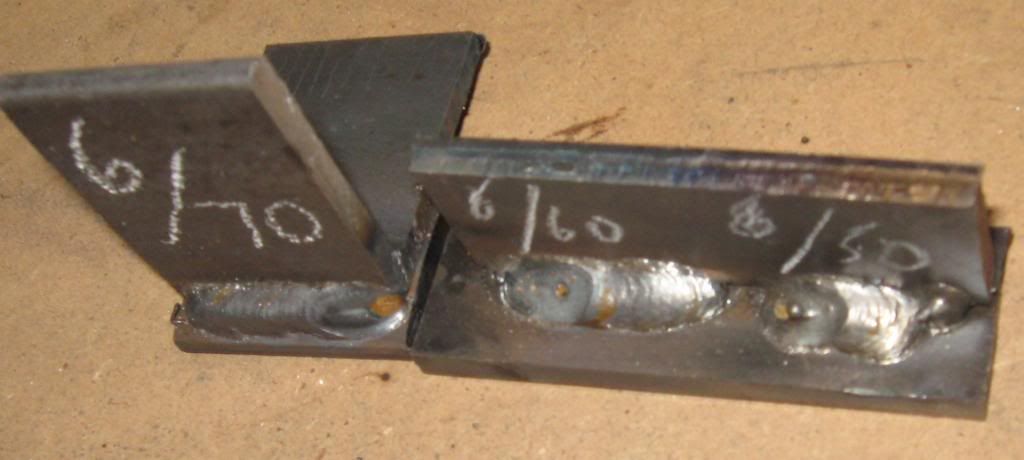
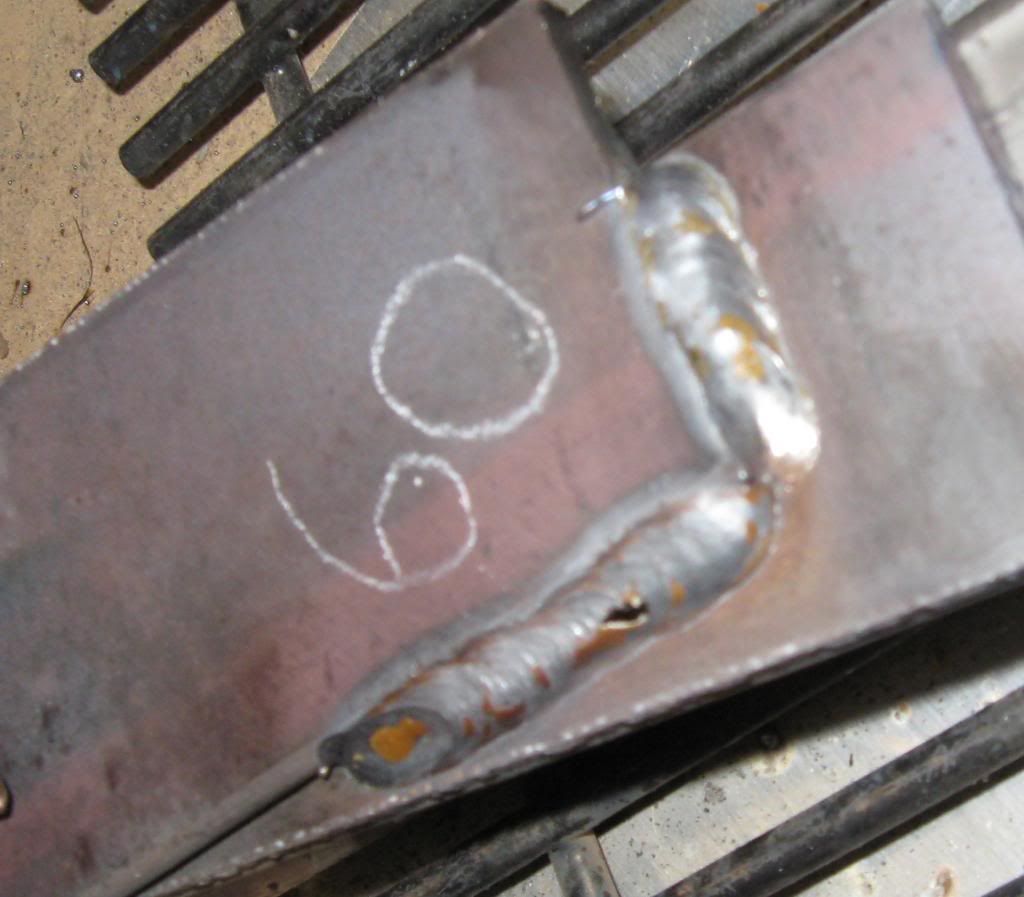

Here's a lap at 60.


IMG_5286_zps67f0e719.jpg


I ran a bunch more practice beads to get back in the swing of things.


IMG_5269_zps67ec9055.jpg

IMG_5274_zps229bff36.jpg


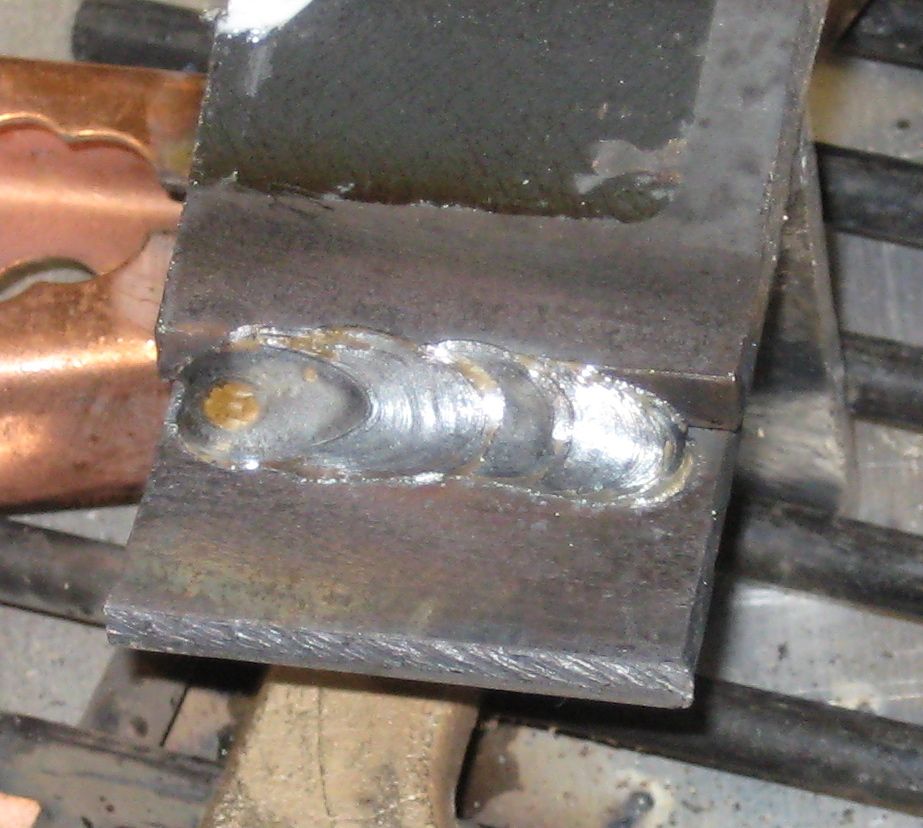
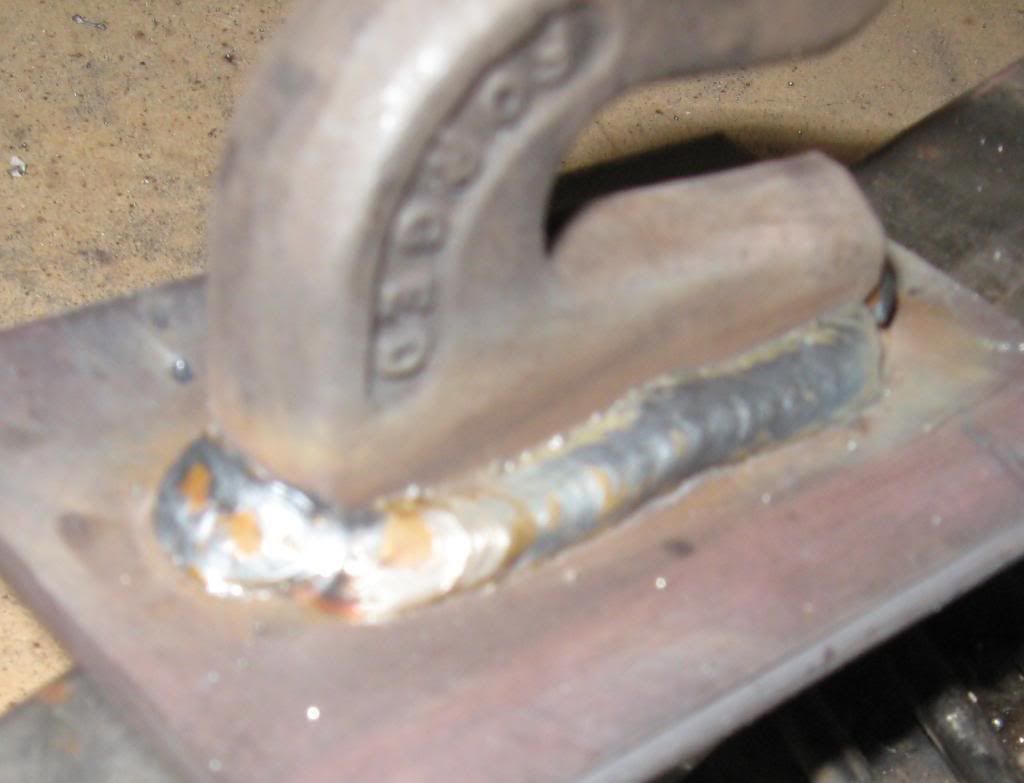
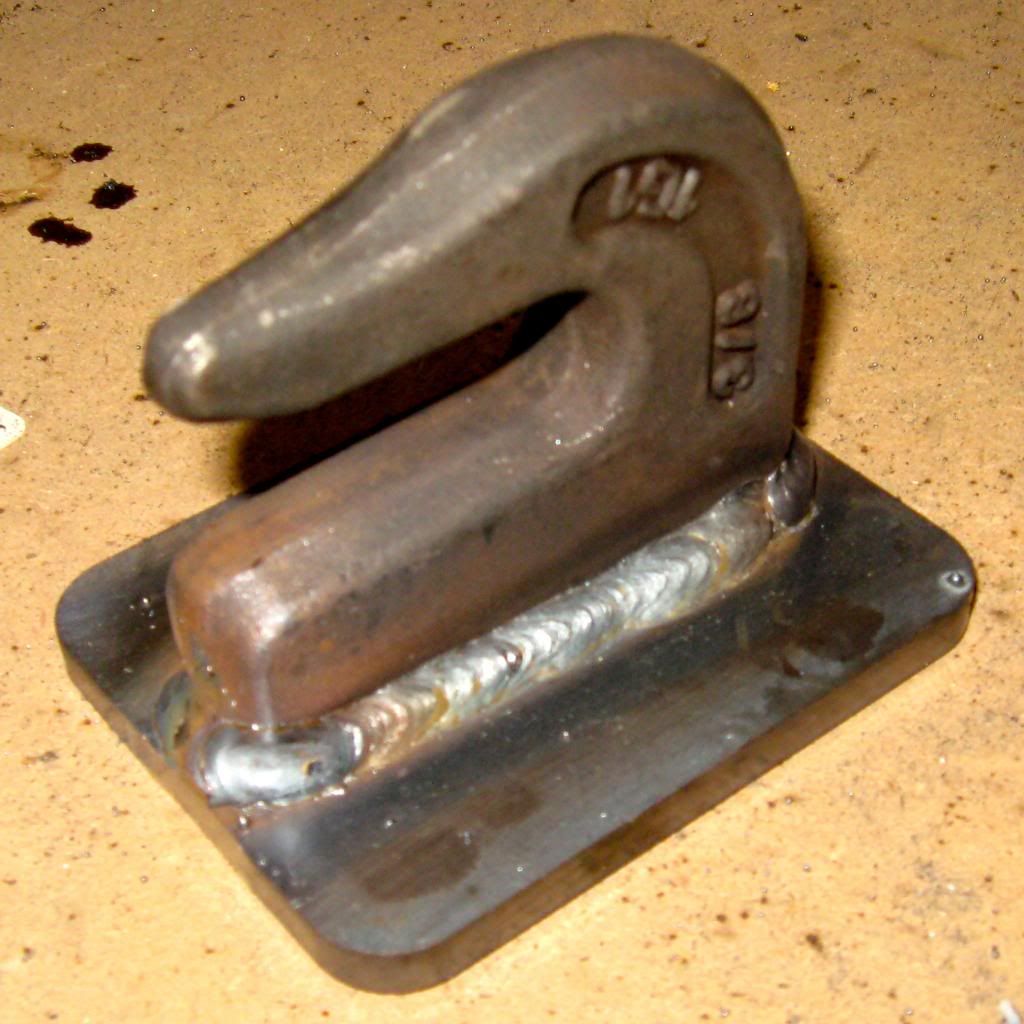
Eventually I took a shot at welding one of the hooks to a flat piece of 3/16 scrap.


IMG_5299_zps091d6f00.jpg

IMG_5297_zps1dea9666.jpg

IMG_5290_zpscfa04bda.jpg

IMG_5288_zps0f5590f4.jpg


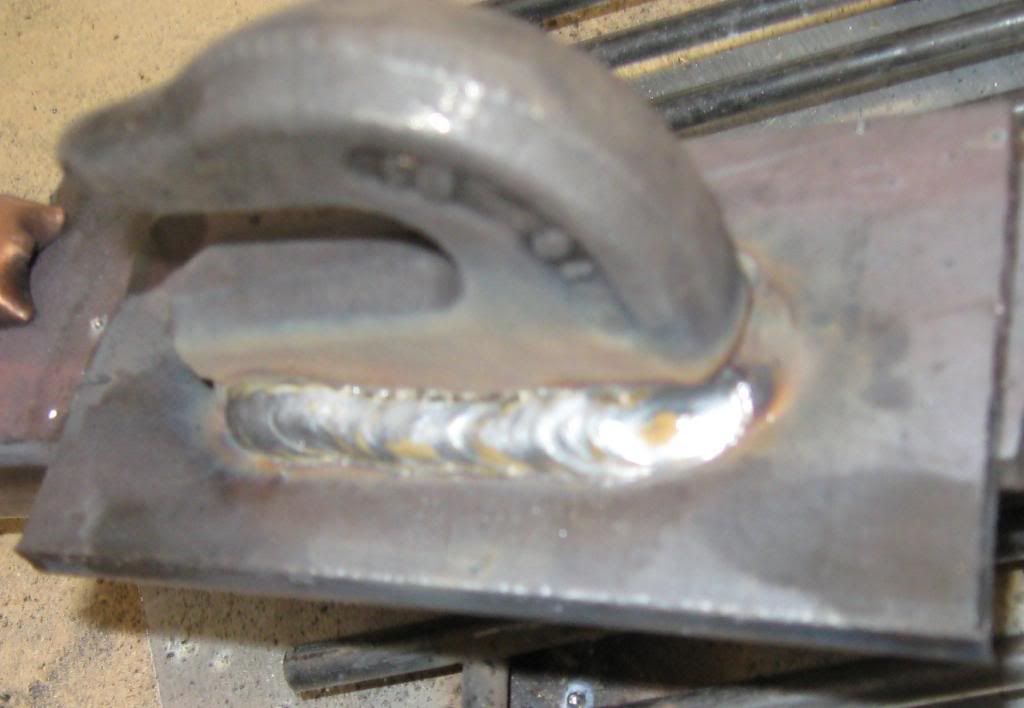
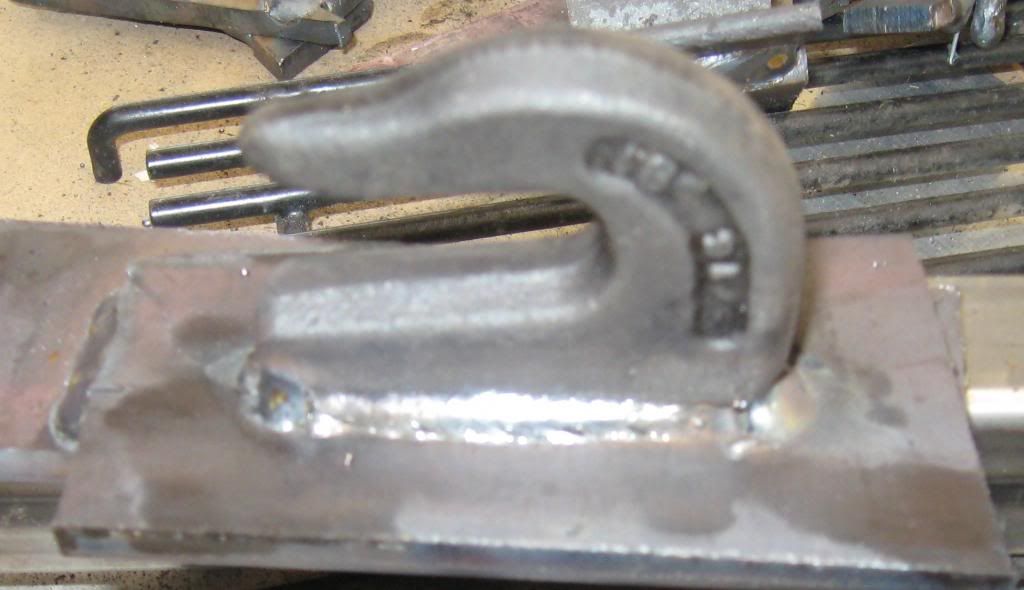
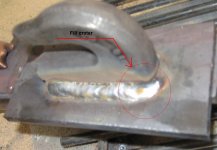
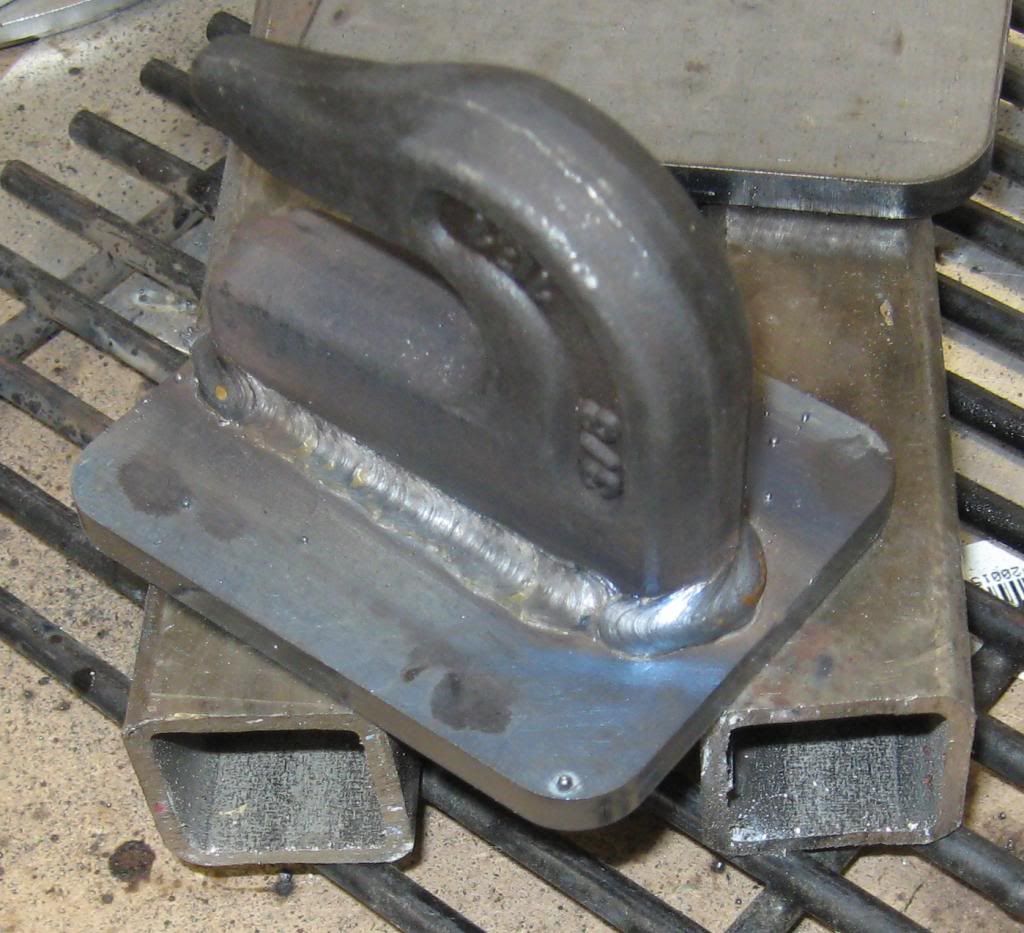
Finally I took one of the hooks that are going on the bucket. This one is going on the back of the bucket just above the heel so I can lift with the bucket back if need be. The hook was welded to a 1/4" plate that I got from Ken's Bolt-on's.


IMG_5302_zps774f8e90.jpg

IMG_5303_zps02baed56.jpg


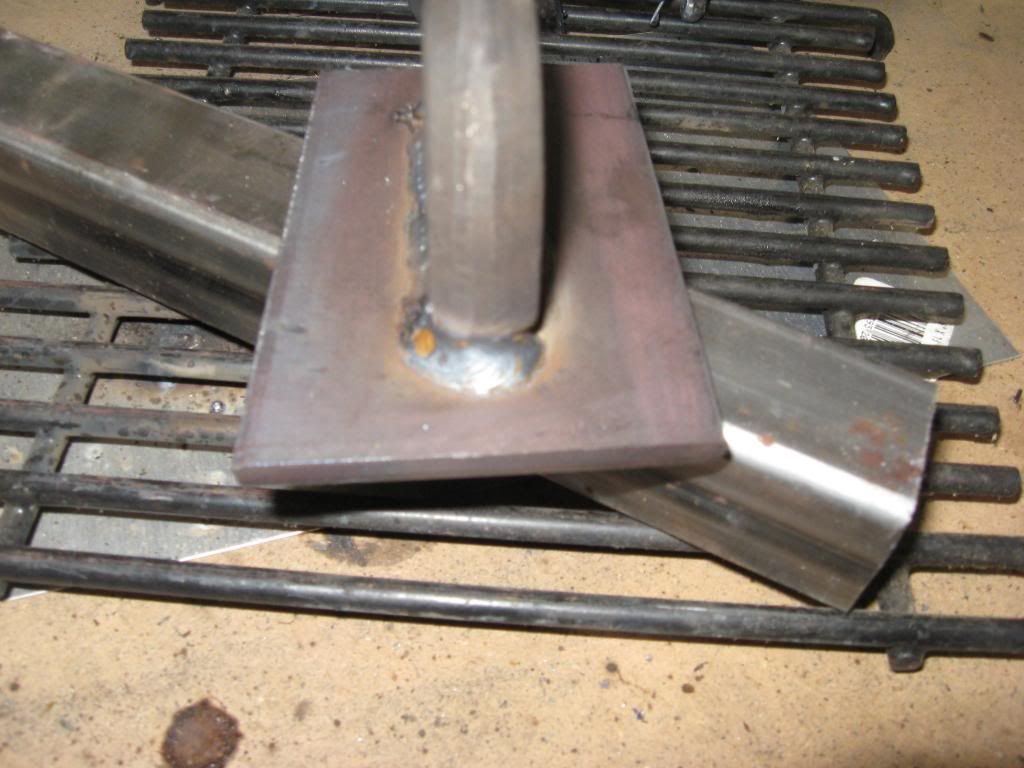
This is the 1"X2" shackle mount that's going inside the bucket lip top. Also welded to one of Ken's plates.


IMG_5307_zps6a88b0b5.jpg


Am I close enough for government work? Any comments, suggestions, advice or criticism is welcome and requested!

I found that I had to concentrate on not moving too fast. I also found out that I need some better cheater glasses under my helmet. The ones I have work good for the computer but not so good for welding, not strong enough. I did try out my new Hobart AD hood today and I'm very happy with it. I replaced a $50 Northern Tool AD helmet that I've had kicking around for 7 or 8 years.
 
   / Please critique my welds #2  
Actually not bad at all!
The first few fillets welds, looks like you need to turn your wire speed down a little bit. But first thing I would do is speed up your travel speed. The welds are just a touch lumpy.

Now those welds on the hooks, and shackle mount are all most picture perfect. I would fill the crater a little more. What I would do is turn the gun 90-degrees to the plate, close the arc length up a touch, and back up 1/4, 3/8 to 1/2-inch to let the crater fill. You are well on your way! :thumbsup:


What I did when my eyes started failing, was go to Wal-Mart or the dollar store, and try on different power reading glasses, then hold something up to read at about the same distance as I would be welding.
 
   / Please critique my welds #3  
The welds should hold up fine.I've seen better and much worse.The weld on the hooks and shackle looks a bit cold and undersized.The leg length of a fillet weld should be equal to,or greater than,the thickness of the thinner piece of metal.I don't think it would hurt to add a couple of more passes to them but that is just my opinion.It would have been better to do all the welding at once as the first pass would have preheated the pieces.Good luck with the project.
 
   / Please critique my welds
  • Thread Starter
#4  
Thanks Carl.

When you talk about filling the crater, do you mean the section under the edge of the hook where the bevel is? Also, turning the gun to 90 degrees, do you mean essentially perpendicular to the hook then angle it about 45 degrees? I was holding the gun at about a 20 degree or so angle to the hook and 45 degrees or so between the hook and the plate and pushed the weld. If I understand correctly, I should put the gun at 90 degree left/right to the hook so the wire goes straight in to where the bevel meets the plate.

The very first photo shows the wire speed at 50, which is what the Hobart chart recommended. When I was looking at it I didn't think it was all that good, but now looking at the photo, the 50 setting bead seems to be a bit wider than the 60 or 70. The 70 bead had a ridge running down the center of it and I knew that wasn't supposed to be there. I also tried a couple different techniques. I took a one day training course at an area welding supply store a couple years ago and they taught move ahead 1/4" then back 1/8" into the puddle, then forward again technique. I've watched a bunch of videos on Youtube where they were doing small loops, like a lower case cursive letter "e" so I tried that too. I found on a lap joint I tended to go over the top of the upper piece edge so the back and forth seemed to be the better choice there. What do you think about the wire speed? Do you think for the 3/16 material that 50 setting would be better? I know the photos are pretty crappy to make a good determination from.

I actually thought I was moving my hands too fast! It was a bit of a pain trying to weld the small scraps and concentrate on a steady hand and I tried to keep a slow steady pace. I think the bucket will be a bit easier because I'll have room to get a good steady hand position. Part of the problem with my wobble was not being able to see the joint really well. I started out with the helmet set on 11, then backed it down to 10 and finally 9. That helped some but I've got to make a trip to Kmart/Walmart/Quickymart or someplace to pick up a set of cheaters that are a little more powerful than my computer and reading glasses.

The hooks that I welded today were from India. They didn't have anywhere near the bevel on the bottom that the other hooks that I've got have on them. They gave me a bit of a problem as I shortened up my stickout too much and got too close to the puddle with the nozzle. Welded two tips shut before I finally figured out what I was doing wrong. The other thing I found on the final hook was that the wire was burning off and the circuit was breaking. I forgot to adjust for the different thickness. The practice hooks were on 3/16" and the plates from Ken are 1/4". When I cranked up the wire speed and voltage I was able to finish the weld without any problem.
 
   / Please critique my welds #5  
If I understand correctly, I should put the gun at 90 degree left/right to the hook so the wire goes straight in to where the bevel meets the plate.
Yes!

Now remember with a tapped machine, you'll have to make your adjustments with your wire speed. Now you can change the voltage by lengthening the arc length to a degree. With Mig I run about 3/8-inch stick out, if I want a little hotter puddle I will open the arc length up to 1/2-inch. If you go too far the puddle will cool right down, and most likely loose the arc all together! I position the gas nozzle flush with the contact tip, or have the contact tip sticking out from the gas nozzle a little bit. With Mig welding, or stick welding fillets I use an up and down motion. I want to be sure the weld is tyeing in on the toes!

Here is your picture with lack of fill in the crater. This is about the weakest spot of a weld! Now with Mig welding sometimes the start of the weld isn't all that good either. When I'm doing something really important, I'll grind my starts out, before bringing the next weld into it.
 

Attachments

  • Teka dad 1.JPG
    Teka dad 1.JPG
    70 KB · Views: 488
   / Please critique my welds #6  
When it comes to welding advice,you will get as many different opinions as the number of people you talk to.As far as wire feeders,I don't believe in putting much movement on the gun,other than forward.If you have to go in circles or letter "e"s that tells me that the machine is set too cold.By using a lot of motion you are slowing down travel speed and putting more heat into the piece,which leads to more stresses and distortion.Have you tried using maximum voltage as this would help to flatten out the bead?I think your welds will hold up fine.
 
   / Please critique my welds #7  
Yes!

Now remember with a tapped machine, you'll have to make your adjustments with your wire speed. Now you can change the voltage by lengthening the arc length to a degree. With Mig I run about 3/8-inch stick out, if I want a little hotter puddle I will open the arc length up to 1/2-inch. If you go too far the puddle will cool right down, and most likely loose the arc all together! I position the gas nozzle flush with the contact tip, or have the contact tip sticking out from the gas nozzle a little bit. With Mig welding, or stick welding fillets I use an up and down motion. I want to be sure the weld is tyeing in on the toes!

Here is your picture with lack of fill in the crater. This is about the weakest spot of a weld! Now with Mig welding sometimes the start of the weld isn't all that good either. When I'm doing something really important, I'll grind my starts out, before bringing the next weld into it.
If he is using a constant voltage power source,which I am pretty sure he is,the only way to truly change the voltage is with the control on the machine.This is why they are called constant voltage machines.By increasing the stickout you are increasing wire speed,which cools the puddle.Decreasing the stickout decreases the wire speed and the puddle gets hotter.
 
   / Please critique my welds
  • Thread Starter
#8  
Thanks again Carl, using the photo helps! I understand what you mean now. kcender, thanks for the input. I wasn't doing circles or "e"s because I had to, it was what the instructor recommended. I don't know if he was trying to make our mig welds look like tig welds or not. Come to think of it though, if I recall when I did the shackle mount and the hook that's going on the back of the bucket, I think I did a straight push and not a back and forth movement. I'll see what I've got left for scrap and try some more beads.
 
   / Please critique my welds #9  
I think people sometimes worry too much about trying to make a weld look a certain way.Using enough heat and getting proper penetration is more important to me.Not to say that the surface of a weld is not important but a mig weld will look like a mig weld,it doesn't have to look like a weld from another process.
 
   / Please critique my welds #10  
If he is using a constant voltage power source,which I am pretty sure he is,the only way to truly change the voltage is with the control on the machine.This is why they are called constant voltage machines.By increasing the stickout you are increasing wire speed,which cools the puddle.Decreasing the stickout decreases the wire speed and the puddle gets hotter.
Really?! You truly believe that?
 
 
Top