My Horse Barn in Progress

   / My Horse Barn in Progress
  • Thread Starter
#111  
Your craftsmanship is absolutely awesome!!! Your gonna give the TBN guy's an inside tip on those steeds that will ultimately live in these luxury apartments, Right??? I'll fax ya $200 crisp money on the one stalled next to the 'tack' room!:D. Will you be boarding-out, to help recover some of your cost? Or is this strictly a 'labor of love' for your & wifes critters? Beautifully done!!! ~Scotty

Thanks, Scotty! Hopefully we'll board out two or three stalls. It won't make me rich, I'm sure, but hopefully it'll offset some of what we've put into the place.

I'll be waiting for your fax. :)

Josh
 
   / My Horse Barn in Progress
  • Thread Starter
#112  
WOW...It's really looking good. I'm jealous...I'm still waiting for the mud to go away so that I can start working on mine again.

Yeah, that's some pretty serious mud! Does the mud ever really go away up there in the Pacific NW or does grass just grow on top of it during the summer?

You're chomping at the bit now, but in a couple of months after mixing and pouring another 20,000 pounds of concrete, you're gonna be wishing it was January again. ;)

Spring can't get here fast enough. It's snowing yet again right now. I've been in NC for five years and I've seen five times as much snow this year as all the other four years combined. The frogs apparently didn't get the memo that spring was delayed this year. They're chirping away out there this evening even under a couple inches of snow!
 
   / My Horse Barn in Progress #113  
Did you mill your T&G yourself? Looks like 6/4 pine #1? If you milled it,what tools did you use? Fine looking horse barn.
 
   / My Horse Barn in Progress
  • Thread Starter
#114  
Did you mill your T&G yourself? Looks like 6/4 pine #1? If you milled it,what tools did you use? Fine looking horse barn.

I bought it from a local mill. It's actually #3, and they sell it for $0.34/lin. ft. It does have a few defects here and there, but I think it looks pretty nice all in all. It's planed out to a thickness of just under 1 1/2", so I assume it started out at 8/4.

I thought (briefly) about milling it myself, but decided against it for a number of reasons: 1) I'd have to spend a couple hundred bucks on the right cutters for my shaper; 2) My shaper is only 1 1/2 HP single phase. I'd probably want at least a 5HP 3ph shaper with a power feeder for the mile or so of lumber to be milled; 3) I don't have a good source for dry rough-cut lumber, and I didn't want to use green lumber for all the T&G. 4) Between planing and shaping, it would have been four more handling steps for each board with my setup. It was bad enough just unloading 8500 lbs of this stuff off the trailer and cutting each board to length!

On the plus side, if I'd milled it all myself, I probably wouldn't have to buy shavings for the horse stalls for at least a year. :D
 
   / My Horse Barn in Progress #115  
Yeah, that's some pretty serious mud! Does the mud ever really go away up there in the Pacific NW or does grass just grow on top of it during the summer?

You're chomping at the bit now, but in a couple of months after mixing and pouring another 20,000 pounds of concrete, you're gonna be wishing it was January again. ;)

Spring can't get here fast enough. It's snowing yet again right now. I've been in NC for five years and I've seen five times as much snow this year as all the other four years combined. The frogs apparently didn't get the memo that spring was delayed this year. They're chirping away out there this evening even under a couple inches of snow!

I probably won't poar more than 4 pallets this year as I want to get three of the four sides sided and get rock into most of it so the mud is gone. I also need to get around 100 yards of rock in around the outside of the barn and that will pretty well wipe out my funds for the year.

As for the mud, it will be gone by May/June and then I will have dry ground until late September. That's my normal window for getting any heavy work done. It's also one of the reasons for doing so much by hand. I want to dump gravel over the outside wall into the stalls and tack room, but pretty mush have to just sit on my hands until June if I don't want to make more work for myself later from the mess I would make.

Within another month or two it should be warm enough that I can buy and pre-paint the siding and actually get the paint to dry. Then I can start getting some of the walls framed in and get some siding on. After that it will be dry enough to get the rock in and finish framing and siding some more. Then winter will be knocking again.
 
   / My Horse Barn in Progress #116  
Just came across your thread - what an amazing job! Everything looks really good - wish I had a nice horse barn like that on my property! Very good job -
:thumbsup:
 
   / My Horse Barn in Progress
  • Thread Starter
#117  
Just came across your thread - what an amazing job! Everything looks really good - wish I had a nice horse barn like that on my property! Very good job -
:thumbsup:

Thanks! It's been almost 9 months of weekends, plus a few more days here and there, so I'm glad to finally be seeing some light at the end of the tunnel. There's still a lot left to do though.
 
   / My Horse Barn in Progress #118  
And here I am making a horse barn into a workshop.

Before: (note the PO's saddle and hay drop/holder from loft above)

http://www.tractorbynet.com/forums/attachment.php?attachmentid=157490&stc=1&d=1267717491

Every stall also had auto-watering bowls. Now I need to dispose of horse unique items and bury my dust collection tubes, electrical conduit and radiant heat tubing.

Work in Progress:

http://www.tractorbynet.com/forums/attachment.php?attachmentid=157491&stc=1&d=1267717491

The other half of the workshop will be for my new tractor :D Hopefully!
 

Attachments

  • DSC00010.jpg
    DSC00010.jpg
    37.3 KB · Views: 944
  • DSC01392.jpg
    DSC01392.jpg
    36.7 KB · Views: 908
   / My Horse Barn in Progress
  • Thread Starter
#119  
And here I am making a horse barn into a workshop.

Before: (note the PO's saddle and hay drop/holder from loft above)

http://www.tractorbynet.com/forums/attachment.php?attachmentid=157490&stc=1&d=1267717491

Every stall also had auto-watering bowls. Now I need to dispose of horse unique items and bury my dust collection tubes, electrical conduit and radiant heat tubing.

Work in Progress:

http://www.tractorbynet.com/forums/attachment.php?attachmentid=157491&stc=1&d=1267717491

The other half of the workshop will be for my new tractor :D Hopefully!

If I wasn't a woodworker, it would pain me to see you dismantling the horse stalls, but it appears to be for a good cause. :)

Smart move to bury your dust collection tubes. It'll be nice not having to dodge pipes running up to the ceiling. Hopefully they never clogged badly enough that you can't snake 'em out!
 
   / My Horse Barn in Progress
  • Thread Starter
#120  
Step 15: Plumbing

I finally have running water inside the barn. And better yet, it only runs when I want it to. :) The big challenge here is freeze prevention. The barn isn't heated, so I need to take precautions to prevent freezing. In the best case, frozen pipes would mean there'd be no running water downstream from the ice-dam. In the worst case, it would mean ruptured pipes, spraying water, and wet hypothermic horses.

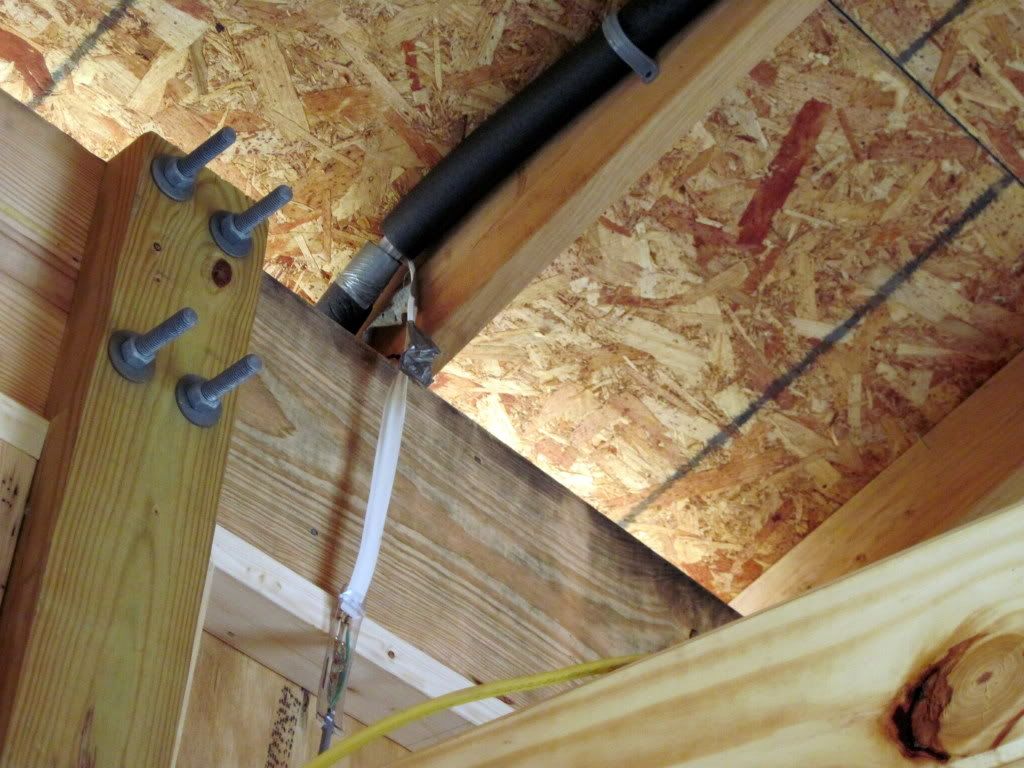
I'm using a two-pronged approach to mitigate the risk: First, I'm using pex everywhere inside the building, since it can stretch significantly without rupturing. Hopefully that will be enough to limit any freezing to the simple inconvenience of no running water until it thaws. Second, for all the critical runs I've wrapped the pipes with heat tape and insulation. The heat tape is 2W/ft and has a built-in thermostat that turns it on whenever the inside temp falls below 38F.

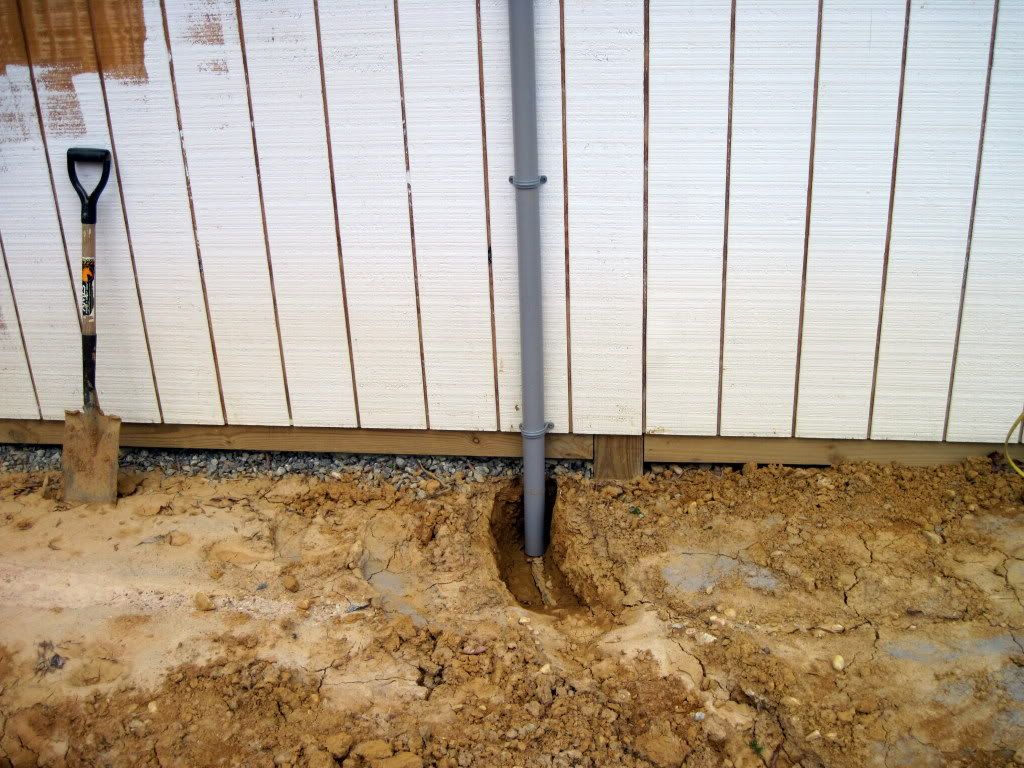
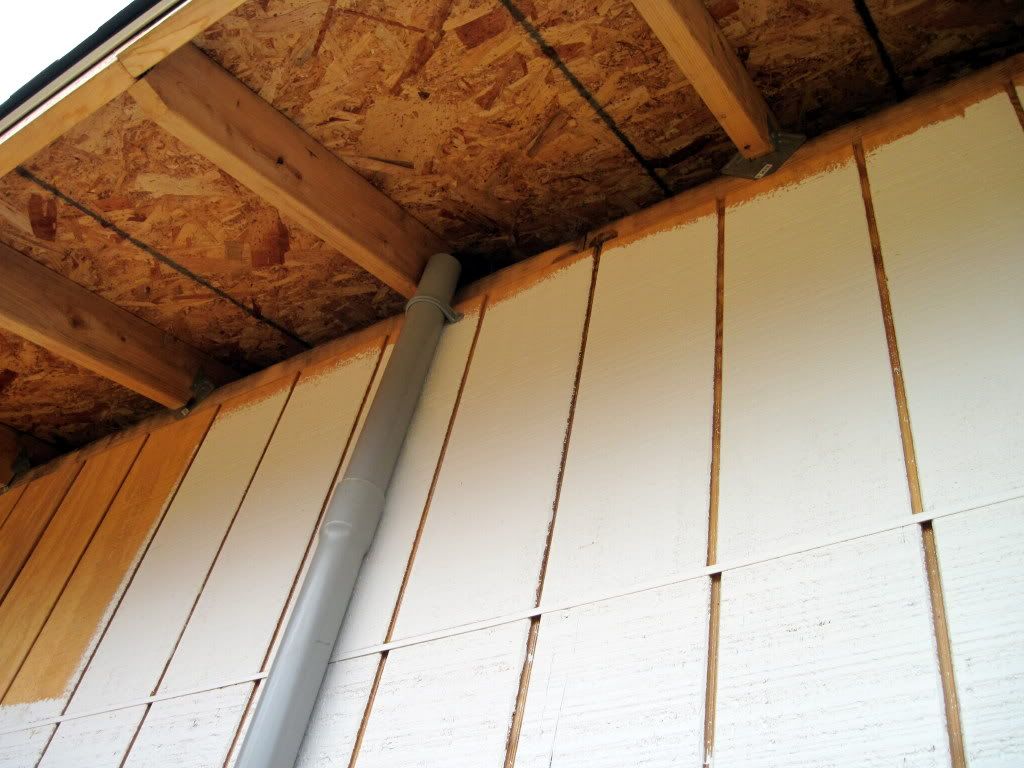
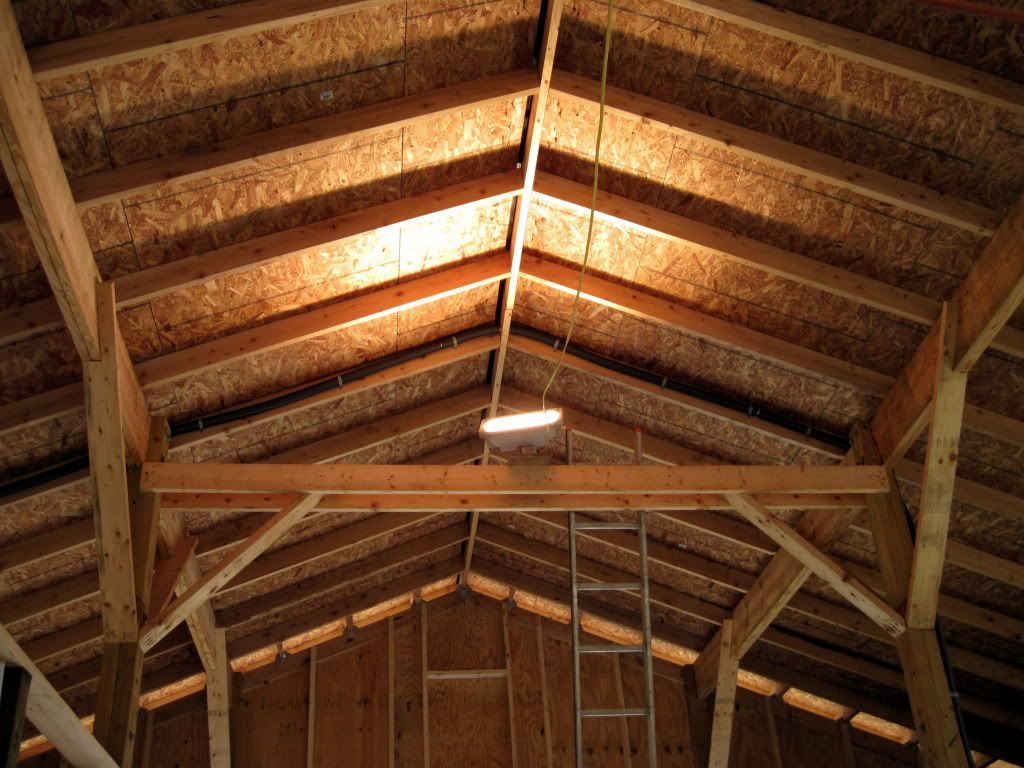
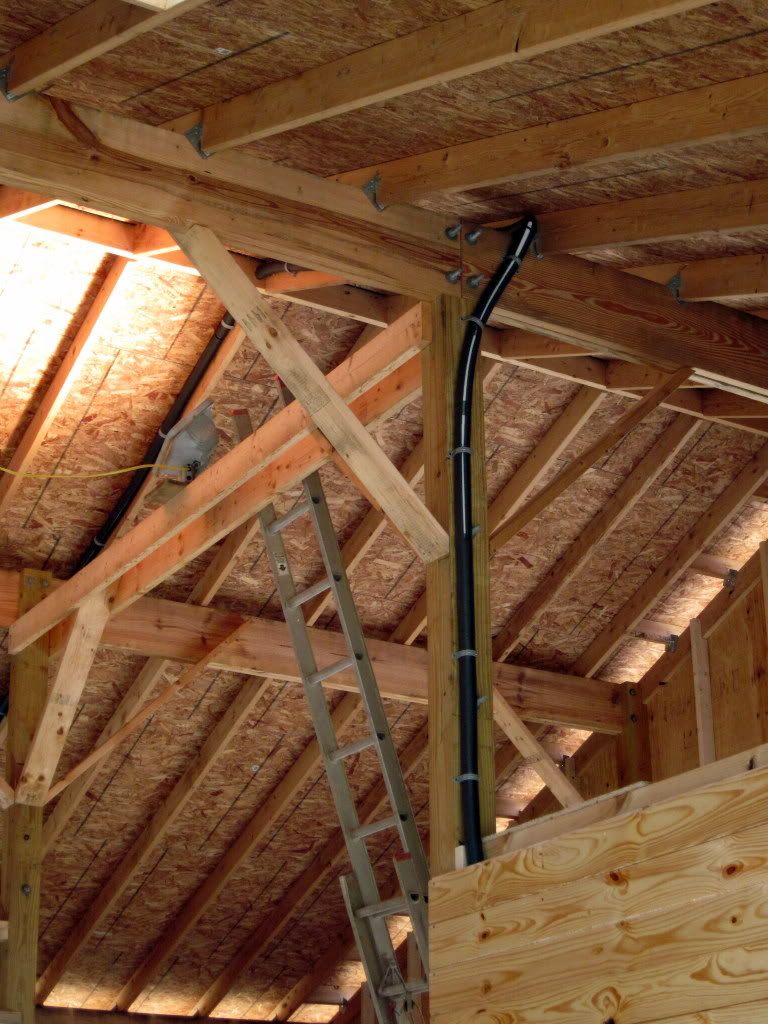
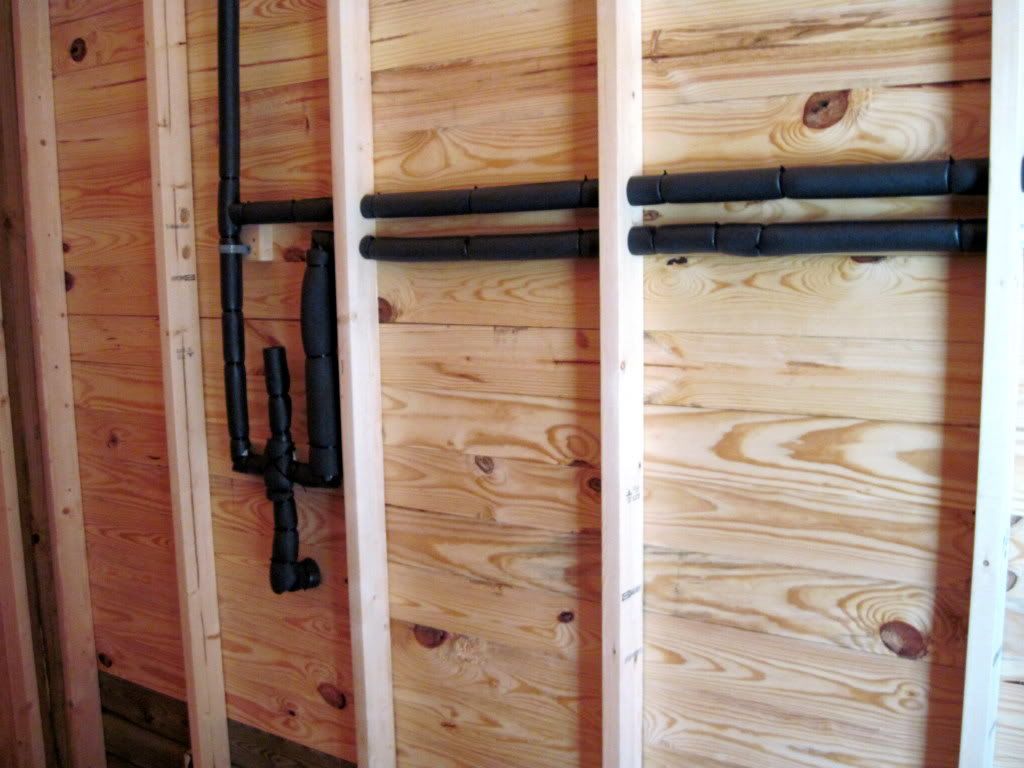
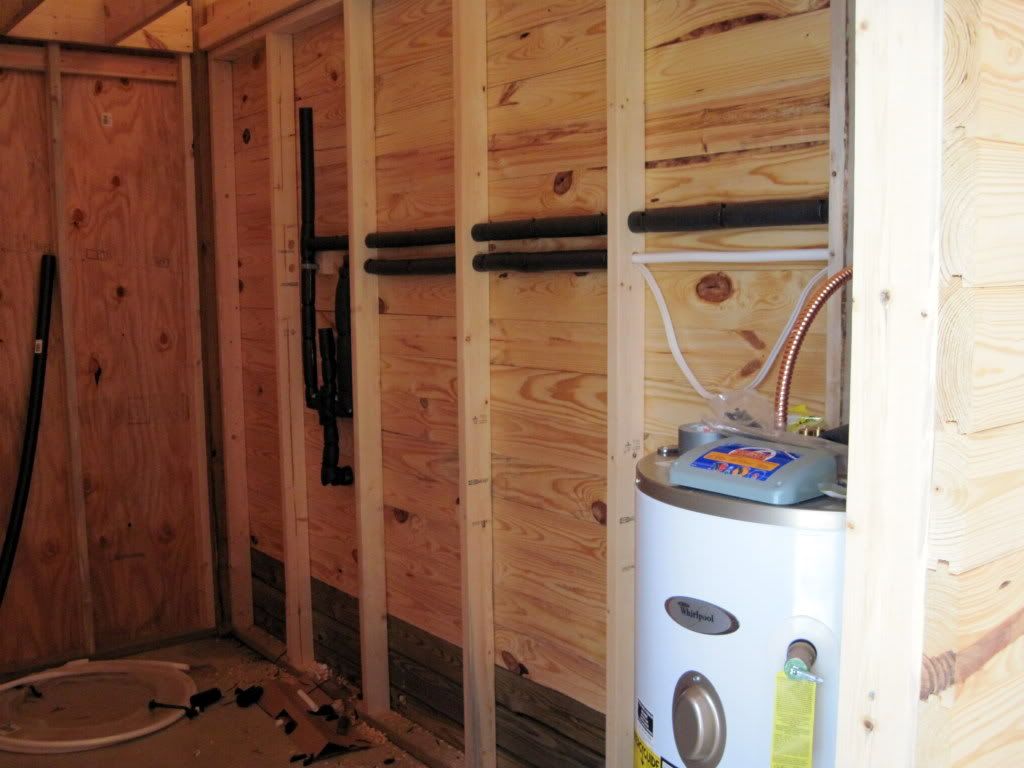
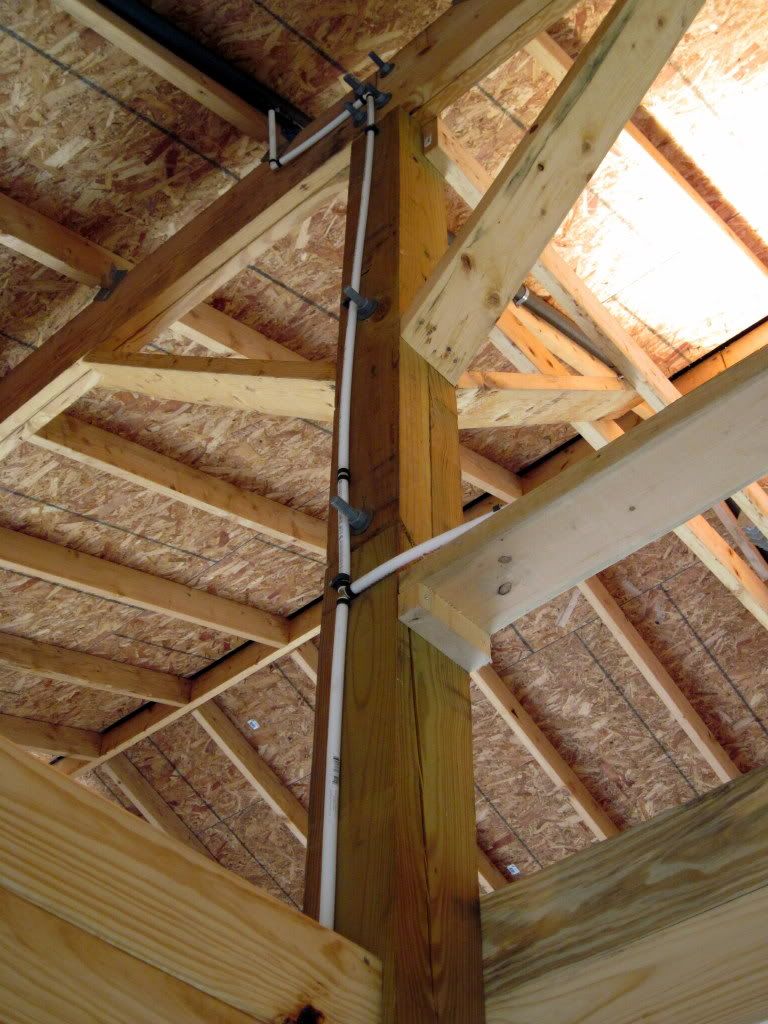
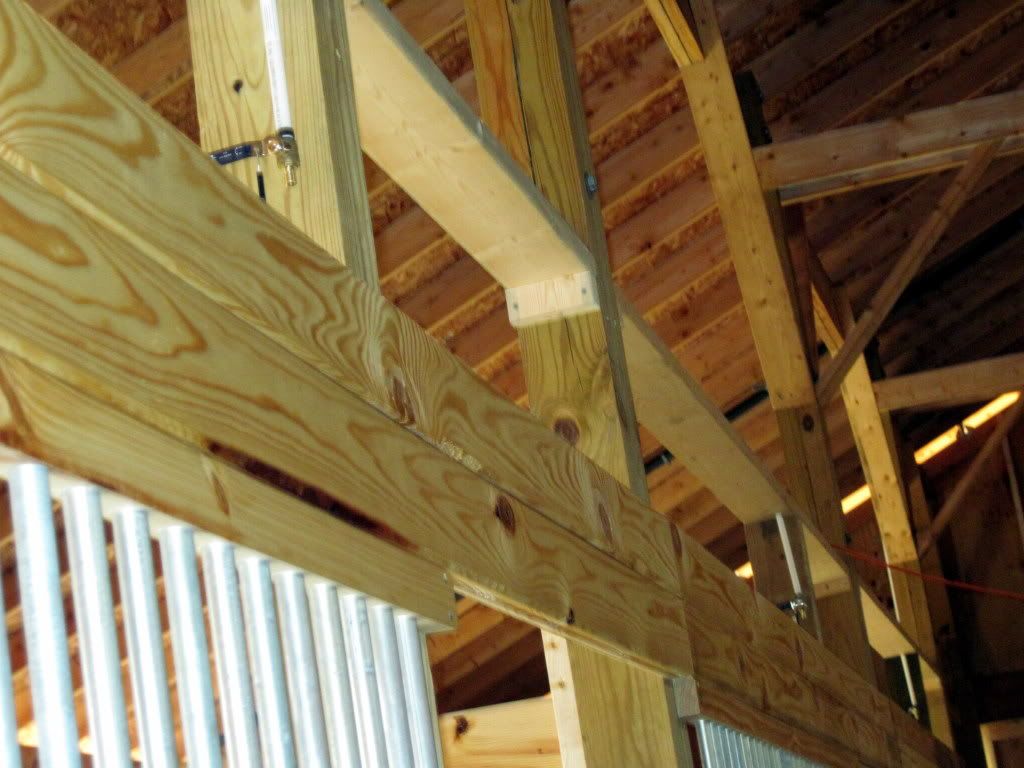
The main line (3/4" pex) comes into the barn through a conduit along the outside of the building and up through the soffit (which is yet to be installed). Once inside, the line runs up along a rafters, through the ridge pole at the peak, and back down the other side of the barn toward the tack room, where it drops down to the hot water heater. At that point, I installed ball valves and ran hot and cold lines through the tack room wall over to a shower valve in the wash rack. These lines will also supply a utility sink in the tack room, but I have yet to install it. Everything mentioned so far includes heat tape and insulation, including the conduit up the outside of the barn and the shower valve and the associated output running to a hose bib in the wash rack.

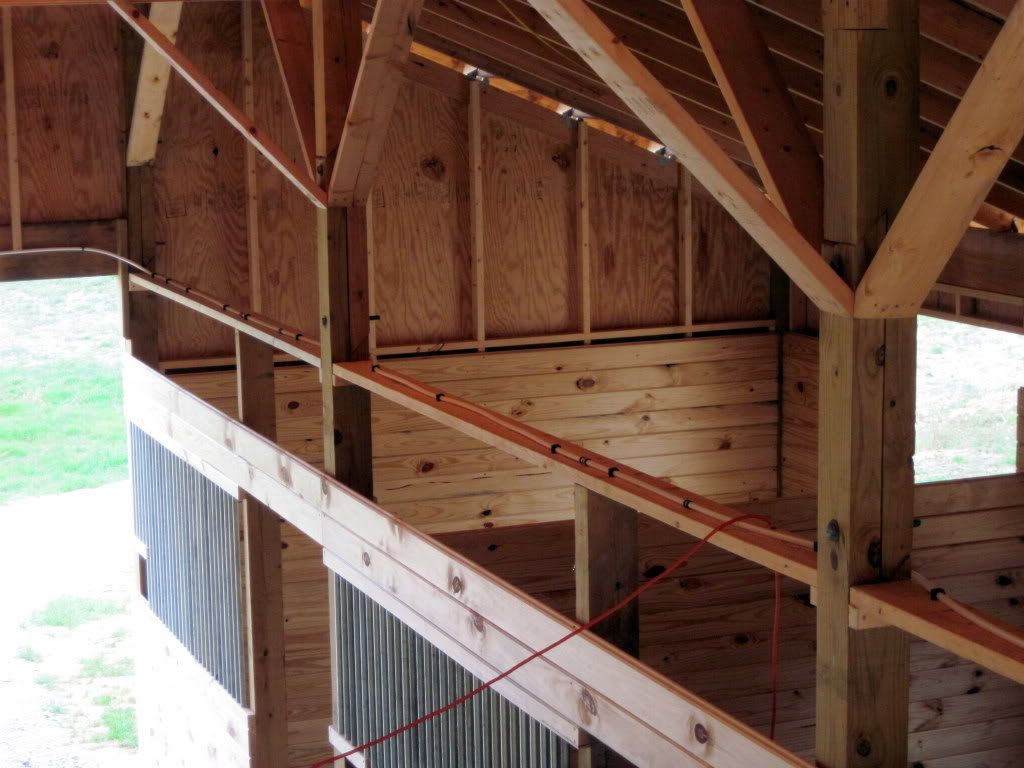
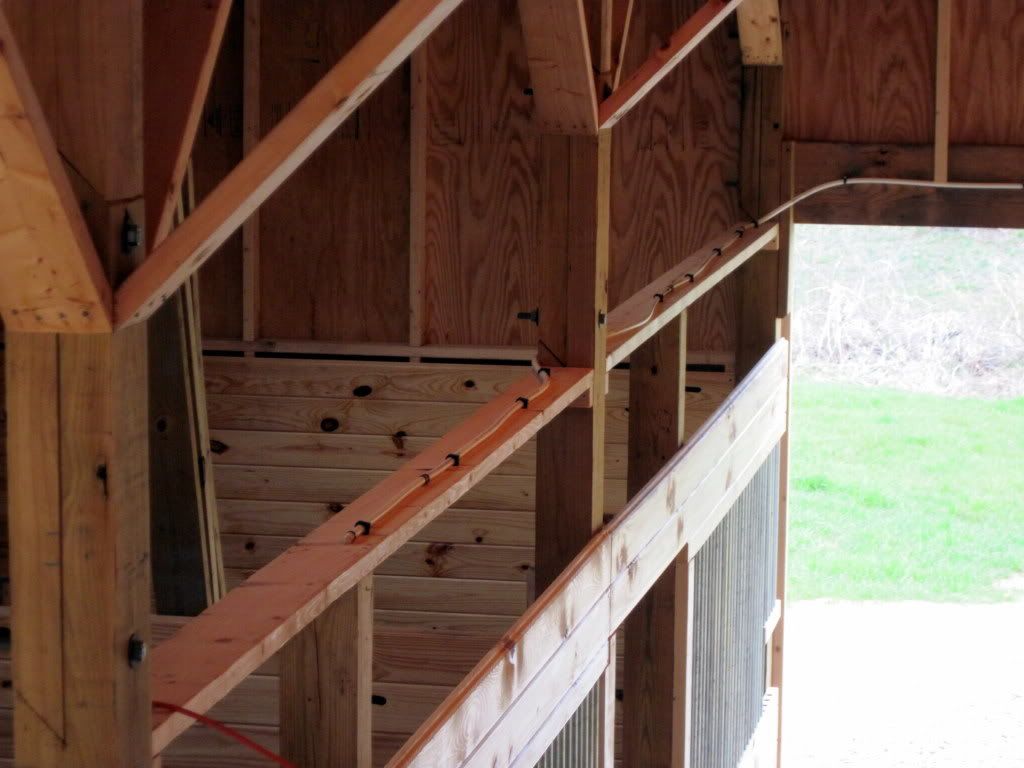
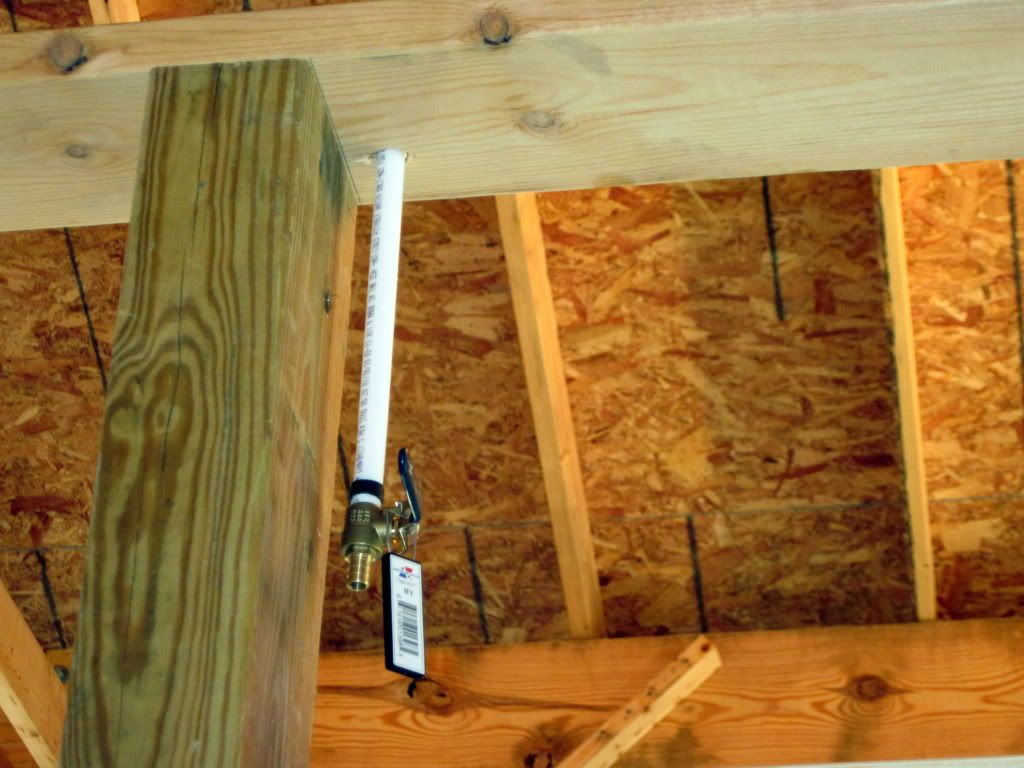
Meanwhile, back on the other side of the aisle, closer to where the water line comes in, I've teed off a 1/2" pex run that feeds all five horse stalls and (eventually) the bathroom. Each horse stall has its own cold water branch with a ball valve. These will feed automatic waterers in each stall (basically a bowl with a float valve). None of the 1/2" lines are insulated or heated, so they may freeze on particularly cold winter nights. Hopefully, between the body heat generated in the barn from the horses and the occasional water flow as they drink, freezing will be rare.

Here are some of the latest pics:

IMG_0724.jpg

IMG_0725.jpg

IMG_0726.jpg

IMG_0727.jpg

IMG_0728.jpg

IMG_0734.jpg


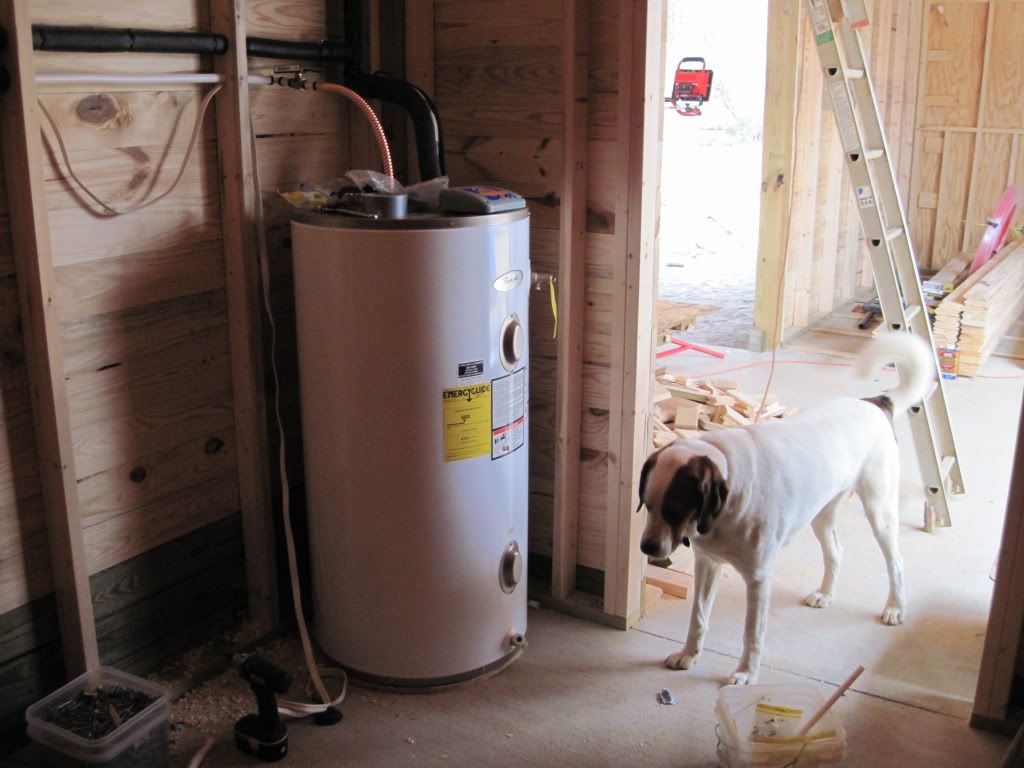
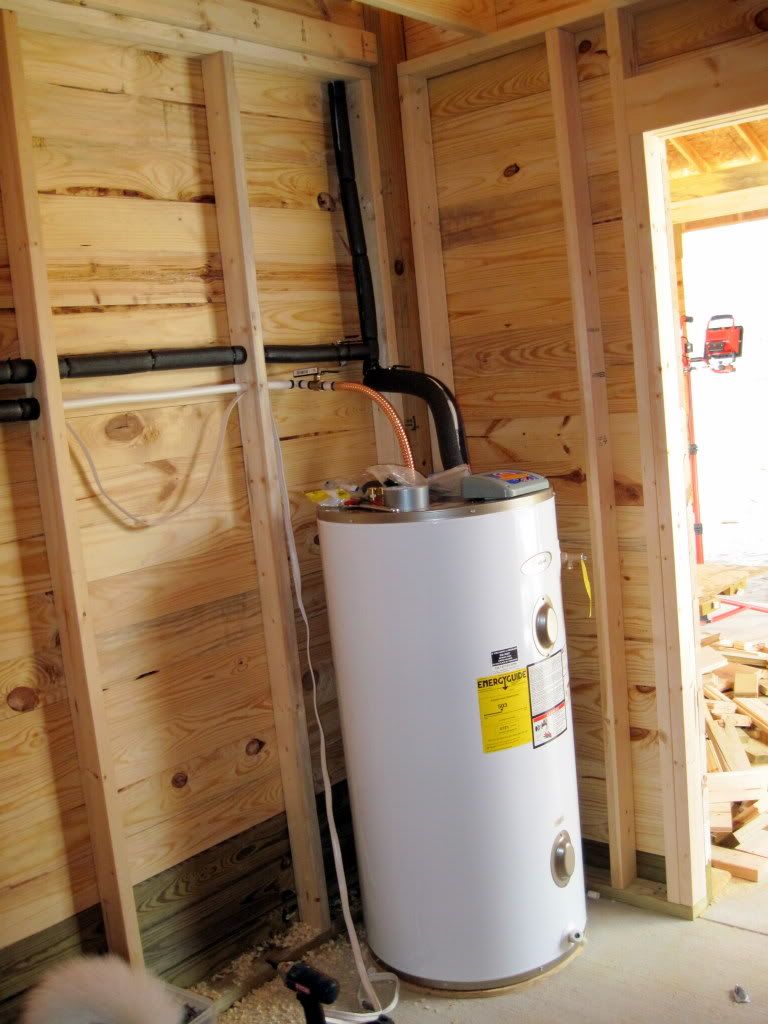
The hot water heater.
IMG_0718.jpg

IMG_0719.jpg

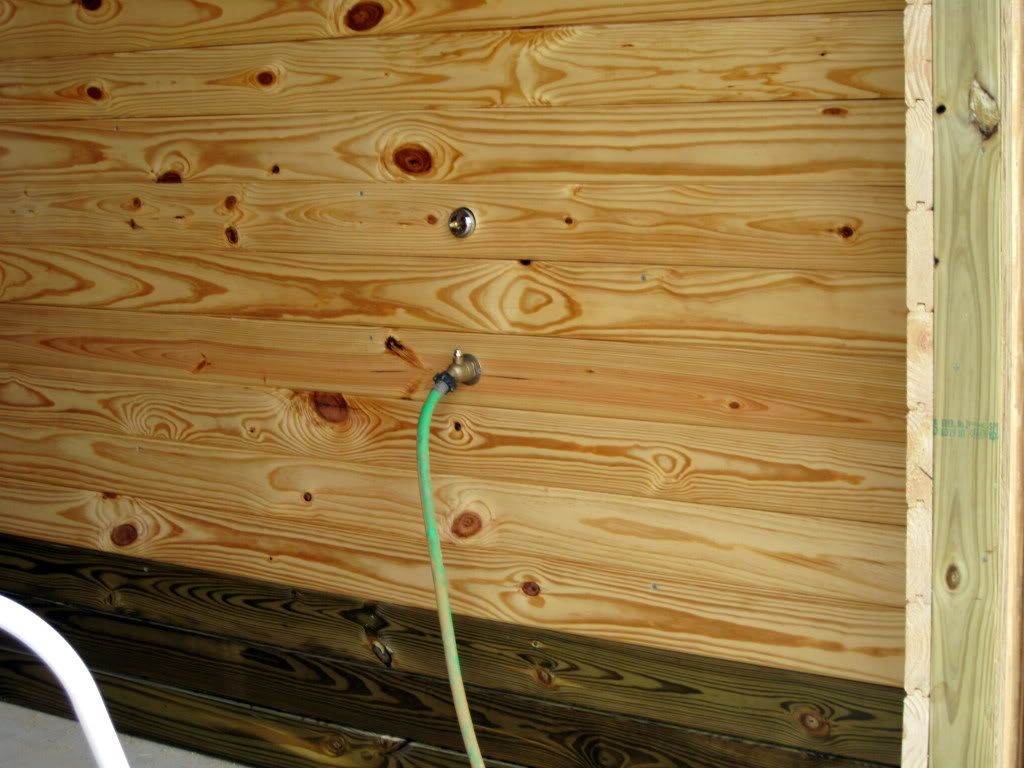
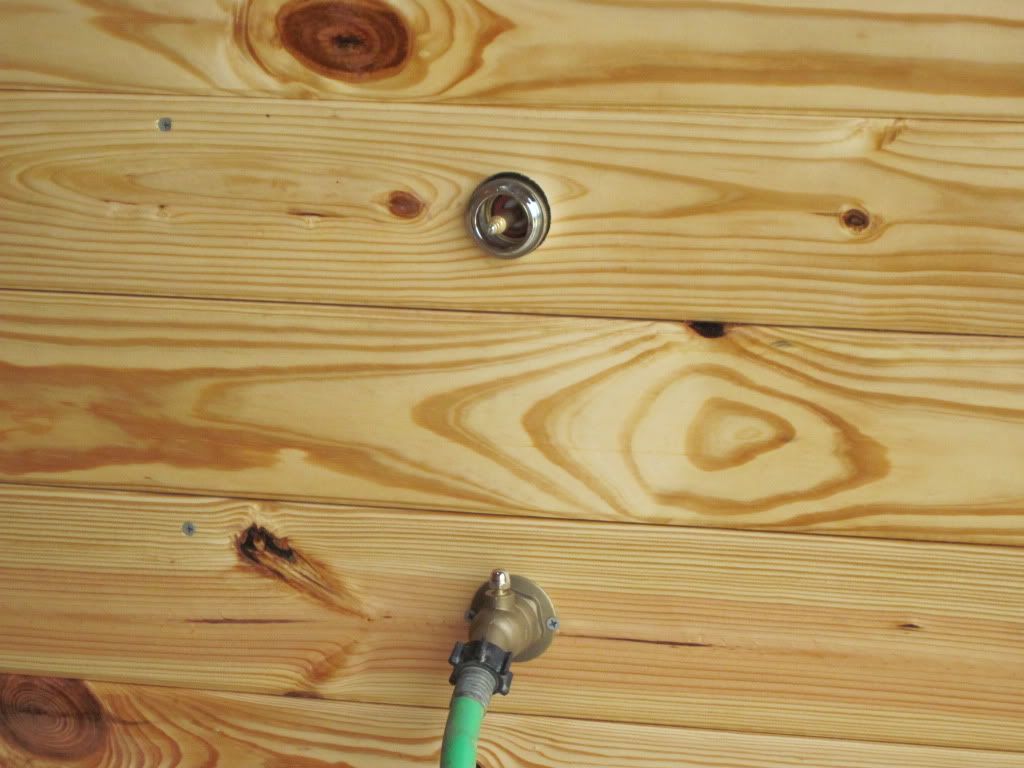
The back side of the shower valve in the wash rack.
IMG_0721.jpg

IMG_0723.jpg


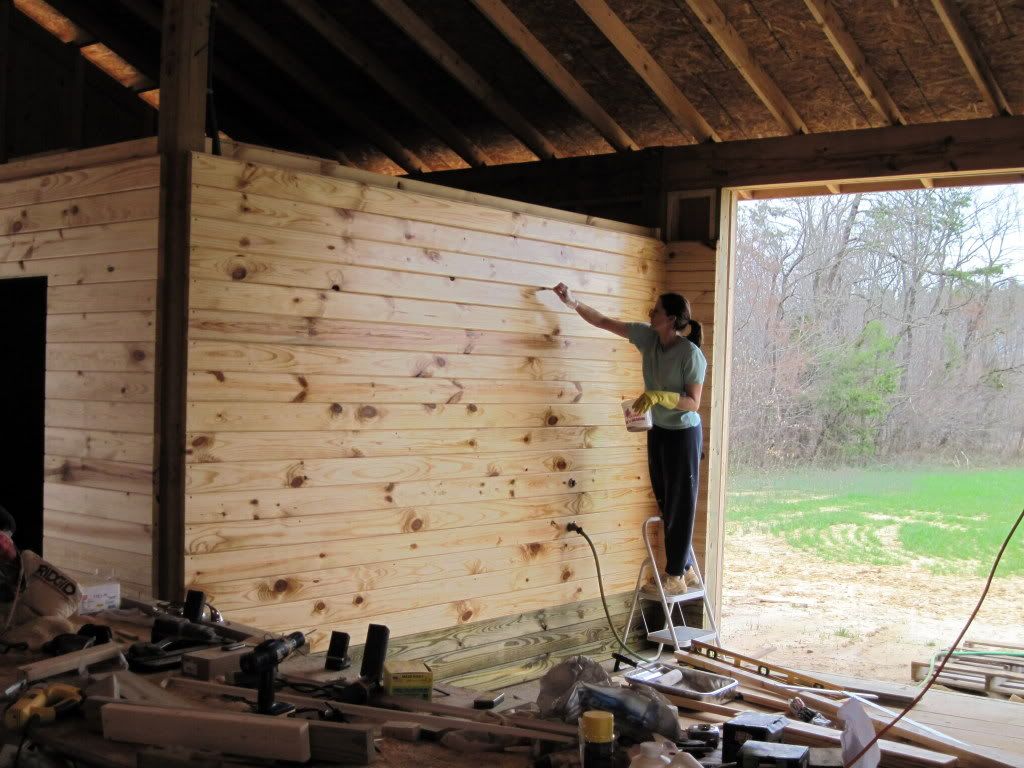
The shower valve as seen from the wash rack. The handle and escutcheon are missing in this pic because my wife was in the process of putting polyurethane on the wall.
IMG_0735.jpg

IMG_0736.jpg

IMG_0746.jpg

The lines to the horse stalls:
IMG_0744.jpg

IMG_0738.jpg

IMG_0737.jpg

IMG_0745.jpg

IMG_0749.jpg
 

Tractor & Equipment Auctions

1999 John Deere 566 Round Baler  Net & Twine, Reliable Performance (A51039)
1999 John Deere...
1981 Case 245 2wd tractor with bushing (A51039)
1981 Case 245 2wd...
2017 Ford F-250 4x4 Knapheide Service Truck (A50323)
2017 Ford F-250...
2015 FORD F-150XL SINGLE CAB TRUCK (A51406)
2015 FORD F-150XL...
2022 JCB HM180T Hydraulic Breaker Excavator Attachment (A49461)
2022 JCB HM180T...
2003 CATERPILLAR 420D BACKHOE (A51242)
2003 CATERPILLAR...
 
Top