DR PTO trimmer: Generally good first impression
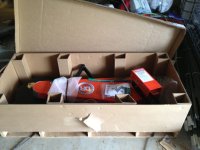
I assembled the DR trimmer yesterday and plunged right into some challenging conditions. Here's what the open box looks like:

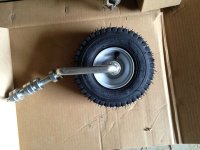
The assembly was pretty simple, with just a few main pieces, including the three-point bracket, wheel, PTO shaft and trimmer body. The latter is the heavy part, but I was able to move it around by hand, though DR recommends having two people. Everything feels pretty solid and sturdy. The first possible (small) negative I encountered is the wheel:

It's pneumatic, meaning possible extra maintenance with inflation. I'd have preferred solid, but maybe this will hold air better and longer than some tires I've had.
Here's one end of the three-point bracket, on which I've installed a ball with Cat 2 adapter bushing:

The PTO shaft connects to the gear box in a way I haven't seen before. Instead of a shear pin there is a key that protrudes from a cutout in the gear box shaft. A groove on the PTO shaft connecter slides around the key. A little 4 mm set screw is used to keep them together. I was skeptical of this. I made it as tight as I could with a T-handle wrench, but sure enough, about when I was finishing my test run, the PTO shaft popped off. Fortunately the key stayed in place, otherwise I'd be hard pressed to find it. Next time I will try an L wrench, which may give me more torque. Also, the manual suggests using Loctite if you'll be leaving things connected for longer periods. By the way, the manual is excellent: clear, well written, and with plenty of illustrations.
After mounting and assembly you should really take the time to adjust your hitch properly. I didn't, so I ended up testing and fiddling for a while until I finally had things about right. There are two modes of operation, which are selected by putting a long bolt in one of two holes. Sorry, don't have a picture of this. In one case the rotation of the trimmer about the tractor's long axis is limited. This is for trimming where the trimming area is in the same plane as the tractor's wheels. The other setting is for ditches and such. This allows for up-and-down rotation. I haven't tried the latter yet.
I used the blue .175 line, of which three pairs were included. There were also some pairs of the green .155 line. The manual suggest using the smallest line you can for the conditions.
After the adjustments were made I opted for trial by fire, heading right for my pasture fence, which hasn't been trimmed in over a year. The grass and weeds were two to three feet high. There were also some saplings in there, which I assume contributed to reduced string life. I made it about a quarter mile in each of two runs before the strings disappeared. You're supposed to stop immediately if one string breaks, but I found it hard to detect when this occurred, instead seeing that I was just knocking the grass down rather than cutting it after both strings when AWOL. I did find one string, which appeared to have broken at the trimmer head.
The biggest problem I had comes from an engineering tradeoff. On the one hand, I appreciated that the swing-arm spring tension wasn't high enough to cause problems with my T-posts during head impact. On the other hand, the lower spring tension means that denser grass and weeds tend to push the arm away from the fence and back behind the tractor. This was even worse at the top of my pasture where gravity was also pushing the trimmer away from the fence. The solution may consist of clearing the other side of the fence so I can trim from the high side, and of course trimming more frequently so the plant growth is less dense.
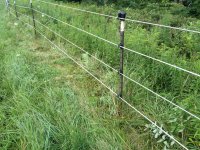
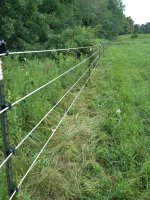
Here are a couple pictures of better results on flat ground:


The wheel axle tends to accumulate grass, which wraps tightly around it:

So there you have my first impression of the DR PTO string trimmer. In spite of it's limitations I think it has the potential to reduce the labor in fence line maintenance. It appears to be well made, and it's relatively easy to use.


