3-Point Hitch Top Link Mounting Holes

   / Top Link Mounting Holes
  • Thread Starter
#11  
AIADW;

Another source of good information is the operators manual for your tractor. There should be a section for 3-point operation.

Rick, Your right the manual does recommend which mounting hole to use for a given use, but it gave no information on the theory behind it. Gordon explained it very well.
 
   / Top Link Mounting Holes #12  
Think you normally would use top hole for heavy ground contact use like a plow.

Sent from my iPad using TractorByNet

usually no.

if the higher the hole makes the lever or toplink rocker longer, and farther from the fulcrum, then there is more mechanical advantage.

extra mechanical advantage is used for very light draft implements.. like spring tooth harrows that need some help to work with draft sensing hyds.

moldboard plows on the other hand are high draft and can use a reduced mechanical advantage, and for instance, a hole closer to the fulcrum.
 
   / Top Link Mounting Holes #13  
I need a little schooling here.


I don't understand the mechanics behind the three locations for the top link? For instance the manual says when using a Moldboard plow for soft soil use the top link and for Heavy use the bottom link. I just can't figure out what the difference would be.

If you have a choice of places to hook the top link to the tractor then it can be for two different reasons.

If it's a very basic tractor without draft control those top link connecting holes are all rigid to the back of the tractor tractor and the different positions are just for getting a decent geometry for the implement.

If you do have draft control - and it sounds like you do - then if you look closely at where the top link connects to the tractor you will see that that connection is actually a lever with a pivot and several choices of how far up the handle of the pivot you want to connect the top link. What that lever is doing is automatically activating the draft control valveto slighly raise the 3 pt. implement when it encounters a lot of ground resistance. You control how much ground resistance you want before activating the draft control by which location you choose. As am implement like a plow is pulled through the soil and hits a hard spot then it will try to rotate around the lower arms but is prevented from doing so by the upper link. That upper link is in compression when that happens and that compression is what the automatic draft control is sensing. The closer to the pivot point that you connect the top link then the more force it is going to take to activate the draft control and vice versa. From what your manual says, you do have draft control and the pivot point is lower down than the connection choices. So if you want the automatic draft control to be more sensitive to small changes as ithe implement is pulled through the soil that means you prefer that it just take a small change in the compressive force in the top link to be able to actuate that draft control valve. For that you need more leverage and that means you use the top hole which is farthest from the mount's pivot point. It works like a cheater bar. And for heavy implements in tough soil you usualy don't want so much leverage because you want the implement to stay at about the same depth in the soil regardless of what resistance it encounters. You are counting on using tractor horsepower to maintain a steady depth of pull through the hard spots instead of slightly raising the implement. Now there might be times when you want the opposite effect from what the manual says. If so, just change to a different mounting hole until the draft is doing what you want. You won't hurt anything with any of the choices. They are just there to give you choices between depth and traction.

HOWEVER: I have to say this...because it happened to me. Having draft control has one HUGE DANGER. And that is if you use a 3pt backhoe you MUST DISABLE THE DRAFT CONTROL! Otherwise the draft control will try to compensate for the bucket forces by raising the 3pt and attached backhoe....which then pinches the operator between the implement and the seat. Vey dangerous. People get killed every year forgetting to disable the draft control when using a 3 pt backhoe. I was lucky and was able to reach over my shoulder and switch off the ignition (Our old JD is gasoline tractor) and shut it down just as the backhoe controls rose up and pinned me to the back of the JD530s steel seat. Think about it.
Sometimes it's better to be lucky than smart.
luck, rScotty
 
   / Top Link Mounting Holes #14  
Thank you to all, I plowed up a spot last week for a potato patch and while hooking up my plow I asked myself why and what about the three holes. My top link was in the middle and has been that way since I bought the tractor (June). I bush hogged with it twice over the summer and fall and never gave it a thought. I plowed with it in the middle hole while playing with the draft control and it worked out ok. I have now located the information in my owners manual. The only dumb ? Is the one you don't ask. Thanks to the OP and all very good explanations.
 
   / Top Link Mounting Holes #15  
If you have a 3ph w/o draft control which is common for most of us with a small tractor this is how it works.

There are two conditions.
1) when the implement is raised: It is a weight partially supported by the top link. The weight on the top link trys to pick up the front end of the tractor. We all know this. If you use the lower hole the force is applied closer to the rear axle (lower) so there is less leverage to lift the front end than when using the upper hole. Soil clings to a plow or the plow sticks in the soil. Heavy soil clings more readily or the plow is harder to pull up. So when you pick up the plow in heavy soil the bottom hole is recommended to lessen the chance of tipping up.

2)When you are actually plowing the force on the top link is the opposite. The soil trys to hold back the bottom of the plow which rolls the top link forward. This force pushes the front of the tractor down. The upper hole has more leverage so holds the front end down better when plowing.

So there is a trade off. The bottom hole is safer for raising a very heavy plow and the top hole is safer if you hit a hard spot while plowing.

For no draft control, this is all you need to know.


If you have a choice of places to hook the top link to the tractor then it can be for two different reasons.

If it's a very basic tractor without draft control those top link connecting holes are all rigid to the back of the tractor tractor and the different positions are just for getting a decent geometry for the implement.

If you do have draft control - and it sounds like you do - then if you look closely at where the top link connects to the tractor you will see that that connection is actually a lever with a pivot and several choices of how far up the handle of the pivot you want to connect the top link. What that lever is doing is automatically activating the draft control valveto slighly raise the 3 pt. implement when it encounters a lot of ground resistance. You control how much ground resistance you want before activating the draft control by which location you choose. As am implement like a plow is pulled through the soil and hits a hard spot then it will try to rotate around the lower arms but is prevented from doing so by the upper link. That upper link is in compression when that happens and that compression is what the automatic draft control is sensing. The closer to the pivot point that you connect the top link then the more force it is going to take to activate the draft control and vice versa. From what your manual says, you do have draft control and the pivot point is lower down than the connection choices. So if you want the automatic draft control to be more sensitive to small changes as ithe implement is pulled through the soil that means you prefer that it just take a small change in the compressive force in the top link to be able to actuate that draft control valve. For that you need more leverage and that means you use the top hole which is farthest from the mount's pivot point. It works like a cheater bar. And for heavy implements in tough soil you usualy don't want so much leverage because you want the implement to stay at about the same depth in the soil regardless of what resistance it encounters. You are counting on using tractor horsepower to maintain a steady depth of pull through the hard spots instead of slightly raising the implement. Now there might be times when you want the opposite effect from what the manual says. If so, just change to a different mounting hole until the draft is doing what you want. You won't hurt anything with any of the choices. They are just there to give you choices between depth and traction.

HOWEVER: I have to say this...because it happened to me. Having draft control has one HUGE DANGER. And that is if you use a 3pt backhoe you MUST DISABLE THE DRAFT CONTROL! Otherwise the draft control will try to compensate for the bucket forces by raising the 3pt and attached backhoe....which then pinches the operator between the implement and the seat. Vey dangerous. People get killed every year forgetting to disable the draft control when using a 3 pt backhoe. I was lucky and was able to reach over my shoulder and switch off the ignition (Our old JD is gasoline tractor) and shut it down just as the backhoe controls rose up and pinned me to the back of the JD530s steel seat. Think about it.
Sometimes it's better to be lucky than smart. luck, rScotty
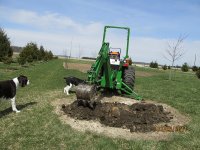
WITH draft control, the above is the best way to remember it. Light equipment needs a lot of ground sensing while heavy plows almost none.


On the backhoe thing, I have seen guys with three point hookups slide just any old top link pin in to hook to the three point hitch. That's a great way to kill yourself since the typical pin is maybe a grade 5 from China while a factory backhoe link pin is a special alloy steel. Imagine that pin breaking while the backhoe is under a lot of digging pressure.

Deere now sells ROPS add-on kits--where it will work-- to increase the height of the ROPS just in case that pin, or something else related, fails. I have the kit on my JD 790. See the pics on the top that bolts on?

011.JPG


.


Ignore the second photo below--I can't get rid of it. Site needs to figure this out.
 

Attachments

  • 014.JPG
    014.JPG
    310.9 KB · Views: 308
   / Top Link Mounting Holes #17  
If you have a 3ph w/o draft control which is common for most of us with a small tractor this is how it works.

There are two conditions.
1) when the implement is raised: It is a weight partially supported by the top link. The weight on the top link trys to pick up the front end of the tractor. We all know this. If you use the lower hole the force is applied closer to the rear axle (lower) so there is less leverage to lift the front end than when using the upper hole. Soil clings to a plow or the plow sticks in the soil. Heavy soil clings more readily or the plow is harder to pull up. So when you pick up the plow in heavy soil the bottom hole is recommended to lessen the chance of tipping up.

2)When you are actually plowing the force on the top link is the opposite. The soil trys to hold back the bottom of the plow which rolls the top link forward. This force pushes the front of the tractor down. The upper hole has more leverage so holds the front end down better when plowing.

So there is a trade off. The bottom hole is safer for raising a very heavy plow and the top hole is safer if you hit a hard spot while plowing.

Your logic in your first condition is faulty. Once the implement is above/out of the ground, the tractor and implement become an example of a First Class lever and it makes no difference how the implement is attached to the tractor. The implement will have a center of gravity and the distance that center of gravity is from the rear axle is the lever. Those are the only two factors that matter.
 
   / Top Link Mounting Holes #18  
I have 2 questions.
Last summer I plowed some extremely hard ground. I used my nieghbors 2 bottom 14" plow. I was having a hard time getting the plow to engage in the ground. I messed with it a half of day before I came up with a good combination. Since the plow was a cat 1 , I took the top link off of my little tractor and used it in the bottom hole. The casting was too tight for the cat 2 top link to fit in. I didn't want to grind it out. So the cat 1 fit rite in. Also I could make it shorter. Why did that work?

When I recently hooked a post auger up I had an operated on the tractor. I told her to raise the 3 ph hitch up slightly. She pulled the draft control lever up instead. The auger and hitch arms started shaking up and down pretty violently. I stood there about 15 seconds trying figure out what was happening. When i realized what had been pulled I reached up and knocked the draft control back down. What made it do that. I have been too afraid to try that again so I bungee the draft lever down. What caused it to shake so bad?
 
   / Top Link Mounting Holes #19  
I have 2 questions.
Last summer I plowed some extremely hard ground. I used my nieghbors 2 bottom 14" plow. I was having a hard time getting the plow to engage in the ground. I messed with it a half of day before I came up with a good combination. Since the plow was a cat 1 , I took the top link off of my little tractor and used it in the bottom hole. The casting was too tight for the cat 2 top link to fit in. I didn't want to grind it out. So the cat 1 fit rite in. Also I could make it shorter. Why did that work?

When I recently hooked a post auger up I had an operated on the tractor. I told her to raise the 3 ph hitch up slightly. She pulled the draft control lever up instead. The auger and hitch arms started shaking up and down pretty violently. I stood there about 15 seconds trying figure out what was happening. When i realized what had been pulled I reached up and knocked the draft control back down. What made it do that. I have been too afraid to try that again so I bungee the draft lever down. What caused it to shake so bad?

1. The top link connects to a rocker which is pinned at the bottom and the various top link pin holes represent various lever lengths vs that pin. The rocker is connected to internal linkage which will respond to changes in the rocker position (it works against a compressed spring located between it and the castiing). By relocating the top link to the lower hole you reduced the mechanical advantage (leverage) of the top link thereby increasing the force required to compress the before mentioned spring and activating the internal linkage to move the control valve spool.

2. She conveniently found a near neutral draft load position for the forces induced by the PH digger. It could decide if it should raise, lower, or what. Raising or lowering the Position Control Lever would have alleviated that as well. Kind of a fluke occurrence.
 
   / Top Link Mounting Holes #20  
I love these discussions.

Everyone needs to clarify their own situation, whether your tractor has draft control or not. Once you've clarified that, then there is some good info here. Just don't get confused and adapt information for a tractor not equipped like your own.
 

Tractor & Equipment Auctions

1998 Dorsey Trailer, VIN # 1DTP16K29WG052604 (A48836)
1998 Dorsey...
2008 Ford F-250 Pickup Truck (A50323)
2008 Ford F-250...
2017 terex warrior 1800 screener (A50322)
2017 terex warrior...
2018 JLG 1644 4x4 15,000lb High-Capacity Rough Terrain Telehandler (A49461)
2018 JLG 1644 4x4...
Komatsu D39PX-24 Crawler Tractor Dozer (A49346)
Komatsu D39PX-24...
2019 Ford F-550 Bucket Truck (A51039)
2019 Ford F-550...
 
Top