Kubota L3301HST/LA525 modifications

   / Kubota L3301HST/LA525 modifications
  • Thread Starter
#41  
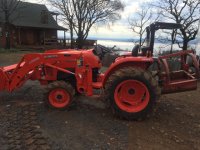
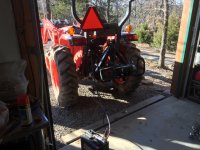
That should not be an action photo. You are missing a heavy implement or counterweight on the 3 point. All of the weight is sitting on the front axle.

Please throw the heaviest implement you have on the 3 point for substantial loader work. Your tractor will thank you.

Thank you.
 
   / Kubota L3301HST/LA525 modifications
  • Thread Starter
#42  
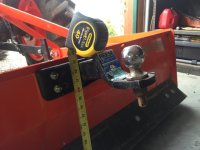
Today I installed a receiver hitch on the rear of my box blade in order to not drop it off and change to the three point receiver hitch adaptor I have when I wanted to move one of the trailers or boat.

I read a few threads and was gathering up the materials to make a hitch when I ran across a hitch from Titan for a John Deere Gator mount.
I wanted a bolt on if possible.
Here it is.
ImageUploadedByTapatalk1456017303.824628.jpg
This is the way it is supposed to be installed. I did try it upside down at first which moved it up a couple of inches. This made the hitch too high without running a big drop down hitch.
ImageUploadedByTapatalk1456017428.601206.jpg
 
   / Kubota L3301HST/LA525 modifications
  • Thread Starter
#43  
Finished up my version of the chain storage carrier. Nothing fancy. I wanted to avoid drilling holes in the tractor if possible. (After all, it is only two months old.)
I used a piece of 4" PVC and a cap cut the height off even with loader frame support.

ImageUploadedByTapatalk1456331996.805457.jpg

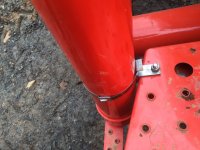
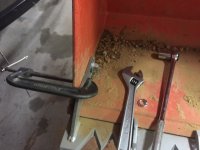
To go along with my not drilling holes theme, I used a piece of angle that was about an 1/8" thick and wouldn't bend. I used one of the floor and step holes with a couple of washers and locknut to secure one side. Though I used a fancy stainless clamp to put mine on, a hose clamp or even another bolt washer nut combo would work fine I think.ImageUploadedByTapatalk1456332709.761603.jpg

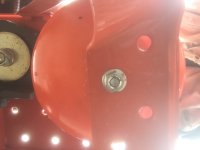
On the bottom, was just a drilled hole through the cap and another set of bolt,washers, & locknut.
I didn't glue the cap on. I meant to but the friction fit of it when I pre assembled everything wouldn't come back apart so I figured "good nuff".
ImageUploadedByTapatalk1456332957.353128.jpg
I still need to drill a few drain holes in the cap. I missed that and had painted it already when I caught it but that can be done on the tractor.
 
   / Kubota L3301HST/LA525 modifications #44  
Finished up my version of the chain storage carrier. Nothing fancy. I wanted to avoid drilling holes in the tractor if possible. (After all, it is only two months old.)
I used a piece of 4" PVC and a cap cut the height off even with loader frame support.

View attachment 458177

To go along with my not drilling holes theme, I used a piece of angle that was about an 1/8" thick and wouldn't bend. I used one of the floor and step holes with a couple of washers and locknut to secure one side. Though I used a fancy stainless clamp to put mine on, a hose clamp or even another bolt washer nut combo would work fine I think.View attachment 458178

On the bottom, was just a drilled hole through the cap and another set of bolt,washers, & locknut.
I didn't glue the cap on. I meant to but the friction fit of it when I pre assembled everything wouldn't come back apart so I figured "good nuff".
View attachment 458179
I still need to drill a few drain holes in the cap. I missed that and had painted it already when I caught it but that can be done on the tractor.

Looks good. Been considering doing the same thing with my L3901 and trying to determine the best location and mounting set up. I am focusing on the round support piece of the loader(seen in pone of your pics)to keep it out of the way. How are you finding mounting the tractor now that you have it installed on the a portion of the step?
 
   / Kubota L3301HST/LA525 modifications
  • Thread Starter
#45  
Hi Deerslayer. I thought I answered this but it musta got lost. I have no problem so far with the step as usually it's only used for one foot getting on or off.
 
   / Kubota L3301HST/LA525 modifications
  • Thread Starter
#46  
Working in my latest. I had a Warn 5000 that the solenoids had quit on so I ordered a contactor and replaced them. Harbor freight has a haul master winch plate for the receiver hitch.
I had ordered a quick disconnect but I ordered it for the wrong size wires. I plan on wiring it to the battery and cutting one end off a set of jumper cables in order to use the winch on other vehicles or the trailer with a matching disconnect on them. ImageUploadedByTapatalk1456526014.638990.jpg

I checked my Hydraulic pressure today and found it a little low at 2200 psi. I shimmed the relief valve up to raise it to 2400. Max for the L3301 is 2417. Really seemed to make a difference.

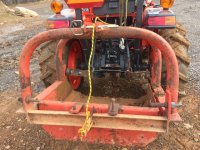
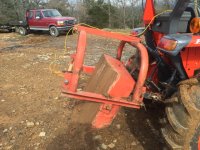
Picked up a dirt scoop on CL for cheap. The trip mechanism was frozen but a little time with wire brush, penetrating oil and a pry bar got her working again perfectly. This allows me to carry more dirt on the rear at same time. Seems to really be useful so far.
ImageUploadedByTapatalk1456526426.449636.jpgImageUploadedByTapatalk1456526440.590636.jpg

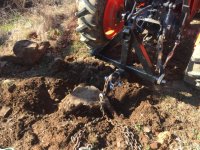
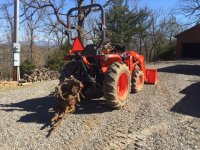
Yes I do work it occasionally<laughing> today was a stump removal morning. This one was lifted with the 3 point and I would cut and dig each root until it came up using a saws all with a demolition blade.
I didn't try yanking it out so no flames please!
ImageUploadedByTapatalk1456526522.714866.jpgImageUploadedByTapatalk1456526552.663213.jpg
ImageUploadedByTapatalk1456526570.723518.jpg
 
   / Kubota L3301HST/LA525 modifications #47  
Working in my latest. I had a Warn 5000 that the solenoids had quit on so I ordered a contactor and replaced them. Harbor freight has a haul master winch plate for the receiver hitch.
I had ordered a quick disconnect but I ordered it for the wrong size wires. I plan on wiring it to the battery and cutting one end off a set of jumper cables in order to use the winch on other vehicles or the trailer with a matching disconnect on them. View attachment 458563

I checked my Hydraulic pressure today and found it a little low at 2200 psi. I shimmed the relief valve up to raise it to 2400. Max for the L3301 is 2417. Really seemed to make a difference.

Picked up a dirt scoop on CL for cheap. The trip mechanism was frozen but a little time with wire brush, penetrating oil and a pry bar got her working again perfectly. This allows me to carry more dirt on the rear at same time. Seems to really be useful so far.
View attachment 458565View attachment 458566

Yes I do work it occasionally<laughing> today was a stump removal morning. This one was lifted with the 3 point and I would cut and dig each root until it came up using a saws all with a demolition blade.
I didn't try yanking it out so no flames please!
View attachment 458567View attachment 458570
View attachment 458571

Where did you get the shims to raise the hydraulic psi? Also, interested in what I need to do this to mine.
 
   / Kubota L3301HST/LA525 modifications
  • Thread Starter
#49  

That is what I referenced also.

I didn't use the shop vac. I just set a clean container under it with the tractor parked on a side hill. About 1/2qt came out in a steady dribble. The tip in the thread about a 3/4 NPT plastic plug would be great if one is available to stop fluid loss while the valve is out but not necessary. A # 10 washer is what I used. First one worked so that was that.

I can't find where I got that spec for the L3301/LA525. If anyone finds it "in writing" please post it. I'm under warranty still so mine is staying "under specs" officially for now. <wink wink nudge nudge>

But I think after researching this a lot it appears to me that 2500 psi is ok, 2700 requires common sense and don't deadhead against the relief all the time, & 3000 is where you should be wearing your hydraulic fluid proof raincoat cuz you are testing every seal, fitting, & crimp in the system and eventually as age progresses something will probably let loose!

Coupla things.
There is a type of valve that is tightened to adjust on some models. This isn't one of those. Yes it could work as you are screwing the cap in tighter, compressing the spring and raising the spring pressure against the relief valve. But you are over torquing that cap and could strip it or crack the hydraulic block it screws into. Then "it sucks to be you". So do it with a washer. Takes less than 15 minutes.

There are two "thingy doodlamabobs" hanging down under my hydraulic block. "How will I ever know which one?" has been a common question on the net for this. Simple. Look closer. One has a line coming out of it on the side. That is a banjo fitting (cuz it resembles a banjo).
You don't want that one. We are not here to reenact the movie Deliverance. We are here for MORE POWER. So pick the other one.
 
   / Kubota L3301HST/LA525 modifications
  • Thread Starter
#50  
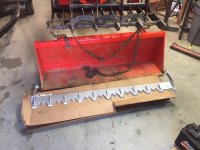
UPS man showed up late last night and came bearing gifts!
ImageUploadedByTapatalk1456581577.747106.jpg
Wife is out of town so had choice between watching Tv or hanging out in shop installing it and drinking beer. You know what happened.

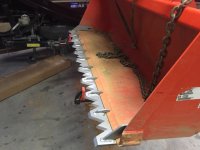
Thing is heavy at 51 lbs shipping weight. And the edges are Sharp! I hung it on the bucket after cleaning some of the Oklahoma red dirt back. Then my toes requested that I put a couple of bar clamps on for safety.(instructions said all that also)
ImageUploadedByTapatalk1456581857.968707.jpg

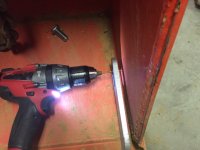
I was kinda dreading that 3/4" hole to drill on each side but not bad after remembering some old tricks. I don't use oil.
First, an old timer taught me a long time ago to use a cordless on low. The speed would actually allow the bit to cut rather than skate and build up heat. This is my best method I've found. And for some reason, both of my dewalt corded drills try to spin and break my arm when they hang up. ImageUploadedByTapatalk1456582290.820282.jpg

I drilled a pilot hole (about 1/8") from inside centering between slot up and down and about 1/8" from the rear of the slot. Per instructions this will account for the bucket lip wearing through time. Pretty smart!
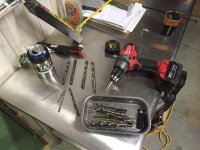
ImageUploadedByTapatalk1456582038.943189.jpg the rest of the drilling went on from outside. One step at a time. This keeps the bit cooler also as you keep changing them out. I used a uni bit for the last 1/8" as my bits ran out at 5/8".
Bx builds them with a little clearance in order to not have to fight them in or out. This makes it necessary to start the bolts and nuts, remove the clamps(let's be safe!) and c clamp one end in order to remove nut and stack on the remaining lock washer. X2 for other side.ImageUploadedByTapatalk1456582655.186845.jpg
Torqued them both down and we are ready for a test run tomorrow. It's a little late to be digging at 10 pm. I live in the country but my neighbors would surely wonder WTH!
 

Tractor & Equipment Auctions

2014 Whisper Watt Generator (A49461)
2014 Whisper Watt...
2025 Swict 84in Bucket Skid Steer Attachment (A50322)
2025 Swict 84in...
2013 INTERNATIONAL 4300 26 FT BOX TRUCK (A51222)
2013 INTERNATIONAL...
2012 Ford F-150 Crew Cab Pickup Truck (A49461)
2012 Ford F-150...
2019 JOHN DEERE 317G SKID STEER (A51242)
2019 JOHN DEERE...
2012 SULLIVAN PALATEK AIR COMPRESSOR (A51222)
2012 SULLIVAN...
 
Top