1968 CC 125 Renovation

   / 1968 CC 125 Renovation
  • Thread Starter
#11  
not sure I understand why load testing the new battery will give me info, I did put it on a smart charger and it took very little to charge fully. Luckily on old machinery like this, unlike our current car/truck engine compartments, one can really see where everything goes. The wiring loom is very ok, for being 48 years old. I thought of replacing it, but you know, these old CC's were built like little IH tractors and the wiring reminds me of something much larger. Besides I can always replace the wiring loom later if need be. Now I just have to get it all out of the way to get the tractor painted. I don't like painting electrical wires; want to see what's going on "under there"....... If I were making this a show tractor, I'd fuss even more but at some point, even for a barn queen, one has to draw the line. Before I bought this thing for 500 bucks years ago, I ran it, the mower deck worked (off the machine and never to return, but I'll rehab it anyway) and it went forwards and backwards fine, so that hydrostatic trans seemed to work. So part of this is, if it works, don't muck with it....

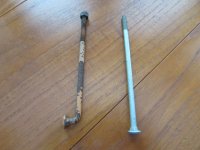
I was missing one tiny 10/32-1/4 screw that holds the air cleaner base on. Napa, two stores didn't have anything smaller than half inch. So, why not try the Kubota dealer, they've been there a long time, and sure enough, in a yellow little parts bag, had been on their shelves for over 30 years, was one little genuine Kohler screw for $1.79. I sure took it and ordered another. So if someone takes off my air cleaner 100 years from now, they will surely be impressed by those genuine oem screws....;)

Kinda wondering if that wheel spinner had been outside for a while before it ever made it to this little garden tractor. I wonder if it's a collector's item, genuine solid aluminum spinner from the 50's or 60's. yeah, putting that screw into the steering wheel clearly showed one prior owner, I have no idea how many people have owned this before, was really a low class act. There will always be a rough spot there though I guess I can fill it in with some rubber/plastic repair kit. Actually, these whole wheels are available in the used market. The steering wheel will look nice once I get the spokes painted in shiny aluminum, or maybe fake chrome.

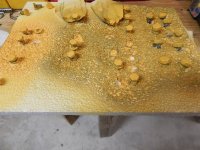
I've restored a Case IH 255 tractor, my Gravely 8199G and a variety of small equipment. Have learned a lot doing so, made a lot of mistakes, and am now properly careful about not painting on cold metal. Done that too many times, it never works well, puckers up. So I am a bit stymied with a unheated barn. Tried a 80k propane heater in there two days ago and it never got warm enough. I can take individual small parts into my woodshop which is heated just fine, but I never wanted paint spray in that room. So I have to be patient and I'll work on what I can until the weather warms up. Mid fifties during the days, very nice, but at nights it goes down to freezing so everything in the barn gets cold. Can't paint that....

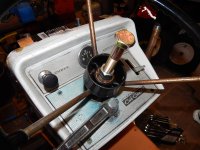
There is a bit of play in the steering wheel. CC had a complicated bearing setup for the column and I'm not confident taking that column apart. There is an aftermarket kit from Kirk engineering that might help but honestly to pull a water cart here and there I'm sure what I have is fine. I did notice that Kirk has a new electronic ignition available. Even with the hybrid system I bought from them, which came with the bigger coil, can't seem to avoid sticking points. If this tractor sits for more than three weeks, in damp weather, the points stick. Sometimes I can bang on the points case and they will let loose, and then if I use the tractor often, like I do now pulling a water roller fixing truck ruts, the old KT19 starts up instantly. Very impressive even in cold weather. So there's plenty of juice in there, but the points remain the weak link.
 
Last edited:
   / 1968 CC 125 Renovation
  • Thread Starter
#12  
lamblessed, thanks for the link. Good info. Unfortunately my seat is totally off and everything is taken apart; wish I knew this years ago...
But I do have a large fireman helper who might be able to supply the muscle. But now I'm really confused. What "steering wheel nut" are they referring to?
There certainly isn't a conventional nut on there...maybe there should be. :confused:

Dave Holtmart - 06:27am Jun 8, 1998 EST (#570 of 890)
Robert Mull, Here is another way for you if you don't have a 3 jaw puller. Go to your local hardware store and buy 5/8 fine thread bolt about 3 to 4 inches long with a nut, remove steering wheel nut and place new nut on covering about half of the threads on steering shaft, screw the bolt down inside the nut so it's tight, sit on the tractor seat with a hammer, place your knees under the outer part of the wheel and push up against the wheel and hit the head of the bolt squarely, may take a few blows to get the wheel to move. Don't place the new nut tight against the wheel leave a little room (afew threads 2to3 ). This is how i remove steering wheels as i don't have 3 jaw puller that will work, have removed several this way even old rusty ones.
Dave

Harry Bursell - 11:04pm Jul 19, 1998 EST (#879 of 890)
Dave Holtmart @570 - this is going back a ways, but wanted to let you know I pulled 3 steering wheels today using your method of a nut and bolt, hammer and up pressure with legs on wheel. It worked slick, really great, etc. I didn't bugger any threads or chip or crack the wheel as I had been with a puller. Hey guys, this is the way to remove your steering wheels. Suggest you print a copy of 570. Thanks again Dave.
Harry
 
   / 1968 CC 125 Renovation #13  
load test new batt: the smaller batteries used by L&G powered eqpt (as compared to automotive batts) have some notoriety for weak/dead cells when new - but will show an acceptable surface charge. Best way to avoid is to have new batt load tested by retailer when purchased to avoid an early life failure. Such can be done at no charge by the dealer.
steering wheel nut - the large nut that secures the strg wheel assy to the steering column shaft.
 
   / 1968 CC 125 Renovation
  • Thread Starter
#14  
well now I'm thinking the nut that should be there was removed by the prior owner who couldn't get the wheel off either...
going to look in parts diagram and see if there is a missing nut. The shaft is threaded, but there's no nut there...
 
   / 1968 CC 125 Renovation
  • Thread Starter
#15  
made some progress on priming and painting today. Challenging, had to heat up the parts in the woodshop, take them outside to paint,then bring them back into dry in the heat. Worked pretty well. Funny thing happened when I was painting some of the bolt heads. Usually I poke holes in cardboard and push them in the holes, but I had a sheet of styrofoam from a box and used that instead. Big mistake. The etching primer melted the styrofoam and lots of the screws fell out. I figured it had to be the acid doing it but no, even when using the final yellow paint, it still ate the styrofoam. Something for sure is reactive, going back to cardboard.
 

Attachments

  • DSCN0667.JPG
    DSCN0667.JPG
    930.7 KB · Views: 202
  • DSCN0669.JPG
    DSCN0669.JPG
    960.4 KB · Views: 199
   / 1968 CC 125 Renovation
  • Thread Starter
#16  
https://www.youtube.com/watch?v=nK0R0OWu5m4

very helpful. Shows me oem engine color is yellow, though it seems if the engine has been replaced or perhaps even rebuilt,
black then predominates.

My engine was allegedly fully rebuilt by a professional mower shop, and since there is no way one could repaint a yellow engine black
within the mower very easily, pretty sure the engine was pulled out entirely, rebuilt, and painted black. With a lot of black paint that is still solid. So I'm sticking with black with a yellow aircleaner. Am repainting part of the engine tin black which had discolored but much of the engine is fine. Gloss black Rustoleum Professional. Same with the white parts. And wonders of wonders I still have six cans of the old Valspar CC yellow paint from TSC before they switched to Majic. This is very sticky oily paint, pita to deal with but a great hard finish when done. Everything needs at least two thin coats. And likely three where it shows.

no drips. no drips. no drips.
repeat

I got the bolt and nut for the steering wheel and sure enough it all screws in as suggested. Will have a big helper next Monday and he and I are going to get that wheel off. Meanwhile, a steady diet of PB Blaster. And lastly, took all those little painted bolts and pushed them into a sheet of cardboard for a final coat. But it was just too cold today to paint and not looking too good for a few more days either. Might even get snow tomorrow, pretty rare for here. This CC will sure never see snow.

Ok, now who knows the trick of getting those bolts in and tightened without wrecking the paint? A wrench might only chip two sides vs a socket that could chip every corner. Usually I have to go back and touch up but that's hard with a rattle can when you have color changes nearby, and you don't want to get overspray. Then all I can do is resort to tiny paint brushes. Better I'm sure to get the bolts on tight enough and then worry about making them look nice, not the other way around.

Really should be using my torque wrench anyway and the manual has the bolt specs. Why not, no rush on this. Though honestly on most things if I'm doing it by hand, I can feel "tight" pretty well now after all these years. So can most of you I'm sure. But torque wrenches aren't hard to use so I'm going to make sure the structural bolts are tightened properly. I'm not worried one little bit about the engine tin. Except to always be careful not to overtighten and break the sucker off in the engine block.
Best example I can think of is putting in spark plugs. You know you have to get them in tightly, but you know equally well that overtight is not good at all, and that nice little compression washer has a "just right" spot. Which without a torque wrench takes a lot of experience to get consistently. Which is why the pros use torque wrenches on critical builds. Which this doesn't qualify for. But I will put a wrench on every bolt and make sure all are "tight". whatever that is...
 

Attachments

  • DSCN0674.JPG
    DSCN0674.JPG
    907.3 KB · Views: 184
Last edited:
   / 1968 CC 125 Renovation
  • Thread Starter
#17  
got some additional painting done yesterday, warmed up enough outside so if I heated up the objects in my woodshop, took them outside to paint, then brought them back into the warmth, it worked...Will be Sunday here before I have a sixty degree day but still not sure that will be enough to paint the main body of the CC. I have an IR heat gun and while the air might be warm enough, the tractor isn't. Usually condensation is a tell tale sign. I might put some portable electric heaters on it overnight and then perhaps sunday afternoon see if the metal is warm enough to paint. Usually a min of 65 degrees for this oil paint.

Changed the oil and now wish I had done it three years ago when I got the unit. Dirty oil sat in there that long, not the best...when the engine finally gets running I'll change the oil again when it's warm. Replaced the stock oil plug with a magnetic one.
 

Attachments

  • cc6.jpg
    cc6.jpg
    867.3 KB · Views: 186
  • cc7.jpg
    cc7.jpg
    818.9 KB · Views: 203
   / 1968 CC 125 Renovation
  • Thread Starter
#18  
very pleased I got a warm enough day in to get some frame painting done. Still have the front and all the little details to do, but good progress.

Need to make a new battery hold down post; one got lost. I'll put this in a vise and heat it up and hopefully I can bend it.
Once I heat it up, any suggestions on how to bend this thing without ruining it? I'm thinking of a jig of some sort with vertical posts, like a bending jig.
The bend is right up near the head too.
 

Attachments

  • CC battery box.JPG
    CC battery box.JPG
    920 KB · Views: 202
  • cc8.JPG
    cc8.JPG
    889.3 KB · Views: 203
  • cc9.JPG
    cc9.JPG
    952.5 KB · Views: 215
Last edited:
   / 1968 CC 125 Renovation #19  
You should be able to just heat the one area with a torch and use pliers or vice grips to bend the head 90 degrees. Another way is to slide a box wrench, just big enough to slip over the threads, onto the bolt and use it to bend the head. Obviously keep the wrench away from the area you're heating until you're ready to bend it. The torch would take he temper out of the wrench.

Bob B.
 
   / 1968 CC 125 Renovation
  • Thread Starter
#20  
Bob thanks, my challenge is that flared head; I can't get a grip on without deforming it. So I have to grip just below it and not much
room to maneuver. Maybe if I put it in the vise, heated it up, put that wrench on the bolt part under the crown, and beat on it carefully...,
perhaps it will bend nicely. I was also thinking of drilling two holes in steel, mounting bolts close together and building a simple bending jig. Without welding, not sure
I could get the verticals close enough together to work. I bet HF has a tool for this for five bucks...going to look this up.

update: HF has dozens of benders and they all look like they won't bend close to the flared head easily.
I'm headed to HF tomorrow for a steering wheel puller, will look at what they have and take my original along and see if it fits in any of them.
 
Last edited:

Tractor & Equipment Auctions

Swict Q.A 60" Bucket (A50121)
Swict Q.A 60"...
New Holland TN70D Tractor (RIDE AND DRIVE) (A50774)
New Holland TN70D...
1998 Featherlite Gooseneck Trailer (A50514)
1998 Featherlite...
2000 International 4700 Truck (RUNS) (TITLE) (A50774)
2000 International...
2014 Dodge Charger Sedan (A50324)
2014 Dodge Charger...
2010 Ford Edge SE SUV (A51694)
2010 Ford Edge SE...
 
Top