OP
DennisFolsom
Gold Member
Bench/Rail done
I haven't posted on the deck for a while, so here's an update:
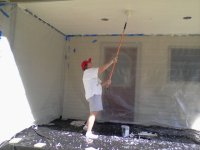
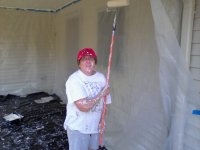
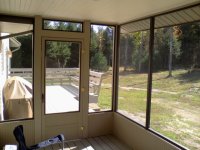
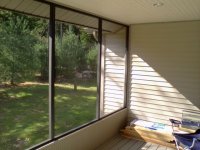
Recently, we stained the ceiling of the screened porch section. We had originally used some sort of clear finish on the beadboards, and it had darkened with age and mildew. I pressure washed it. In order to strip it, I had to hold my 20 degree fan nozzle within 3 inches. At that range, I was taking off the mildew, the old finish and some of the wood! When I got about half done, I realized how much damage I was doing and improved my technique a bit. We used a Navaho White opaque stain, the best grade of Behr stain that Home Depot sells. I did some edging, but Sonia (my wife) rolled most of it. Here's a couple of photos of her in action. She really got into it!
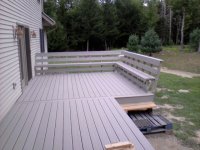
This past weekend, I cut and fit the Western Red Cedar lumber to make the Bench/Rail and Sonia stained it. For the seat and down, I fit and assembled, then disassembled, Sonia did the staining, and I reassembled. On the upper portion, it was a bit of a job to pull the posts into line, so I put in all of the screws. It was getting late on Sunday and Sonia said "I think I can stain that in place." She did that staining today - three coats on the seats and 2 coats on the rest.
It came out quite well. We are both happy with it.") The last photo shows Sonia trying it out.
The last photo shows Sonia trying it out.
I'm pretty lucky to have a wife that is willing to, and actually likes, finishing wood!
I haven't posted on the deck for a while, so here's an update:
Recently, we stained the ceiling of the screened porch section. We had originally used some sort of clear finish on the beadboards, and it had darkened with age and mildew. I pressure washed it. In order to strip it, I had to hold my 20 degree fan nozzle within 3 inches. At that range, I was taking off the mildew, the old finish and some of the wood! When I got about half done, I realized how much damage I was doing and improved my technique a bit. We used a Navaho White opaque stain, the best grade of Behr stain that Home Depot sells. I did some edging, but Sonia (my wife) rolled most of it. Here's a couple of photos of her in action. She really got into it!
This past weekend, I cut and fit the Western Red Cedar lumber to make the Bench/Rail and Sonia stained it. For the seat and down, I fit and assembled, then disassembled, Sonia did the staining, and I reassembled. On the upper portion, it was a bit of a job to pull the posts into line, so I put in all of the screws. It was getting late on Sunday and Sonia said "I think I can stain that in place." She did that staining today - three coats on the seats and 2 coats on the rest.
It came out quite well. We are both happy with it.
The last photo shows Sonia trying it out.I'm pretty lucky to have a wife that is willing to, and actually likes, finishing wood!